

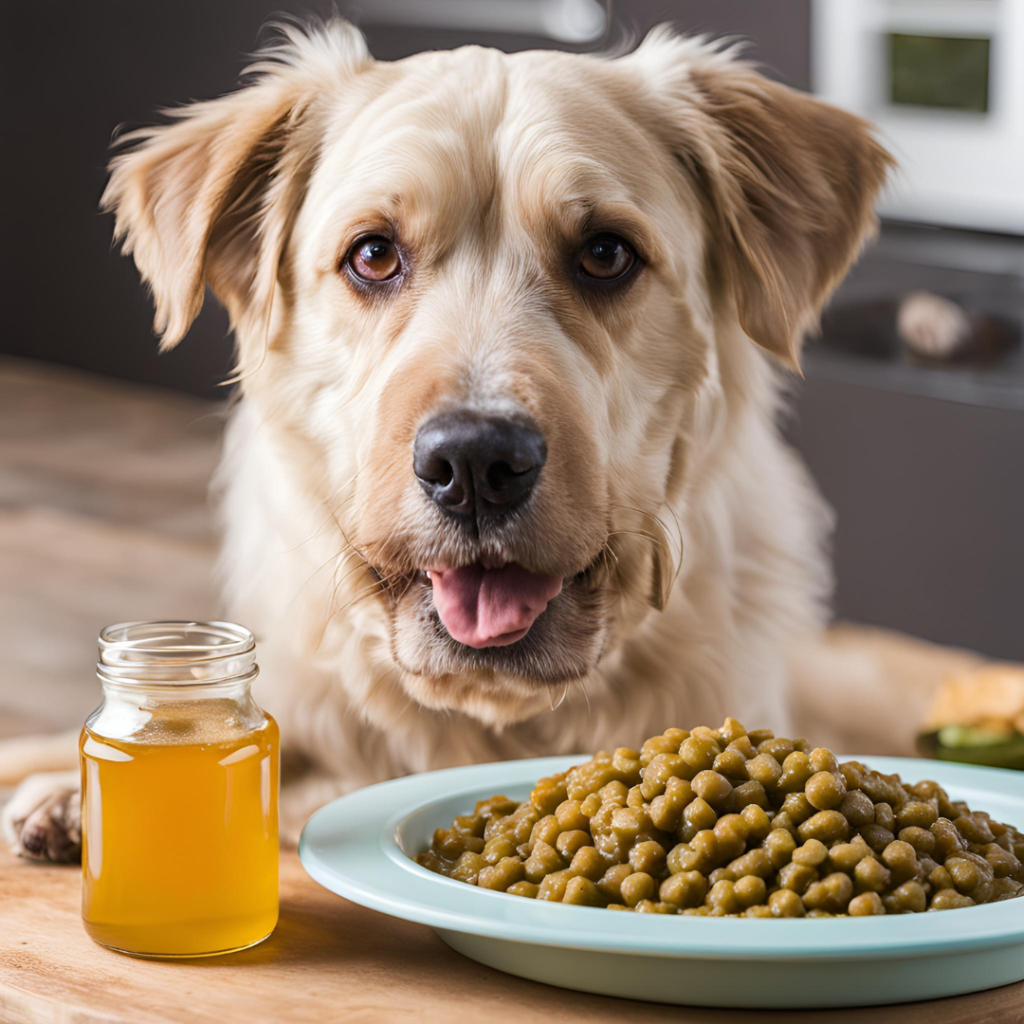
Looking to treat your furry friend with something both tasty and nutritious? Homemade Dog Foods With Honey might be just what your pup needs. More and more pet owners are turning to wholesome, homemade meals to ensure their dogs get real, high-quality ingredients—without the preservatives or fillers often found in commercial kibble.
Honey, in particular, can be a surprising but beneficial addition. Not only is it naturally sweet, but it also offers antibacterial properties, supports digestion, and can even help with seasonal allergies when used in moderation.
Of course, not all human foods are safe for dogs, so it’s important to know how to prepare meals that are both healthy and dog-approved. In this guide, we’ll explore simple recipes and smart tips for crafting Homemade Dog Foods With Honey that your pet will love—and you’ll feel good about serving. After all, a happy, healthy dog starts with what’s in their bowl.
Why Use Honey in Homemade Dog Food

Thinking about sweetening your pup’s meals the natural way? Honey might be your new go-to ingredient. This golden syrup isn’t just for humans—it offers surprising benefits for your dog, too. Let’s dig into why honey could be a helpful addition to your homemade dog food recipes.
A Natural Source of Energy
Honey is packed with simple sugars like glucose and fructose. These sugars break down quickly, giving your dog a quick energy boost—especially helpful for active pups or senior dogs who need a little pep in their step. Unlike refined sugar, honey is unprocessed and comes with additional health perks.
If you like taking your dog on hikes, runs, or long adventures, a spoonful of honey mixed into their homemade food can help fuel their energy reserves.
Full of Antioxidants and Nutrients
You might be surprised to learn that honey isn’t just sugar—it’s loaded with natural antioxidants. These help protect your dog’s cells from damage caused by free radicals. That means it can support everything from a strong immune system to healthy aging.
Honey also contains trace amounts of vitamins and minerals like:
- Vitamin B complex
- Vitamin C
- Calcium
- Magnesium
- Iron
While these nutrients are present in small amounts, every bit helps when you’re aiming to craft balanced, nutrient-rich meals for your pup.
Supports Digestion and Gut Health
Is your dog prone to tummy troubles? Honey has natural prebiotic properties that can support a healthy gut. Prebiotics help feed the “good” bacteria in the digestive system, making it easier for your dog to absorb nutrients and maintain a balanced gut microbiome.
If you’re feeding your dog homemade meals with probiotics like yogurt or kefir, adding a little honey can boost those effects by feeding the friendly bacteria and helping them thrive.
Helps Soothe Allergies and Coughs
Local, raw honey is often praised for helping with seasonal allergies in humans—and it can work for dogs, too! The idea is that small amounts of local pollen in raw honey can help build your dog’s tolerance to allergens in your environment. While science is still catching up, many pet owners swear by this natural remedy.
Honey is also a gentle way to calm a dog’s irritated throat or mild cough. Think of it as a sweet spoonful of comfort when your dog isn’t feeling their best.
A Natural Sweetener with Fewer Risks
Many dog owners turn to sweeteners when making treats, but some options—like xylitol—are dangerous for pets. Honey, in contrast, is safe in small amounts and far more natural. It gives homemade dog treats or meals a touch of sweetness without the worry of toxic ingredients.
Just remember: moderation is key. Honey is still sugar, and too much can lead to weight gain or dental issues. A small drizzle now and then is plenty.
1. Peanut Butter and Honey Dog Treats Recipe
If you’re looking to pamper your pup with something homemade, nutritious, and downright delicious, peanut butter and honey dog treats are a fantastic choice. These easy-to-make goodies are not only packed with dog-approved flavors, but they also provide some wonderful health benefits.
With just a few simple pantry staples and a little time in the kitchen, you can whip up a batch of wholesome treats that are sure to have your dog’s tail wagging with excitement. Whether you’re an experienced pet parent or trying DIY dog treats for the first time, this recipe is beginner-friendly and endlessly customizable.
Let’s dig into everything you need to know to create these yummy snacks right in your own kitchen.
Why Peanut Butter and Honey Make a Great Combo
Peanut butter is a longtime favorite among dogs—and for good reason! It’s rich, creamy, and full of protein, healthy fats, and essential vitamins like B and E. It also serves as an excellent base for treats since most dogs can’t resist the flavor.
Honey, on the other hand, brings its own benefits to the table. This natural sweetener contains antioxidants, has antibacterial properties, and can even help soothe seasonal allergies in dogs when used in small amounts. It also helps bind ingredients together while adding a subtle, dog-friendly sweetness to each bite.
Together, peanut butter and honey form a powerhouse duo that creates a treat both tasty and nourishing. And best of all? You know exactly what’s going into your dog’s snacks—no hidden fillers, preservatives, or artificial junk.
What You’ll Need
Before you begin baking, make sure you have all your ingredients and tools ready to go. Here’s a quick list to keep things organized.
Ingredients:
- 1 cup of natural, unsalted peanut butter (make sure it contains no xylitol, which is toxic to dogs)
- 2 tablespoons of raw honey
- 1 ¾ cups of whole wheat flour (use oat or rice flour if your dog is sensitive to wheat)
- 1 large egg
- ¼ cup of water (you may need slightly more depending on dough consistency)
Optional Add-ins:
- ½ mashed banana or ¼ cup pumpkin purée for added flavor and fiber
- A dash of cinnamon for a warm, inviting aroma (in moderation)
Tools:
- Mixing bowl
- Rolling pin
- Baking sheet
- Parchment paper
- Cookie cutters (bone shapes are fun, but any will do)
Step-by-Step Instructions
Now for the fun part—baking! Just follow these simple steps to make a batch of tasty treats your furry friend will love.
Step 1: Preheat the Oven
Set your oven to 350°F (175°C). It’s important to let the oven fully preheat before baking to ensure the treats cook evenly.
Step 2: Combine the Wet Ingredients
In a large mixing bowl, stir together the peanut butter, honey, and egg. Mix until you have a smooth, thick base. If you’re using banana or pumpkin purée, now’s the time to add it in. This step ensures your dough has both flavor and moisture.
Step 3: Add the Dry Ingredients
Gradually stir in the flour, mixing well after each addition. Once the dough starts to come together, assess the texture. If it feels too dry or crumbly, add a bit of water—one tablespoon at a time—until the dough is soft but firm and not sticky. You should end up with a pliable dough that’s easy to roll and cut.
Step 4: Roll and Cut the Dough
Sprinkle a little flour on a clean surface and roll out the dough to about ¼ inch thick. Use your favorite cookie cutters to make shapes—or simply cut the dough into squares or rectangles with a knife. Be sure to adjust treat sizes based on your dog’s breed and jaw size.
Step 5: Bake to Perfection
Line a baking sheet with parchment paper and arrange your cut-out treats with a bit of space between them. Bake in the preheated oven for 15–20 minutes, or until the edges begin to turn golden brown.
For dogs who love a crunchier snack, you can turn the oven off after baking and let the treats sit inside for another 10–15 minutes as it cools.
Step 6: Cool and Store
Allow the treats to cool completely on a wire rack. Once they’re cool to the touch, transfer them to an airtight container. These treats will stay fresh for up to 1 week at room temperature or up to 2 weeks in the refrigerator.
If you’d like to make a larger batch, feel free to freeze extras. Just store them in a zip-top freezer bag, and they’ll last up to 3 months. Simply thaw a few treats at a time as needed.
2. Brie’s Banana and Honey Dog Treats
If you’re looking for a way to pamper your dog with a wholesome, homemade treat that combines natural sweetness and nutrition, Brie’s Banana and Honey Dog Treats are the perfect choice! These treats are packed with dog-friendly ingredients that support your pup’s health while satisfying their taste buds. Plus, they’re incredibly simple to make with just a few pantry staples!
In this guide, we’ll walk you through the process step by step, ensuring you can bake these treats with ease and confidence. Your dog will be wagging their tail in excitement, ready to indulge in these healthy and delicious bites!
Why Choose Banana and Honey for Dog Treats?
Bananas are not only tasty, but they’re also a fantastic source of potassium, fiber, and vitamin B6. These nutrients are beneficial for digestion, heart health, and even skin condition. Plus, bananas are easy on your dog’s tummy, making them a perfect choice for sensitive stomachs.
Honey, on the other hand, is a natural sweetener that offers multiple health benefits. It contains antioxidants, has antibacterial properties, and can soothe digestive issues. When used in moderation, honey can be a great addition to your dog’s diet, providing both flavor and health perks.
Together, banana and honey form a perfectly balanced combo, delivering both taste and nutrients to your pup’s snack time.
What You’ll Need
Before you get started, gather all the ingredients and tools you’ll need for this treat-making adventure. Here’s your shopping list:
Ingredients:
- 1 ripe banana (mashed)
- 2 tablespoons of raw honey
- 1 ½ cups of whole wheat flour (or oat flour for a gluten-free option)
- 1 egg
- ¼ cup of water (adjust as needed to achieve dough consistency)
- ½ teaspoon of cinnamon (optional, for extra flavor)
Tools:
- Mixing bowl
- Fork (for mashing the banana)
- Rolling pin
- Cookie cutters (bone shapes, hearts, or any fun shapes you like)
- Baking sheet
- Parchment paper or silicone baking mat
Step-by-Step Instructions
Now that you have everything ready, let’s dive into the process of creating these tasty treats for your dog. Follow these easy steps to bake your dog’s new favorite snack!
Step 1: Preheat Your Oven
Start by preheating your oven to 350°F (175°C). This ensures it’s at the right temperature when your treats are ready to go in.
Step 2: Mash the Banana
Using a fork, mash the ripe banana in a mixing bowl. Make sure to mash it thoroughly until it’s smooth, with no large chunks. Bananas are naturally sweet, so they’ll provide a lot of flavor to your treats. If you’re adding cinnamon, sprinkle it in with the banana to mix it evenly.
Step 3: Add the Honey and Egg
To the mashed banana, add the raw honey and egg. Stir the mixture well until it’s smooth and well-combined. The honey will add a slight sweetness, while the egg helps to bind everything together, making the dough easier to work with.
Step 4: Mix in the Flour
Next, gradually add the flour, a little at a time, to the banana mixture. Stir it in thoroughly after each addition. You’ll want the dough to come together but not be too sticky. If it feels too dry, add a small amount of water, one tablespoon at a time, until you get a firm, non-sticky dough.
Step 5: Roll Out the Dough
Once your dough is ready, lightly flour your work surface and rolling pin. Roll out the dough to about ¼ inch thickness. If the dough sticks, you can add a little more flour. Roll it evenly to ensure that your treats bake consistently.
Step 6: Cut the Dough into Fun Shapes
Use cookie cutters to cut the dough into fun shapes. Bone-shaped cookie cutters work great for dog treats, but feel free to use any shape you like! If you don’t have cookie cutters, you can use a knife to cut the dough into squares or rectangles. You can adjust the size of the treats based on your dog’s breed and size—smaller treats for smaller dogs, and larger ones for big pups!
Step 7: Bake the Treats
Place your cut-out treats on a baking sheet lined with parchment paper or a silicone baking mat. Be sure to space them evenly to allow air to circulate and ensure even baking. Bake the treats in the preheated oven for about 15–20 minutes, or until the edges are golden brown.
If you want extra-crunchy treats, you can leave them in the oven for a few minutes after baking is done, with the oven turned off. This helps them firm up and get that perfect crunch.
Step 8: Cool the Treats
Let the treats cool completely on a wire rack before serving them to your dog. This prevents any burning and ensures they are the perfect texture for your dog to enjoy. Once they’re cool, they’re ready to serve!
Step 9: Store the Treats
Once your treats are fully cooled, store them in an airtight container at room temperature for up to a week. If you want them to last longer, you can refrigerate them for up to two weeks or freeze them for up to three months. Just be sure to thaw them out before serving!
3. Honey Peanut Butter Dog Biscuits

Looking to treat your dog to something special and wholesome? Honey Peanut Butter Dog Biscuits are a perfect option! These delicious and nutritious treats are packed with two dog-friendly ingredients that pups love—peanut butter and honey. They’re also simple to make, requiring just a few ingredients and minimal preparation time. Your dog will not only appreciate the tasty treat, but you’ll also know exactly what’s going into their snacks!
Ready to make some homemade treats that will make your dog’s tail wag? Follow this easy, step-by-step guide to bake up a batch of Honey Peanut Butter Dog Biscuits your pup will adore!
Why Honey and Peanut Butter are the Perfect Combo
Before we dive into the recipe, let’s talk about why peanut butter and honey make such an awesome pairing for dog treats.
Peanut Butter
Peanut butter is a popular ingredient in dog treats for a reason! It’s tasty, rich in protein, and loaded with healthy fats that can help support your dog’s energy levels. It also contains vitamins and minerals, including B vitamins, niacin, and magnesium, making it a nutritious addition to your dog’s diet. Just be sure to use natural, unsalted peanut butter that doesn’t contain xylitol (an artificial sweetener toxic to dogs).
Honey
Honey isn’t just sweet; it also offers a number of health benefits for dogs. It contains antioxidants that help support your dog’s immune system and can also soothe minor digestive issues. Plus, honey provides a touch of natural sweetness that dogs find irresistible!
Together, these ingredients make a winning combination that’s both tasty and beneficial for your furry friend.
What You’ll Need
Before you start baking, gather all the necessary ingredients and tools. Don’t worry, it’s a short list—these treats are as simple as they are delicious!
Ingredients:
- 1 cup of natural, unsalted peanut butter (make sure it does not contain xylitol)
- 2 tablespoons of raw honey
- 1 ¾ cups of whole wheat flour (you can use oat flour for a gluten-free version)
- 1 egg
- ¼ cup of water (you may need a little more depending on the dough consistency)
Tools:
- Mixing bowl
- Rolling pin
- Cookie cutters (bone-shaped or any fun shape you prefer)
- Baking sheet
- Parchment paper or silicone baking mat
Step-by-Step Instructions
Now that you’ve got everything ready, let’s get baking! Follow these simple steps to make these drool-worthy Honey Peanut Butter Dog Biscuits.
Step 1: Preheat the Oven
Start by preheating your oven to 350°F (175°C). This ensures it’s nice and hot when your biscuits are ready to go in.
Step 2: Mix Wet Ingredients
In a large mixing bowl, combine the peanut butter and honey. Stir them together until smooth and well-blended. Add the egg and mix again until fully incorporated. The egg will help bind the dough together, giving it the perfect consistency for shaping and baking.
Step 3: Add the Flour
Gradually add the flour to the peanut butter mixture. Stir it in a little at a time to prevent clumps. As you mix, the dough will begin to come together. If it feels too dry or crumbly, add a tablespoon of water at a time until the dough is firm but not sticky.
The dough should hold its shape well and be easy to work with. You want a consistency that is neither too dry nor too sticky.
Step 4: Roll Out the Dough
Lightly flour your work surface and rolling pin to prevent sticking. Roll out the dough to about ¼-inch thickness. If the dough sticks to the rolling pin, add a little extra flour. Once the dough is rolled out, it’s time to get creative with your cookie cutters!
Step 5: Cut the Biscuits
Using your favorite cookie cutters, cut out shapes from the dough. Bone-shaped cutters are a fun option for dog treats, but feel free to get creative with other shapes—hearts, stars, or even paw prints! If you don’t have cookie cutters, you can simply use a knife to cut the dough into squares or rectangles.
Step 6: Bake the Biscuits
Place the cut-out biscuits on a baking sheet lined with parchment paper or a silicone baking mat. Arrange them so they are evenly spaced to allow air to circulate for even baking. Bake the biscuits in your preheated oven for about 15 to 20 minutes, or until they are golden brown around the edges.
For extra-crunchy biscuits, turn the oven off and leave the treats in the oven for an additional 5-10 minutes to firm up.
Step 7: Let the Biscuits Cool
After baking, remove the biscuits from the oven and allow them to cool completely on a wire rack. This step is important to ensure the biscuits are safe to serve to your dog and to preserve their crunchiness.
Step 8: Store the Biscuits
Once the biscuits have cooled, store them in an airtight container. You can keep them at room temperature for up to a week, or refrigerate them for up to two weeks. If you want to store them for longer, you can freeze the biscuits for up to three months. Just make sure to let them thaw out before giving them to your dog.
People Also Asked
Is Honey Safe for Dogs to Eat in Homemade Food?
Yes, honey is generally safe for dogs when used in moderation and can be a healthy addition to homemade dog food. It’s rich in antioxidants, enzymes, and natural sugars that provide a quick energy boost. However, honey should not be given to puppies under one year old or dogs with diabetes due to its high sugar content. Always use raw, unprocessed honey, and avoid overfeeding to prevent weight gain or blood sugar spikes.
What Are the Benefits of Adding Honey to Homemade Dog Food?
Honey offers several health benefits for dogs. It supports the immune system with its natural antibacterial and antifungal properties. It can also help with minor digestive issues and soothe allergies when fed regularly in small amounts. For active dogs, honey provides a natural energy source thanks to its simple sugars. Just make sure the rest of the diet is well-balanced and low in added sugars to maintain overall health.
How Much Honey Can You Add to Your Dog’s Food?
Moderation is key when feeding honey to dogs. A small dog can have about ½ teaspoon of honey per day, while larger dogs can have up to 1 teaspoon. Too much honey can lead to obesity or dental issues due to its sugar content. Always consult your veterinarian before making significant changes to your dog’s diet, especially if they have underlying health conditions.
Can Honey Help With Dog Allergies?
Local raw honey may help reduce your dog’s seasonal allergy symptoms. The theory is that it contains trace amounts of pollen from the environment, which can build your dog’s tolerance over time. While results may vary and research is still limited, some pet owners have found that adding small amounts of honey to homemade meals can ease symptoms like itching and sneezing. This should always be part of a broader allergy management plan approved by your vet.
Can You Use Honey in Both Raw and Cooked Homemade Dog Food?
Yes, honey can be used in both raw and cooked dog food recipes. For raw meals, you can drizzle honey directly over the ingredients before serving. For cooked food, add honey after cooking when the food has cooled slightly, as high heat can destroy some of honey’s natural enzymes and beneficial compounds. This way, your dog reaps the full nutritional benefits.
Are There Dogs That Should Not Eat Honey?
While most adult dogs can safely enjoy honey, it’s not suitable for all. Dogs with diabetes, obesity, or compromised immune systems should avoid honey due to its high sugar content. Puppies under 12 months old should not be given honey at all, as their digestive and immune systems are not fully developed and may be more susceptible to bacteria like botulism spores. Always check with your vet before introducing honey to your dog’s meals.
What Kind of Honey Is Best for Homemade Dog Food?
Raw, unprocessed honey is the best type to use in homemade dog food. It retains natural enzymes, vitamins, and antioxidants that offer health benefits for your dog. Avoid honey that contains added sugars or artificial sweeteners, especially xylitol, which is highly toxic to dogs. Local raw honey is often recommended because it may help with seasonal allergies by exposing your dog to small amounts of local pollen.
Can Honey Be Used in Homemade Dog Treats Too?
Absolutely! Honey is a popular ingredient in homemade dog treats and adds a touch of sweetness that dogs love. It pairs well with ingredients like peanut butter, oats, banana, and pumpkin. Besides enhancing flavor, honey can help bind the treat ingredients together. Just remember to use it in moderation and adjust your dog’s daily calorie intake accordingly to avoid overfeeding.
Final Words
Adding honey to your homemade dog food is a simple and natural way to boost both flavor and nutrition. With its antioxidant-rich profile, gentle digestive support, and immune-boosting properties, honey can be a valuable ingredient in your dog’s diet—when used wisely.
Whether you’re baking treats or mixing meals, a small drizzle of raw honey goes a long way in promoting your pup’s overall well-being. Just be sure to use it in moderation, choose the right type, and always consider your dog’s individual health needs.
When combined with balanced, wholesome ingredients, honey can help turn everyday meals into something your furry friend will truly love. Ready to sweeten up your dog’s bowl the healthy way?