
If you’re a dog owner who loves to treat your furry friend to something homemade, then this 4-Ingredient Peanut Butter Dog Cookies Recipe is perfect for you! These simple yet delicious treats are made with just four basic ingredients, so you won’t have to worry about any complicated steps or hard-to-find items.
Peanut butter is the star of this recipe, and it’s not only a tasty addition but also packed with healthy fats and protein that your dog will love. Whether you’re baking for a special occasion or just want to spoil your pup a little, these homemade dog cookies are sure to make tails wag.
Plus, you’ll know exactly what’s going into your dog’s treats, which is always a win. So, let’s dive into this easy, no-fuss recipe that’s bound to become your dog’s new favorite snack!
How to Make Peanut Butter Dog Cookies

Making homemade dog cookies is an easy and rewarding way to spoil your pup with a healthy treat. The 4-Ingredient Peanut Butter Dog Cookies Recipe is simple to follow and ensures your dog gets a tasty, nutritious snack without any artificial additives. Let’s dive into how to make these scrumptious peanut butter dog cookies from start to finish.
Step 1: Gather Your Ingredients

The 4-Ingredient Peanut Butter Dog Cookies Recipe uses four simple and dog-friendly ingredients that come together to create a tasty, healthy treat for your furry friend. Here’s what you’ll need:
- Peanut Butter – Make sure to choose a natural, unsweetened peanut butter without xylitol, as this sweetener is harmful to dogs. Peanut butter is rich in healthy fats and protein, making it a delicious and nutritious base for these cookies.
- Oat Flour – Oat flour is a great gluten-free option that’s gentle on your dog’s tummy. It helps bind the ingredients together and adds a lovely texture to the cookies.
- Egg – The egg acts as a binding agent, helping the dough hold its shape while baking. It also provides additional protein and nutrients.
- Water – A bit of water is added to bring the dough together and help achieve the right consistency for shaping the cookies.
These four ingredients combine to create a simple yet flavorful dog treat that’s safe and satisfying for your pup!
Step 2: Mix the Ingredients
In a large mixing bowl, combine the peanut butter and egg. Use a spoon or a hand mixer to blend them together until smooth. Make sure the peanut butter is fully incorporated with the egg to create a creamy, thick mixture.
Next, gradually add in the oat flour. You might want to do this in small batches to avoid the flour spilling out of the bowl. Stir the flour into the mixture until everything is well combined. The dough should start to come together in a firm, dough-like texture.
Once the dough is mixed, slowly add water. Start with a tablespoon at a time, stirring as you go, until you achieve the right consistency. You want the dough to be workable and slightly sticky but not too wet.
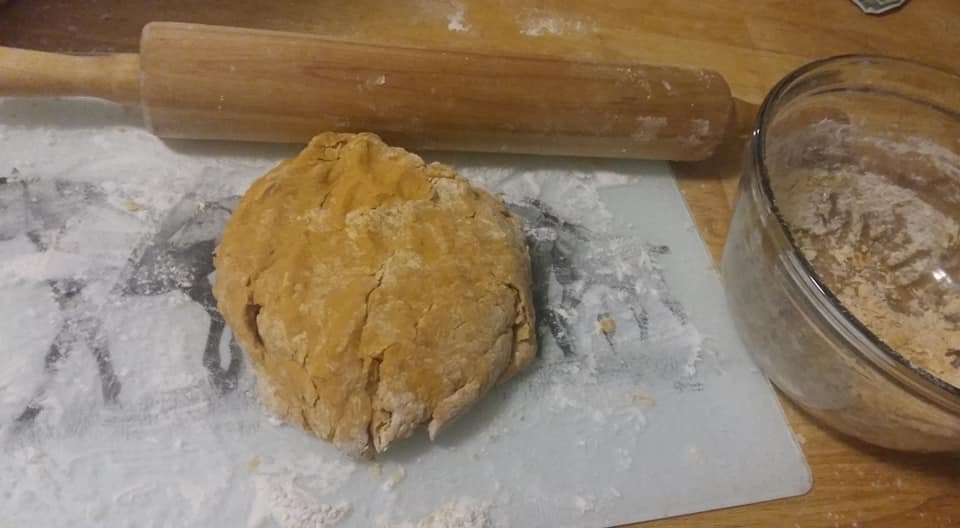
Step 3: Roll Out the Dough
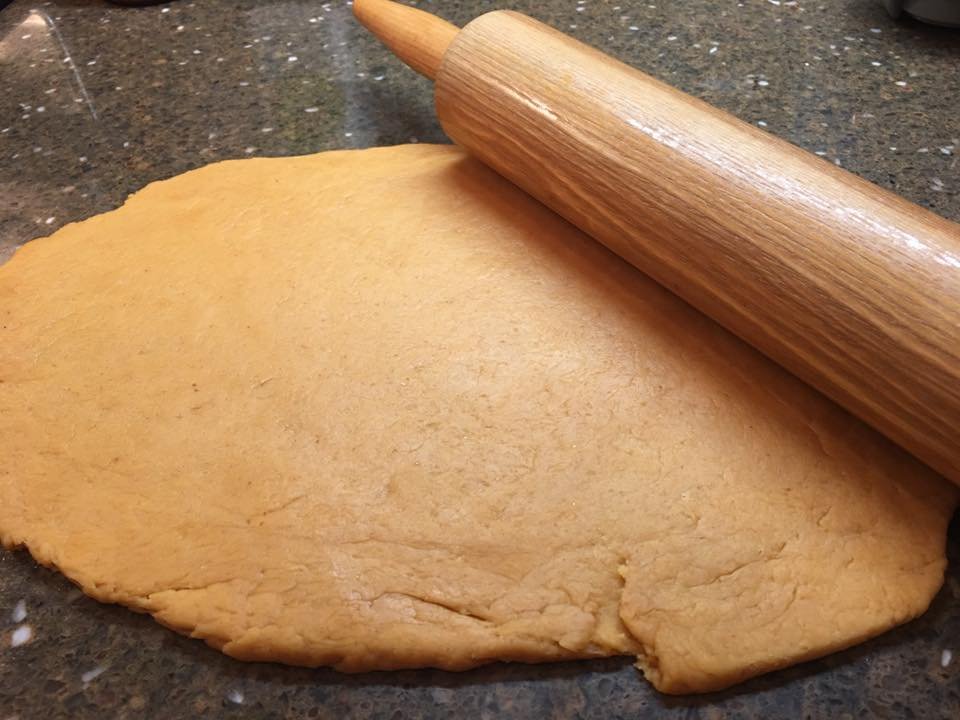
Once your dough is ready, lightly flour a clean surface with some extra oat flour to prevent sticking. Roll out the dough with a rolling pin until it’s about ¼ inch thick. The dough should be firm enough to hold its shape but soft enough to roll easily.
If you don’t have a rolling pin, you can also use your hands to press the dough out. The goal is to make it thick enough to hold the shape of the cookie cutter but not too thick to make the cookies overly hard.
Step 4: Cut Out the Cookies

Using a cookie cutter of your choice (we recommend fun shapes like bones or paws for added cuteness), cut the dough into your desired shapes. If you don’t have a cookie cutter, you can always use a sharp knife to cut the dough into squares or rectangles. Just make sure the cookies are all roughly the same size for even baking.
Once your cookies are cut out, place them on a baking sheet lined with parchment paper. Leave a little space between each cookie to allow for slight expansion during baking.
Step 5: Bake the Cookies
Place the baking sheet in your preheated oven and bake for 10 to 12 minutes. Keep an eye on them towards the end of the baking time to ensure they don’t burn. The cookies should turn golden brown around the edges when they are ready.
If you want your cookies to have a more crispy texture, you can leave them in the oven for an extra 1-2 minutes. Just be cautious not to overbake them, as they can become too hard for your dog to chew.
Step 6: Cool and Serve
Once the cookies are done, remove them from the oven and let them cool completely on a wire rack. This will help them firm up and make them easier for your dog to munch on. Once cooled, they’re ready to serve! Store any leftovers in an airtight container to keep them fresh for up to a week.
Tips for Perfect Dog Cookies
Baking homemade dog cookies is a fun and rewarding activity, but there are a few tips and tricks you can follow to ensure your 4-Ingredient Peanut Butter Dog Cookies turn out perfectly every time. Here are some handy suggestions to help you achieve the best results for your furry friend:
1. Use Natural, Xylitol-Free Peanut Butter
Peanut butter is the star ingredient in these cookies, but not all peanut butter is safe for dogs. Make sure to choose unsweetened peanut butter with no added sugars, salt, or artificial sweeteners like xylitol, which is highly toxic to dogs. Look for peanut butter that contains only peanuts (and possibly salt), and double-check the label to ensure it’s safe for your pet.
2. Measure Ingredients Accurately
Baking is all about precision, even when it comes to dog treats! To ensure your dog cookies have the right texture and consistency, be sure to measure your ingredients carefully. If you’re using oat flour, make sure it’s properly sifted to avoid lumps. Accurate measurements will help the dough come together smoothly and bake evenly.
3. Adjust the Water as Needed
The amount of water required in your dough can vary depending on the peanut butter you use and the humidity in your kitchen. Add the water slowly, a tablespoon at a time, until the dough reaches a workable consistency. It should be firm but slightly sticky, not too wet. If the dough feels too dry, you can add a little more water. If it’s too sticky, just sprinkle a bit more oat flour to balance it out.
4. Roll the Dough Evenly
To ensure your cookies bake evenly, make sure the dough is rolled out to an even thickness of about ¼ inch. If the dough is too thick, the cookies will take longer to bake and might turn out too hard. If it’s too thin, the cookies may burn quickly. A consistent thickness will help them bake uniformly and achieve that perfect crunchy texture.
5. Choose Fun Cookie Shapes
Using cookie cutters can make these treats even more fun! While bone-shaped cutters are the most common, feel free to get creative with shapes that match your dog’s personality or interests—paw prints, hearts, or even dog faces. Just be sure to adjust the baking time slightly for smaller or larger cookie shapes to avoid burning.
6. Don’t Overbake the Cookies
It’s tempting to leave the cookies in the oven for longer, but overbaking them can make them too hard and difficult for your dog to chew. Bake the cookies for 10 to 12 minutes, and keep an eye on them toward the end. The edges should be golden brown, and the cookies should feel firm to the touch when they’re done.
7. Let the Cookies Cool Completely
Once the cookies are baked, remove them from the oven and allow them to cool completely on a wire rack. This cooling process helps them firm up and ensures they don’t crumble when your dog chomps down on them. Plus, it prevents the cookies from being too hot when served to your pup.
8. Store Properly for Freshness
If you’re making a batch of cookies in advance, store them properly to keep them fresh. Place the cooled cookies in an airtight container and store them at room temperature for up to a week. For longer storage, you can freeze the cookies for up to three months. Just be sure to let them thaw before serving.
9. Experiment with Add-ins
While the 4-Ingredient Peanut Butter Dog Cookies recipe is already simple and delicious, you can experiment with dog-friendly add-ins for extra flavor and nutrients. Some great options include:
- Shredded carrots or pumpkin puree for extra vitamins
- Coconut oil for added healthy fats
- Blueberries or bananas for a natural sweetness
Just be sure to keep any additions safe and appropriate for your dog’s dietary needs.
10. Keep It Simple and Healthy
When making dog treats, it’s important to focus on quality ingredients that support your dog’s health. Avoid any processed or sugary ingredients that can cause health problems over time. Stick to simple, whole-food ingredients, and your dog will be enjoying healthy snacks in no time.
By following these tips, you’ll be able to create perfectly baked, healthy, and delicious dog cookies that your pup will absolutely love. Enjoy baking, and happy treating!
Frequently Asked Questions
What Are The Ingredients In The 4-Ingredient Peanut Butter Dog Cookies Recipe?
The 4-Ingredient Peanut Butter Dog Cookies Recipe is made with simple, dog-friendly ingredients. You’ll need unsweetened peanut butter, oat flour, an egg, and water. These ingredients come together to create a delicious and healthy treat for your dog without any artificial additives or preservatives. Just make sure to choose a peanut butter that’s free from xylitol, as it’s harmful to dogs.
Is Peanut Butter Safe For Dogs In These Cookies?
Yes, peanut butter is safe for dogs when given in moderation, and it’s a key ingredient in these cookies. However, you must ensure that the peanut butter is unsweetened and free from xylitol, a sweetener that is toxic to dogs. As long as you choose the right peanut butter, it can be a tasty and healthy treat for your pup, packed with healthy fats and protein.
Can I Use Regular Flour Instead Of Oat Flour?
While oat flour is a great gluten-free option and gentle on your dog’s digestive system, you can substitute it with regular flour if necessary. However, it’s important to note that regular wheat flour may not be as easily digestible for some dogs, especially those with sensitivities or allergies. Oat flour is generally a better choice for creating dog-friendly cookies.
How Do I Know If The Dough Is The Right Consistency?
The dough should be firm and slightly sticky, but not too wet. If the dough is too dry, gradually add a little more water until it comes together into a smooth, workable texture. If it’s too sticky, add a bit more oat flour. It should be easy to roll out and hold the shape when you use cookie cutters.
How Long Do The Dog Cookies Last?
Once baked and completely cooled, your 4-Ingredient Peanut Butter Dog Cookies will stay fresh for up to a week when stored in an airtight container at room temperature. If you want to keep them fresh for longer, you can freeze the cookies for up to three months. Just make sure to let them thaw before serving to your pup.
Can I Add Other Ingredients To The Dog Cookies?
Absolutely! While the 4-Ingredient Peanut Butter Dog Cookies Recipe is simple and tasty on its own, you can customize the treats by adding dog-friendly ingredients. You could mix in shredded carrots, pumpkin puree, or blueberries to boost the flavor and nutritional value. Just be sure to stick to ingredients that are safe and healthy for your dog.
How Can I Make The Cookies More Crunchy?
If you prefer a crunchier texture, bake the cookies a bit longer than the recipe suggests—around 12 to 15 minutes. Keep an eye on them as they bake, and ensure they’re golden brown around the edges. Once they cool, they’ll harden further, making them a satisfying crunch for your dog to enjoy.
Can I Make These Dog Cookies Without An Egg?
Yes, you can make these cookies without an egg if your dog has an allergy or sensitivity to eggs. Instead, you can try replacing the egg with applesauce or a flaxseed mixture (mix 1 tablespoon of ground flaxseeds with 3 tablespoons of water and let it sit for a few minutes until it thickens). These substitutes will help bind the dough together, although the texture may be slightly different.
Final Words
The 4-Ingredient Peanut Butter Dog Cookies Recipe is a simple, healthy, and delicious treat that’s easy to make and perfect for your pup. With just four ingredients—peanut butter, oat flour, egg, and water—you can create a wholesome snack that your dog will love. It’s a great way to spoil your furry friend with a homemade, nutritious treat without any artificial additives.
Whether you keep them crunchy or soft, these cookies are sure to become a favorite in your dog’s treat jar. Happy baking, and enjoy seeing your dog’s tail wag with every bite!