

Looking for a delicious and foolproof way to elevate your baking? Look no further than this Tasty Bakery Recipe with Crisco Frosting! Whether you’re baking a cake for a special occasion or just treating yourself to something sweet, this recipe is sure to impress. Crisco frosting is the secret ingredient that gives your creations a smooth, creamy texture with the perfect balance of sweetness.
It’s easy to make, holds its shape beautifully, and pairs perfectly with a variety of cakes and cupcakes. With a few simple ingredients and a bit of time, you can create a bakery-worthy dessert right at home.
This Tasty Bakery Recipe with Crisco Frosting will not only satisfy your taste buds but also leave your guests asking for the recipe. So, let’s get baking and bring a little slice of bakery magic into your kitchen! #CriscoFrosting #BakeryRecipe #TastyDesserts #BakingFun #SweetTreats
Ingredients of Tasty Bakery Recipe with Crisco Frosting
When it comes to baking a delicious treat, having the right ingredients is key to achieving that perfect flavor and texture. For this bakery recipe, you’ll need some essential pantry items to create a soft and moist base, along with the creamy Crisco frosting that adds the perfect finishing touch.
Key Ingredients for the Cake
The base of this bakery recipe is light and fluffy, thanks to a combination of flour, sugar, eggs, and baking powder. These simple ingredients come together to create a rich, smooth texture that serves as the perfect canvas for the frosting. Adding vanilla extract enhances the flavor, making each bite a delightful experience. A pinch of salt is included to balance the sweetness and elevate the flavors of the other ingredients.
Essential Crisco Frosting Ingredients
The frosting, made with Crisco shortening, provides a silky, smooth texture that holds up beautifully for decorating. You’ll need powdered sugar to give the frosting its perfect sweetness and a bit of vanilla extract to complement the cake’s flavor.
A small amount of milk is added to adjust the consistency, making it easy to spread. The Crisco frosting is light and airy, yet rich enough to hold its shape for decorating purposes, adding that extra special touch to any bakery-worthy creation.
Step-by-Step Instructions to Make Tasty Bakery Recipe with Crisco Frosting
Baking a delicious treat from scratch can be incredibly rewarding, and when paired with Crisco frosting, you’re sure to create a dessert that’s both moist and beautifully decorated. This step-by-step guide will walk you through the process of making a tasty bakery-style cake with smooth, creamy frosting, ensuring your creation turns out perfect every time.
Preparing the Cake Batter
Making a delicious cake starts with a well-prepared batter. This process brings together the right balance of dry and wet ingredients to create a light, fluffy texture. From preheating the oven to properly mixing and combining each component, every step plays a crucial role. Taking the time to get the batter just right sets the stage for a moist, flavorful cake that bakes evenly and tastes amazing.
Step 1: Preheat and Prepare the Pans
Start by preheating your oven to 350°F (175°C). While it heats, grease and flour two 9-inch round cake pans or line them with parchment paper. This step is essential to prevent the cake from sticking and to ensure easy removal. Properly prepared pans make for a smooth release and help maintain the shape of your cake, especially if you’re planning to decorate it later. Set the pans aside once ready.
Step 2: Mixing the Dry Ingredients
In a large bowl, combine 2 ½ cups of all-purpose flour, 1 ½ cups of granulated sugar, 2 teaspoons of baking powder, and a pinch of salt. Whisk thoroughly to distribute the leavening agents evenly. This ensures your cake rises uniformly and bakes with a consistent texture. Dry ingredient mixing is often overlooked, but it’s key for balanced flavor and structure throughout the cake. Set this bowl aside for now.
Step 3: Creaming the Wet Ingredients
In a separate mixing bowl, beat 1 cup of softened butter (or margarine) with 2 teaspoons of vanilla extract until the mixture is light and fluffy. Use an electric mixer on medium speed for best results. Next, add 4 large eggs, one at a time, beating well after each addition. This step is crucial because it traps air, creating a lighter batter and fluffier cake. Make sure the ingredients are fully blended.
Step 4: Combining Wet and Dry Ingredients
Gradually add the dry ingredients to the wet mixture in portions, blending gently after each addition. Slowly pour in 1 cup of milk while mixing to keep the batter smooth and moist. Use a medium mixer speed for 2–3 minutes until fully combined. Avoid overmixing, as this can cause the gluten in the flour to toughen, leading to a dense cake. The batter should be creamy, smooth, and lump-free.
Step 5: Baking the Cake
Evenly divide the batter between the two prepared pans. Use a spatula to level the tops so they bake uniformly. Place the pans in the oven and bake for 25–30 minutes, or until a toothpick inserted into the center comes out clean. Let the cakes cool in their pans for about 10 minutes before transferring them to a wire rack. Fully cooled layers are essential before applying any frosting or decoration.
Making the Crisco Frosting
Now that your cake layers are cooling, you can prepare a delicious Crisco-based frosting. This smooth and stable frosting is great for piping or spreading, and it holds up well even at room temperature.
Step 1: Beating the Crisco Shortening
In a large mixing bowl, add 1 cup of Crisco shortening. Use an electric mixer set to medium speed to beat the shortening for 2–3 minutes. This step gives the shortening a light, creamy texture. Properly whipped Crisco provides the base for a silky and stable frosting that spreads smoothly and maintains shape during decoration. Once it’s fluffy and pale, you’re ready to add the sugar.
Step 2: Adding the Powdered Sugar
Slowly incorporate 4 cups of powdered sugar, one cup at a time, into the beaten shortening. Continue beating the mixture well after each addition to avoid lumps and maintain a fluffy texture. Powdered sugar is the main sweetener here, and how you incorporate it affects the final texture. Keep your mixer on medium speed and scrape the sides of the bowl as needed to ensure even mixing.
Step 3: Adding Vanilla and Milk
Add 2 teaspoons of vanilla extract and 2 tablespoons of milk to the frosting base. The vanilla adds flavor, while the milk controls the consistency. If the frosting seems too thick, add more milk, one teaspoon at a time, until it’s spreadable. Beat the mixture on medium-high for another 2 minutes. This final whip gives the frosting a light, airy texture that’s easy to work with and tastes delicious.
Step 4: Frosting the Cake
Once your cake layers are completely cool, place the first layer on a cake stand or plate. Spread a generous amount of Crisco frosting over the top using a spatula, smoothing it evenly. Carefully place the second layer on top and continue frosting the top and sides of the cake. You can use the spatula for a rustic finish or a piping bag for decorative touches. The frosting holds up beautifully for both.
Tips and Tricks
Baking a cake with Crisco frosting is a rewarding experience, and with a few helpful tips, you can ensure your creation turns out perfectly every time. These tricks will not only improve the flavor and texture but also make the decorating process much easier.
Getting the Perfect Texture
For a super moist cake, make sure not to overmix your batter. Once the wet and dry ingredients are combined, mix just until smooth to prevent the cake from becoming dense. Also, using room-temperature ingredients like butter and eggs helps the batter come together more easily and ensures a light texture.
When it comes to the frosting, if you prefer a thicker consistency for piping or decorations, simply add more powdered sugar. If it’s too thick, add a bit more milk, one teaspoon at a time, until you reach the desired texture. If you’re aiming for a smoother finish, let the frosted cake sit for a few minutes before smoothing out any imperfections with a spatula.
To prevent your cake from sticking to the pan, don’t forget to grease and flour your pans thoroughly or use parchment paper. And, for an added touch, refrigerate the cake after frosting it for 20-30 minutes to help the frosting set, making it easier to cut and serve.
Serving Suggestions
A beautifully baked cake topped with Crisco frosting deserves to be served in style. Whether you’re hosting a party, celebrating a special occasion, or enjoying a casual family dessert, the right presentation and pairings can enhance the entire experience.
Creative Ways to Serve and Enjoy
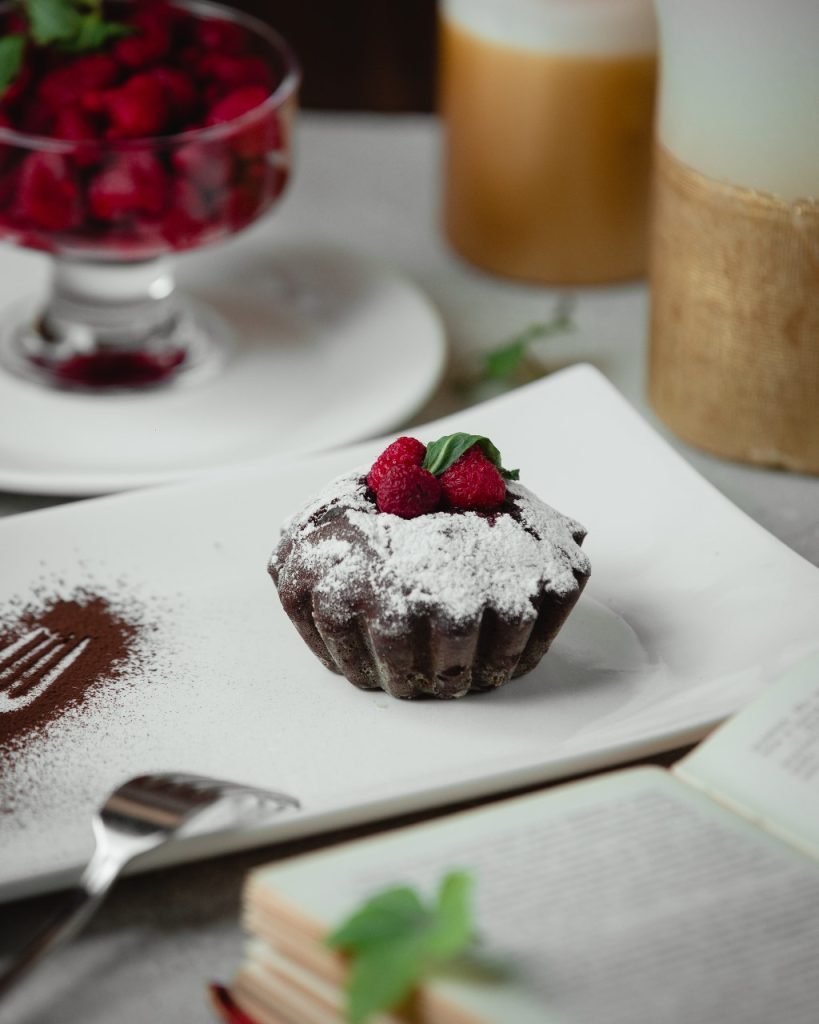
To make your bakery-style cake even more inviting, slice it into even, generous pieces and serve on decorative dessert plates. Adding a garnish like fresh berries, mint leaves, or a dusting of powdered sugar can elevate its look without much effort. If you’re entertaining guests, consider pairing the cake with a scoop of vanilla ice cream or a drizzle of fruit sauce for added flavor and a touch of elegance.
For casual gatherings or afternoon treats, serve the cake with a hot cup of coffee, tea, or a glass of cold milk. The light, creamy texture of Crisco frosting balances beautifully with both warm and cold beverages. You can also turn leftover cake into delightful cake pops or trifle desserts by layering chunks of cake with whipped cream and fresh fruit in a glass. No matter how you choose to serve it, this bakery recipe with Crisco frosting is sure to be a crowd-pleaser every time.
FAQs
What Makes Crisco Frosting Different From Buttercream Frosting?
Crisco frosting stands out because it uses vegetable shortening instead of butter, which gives it a lighter, creamier texture and a bright white color. Unlike butter-based frostings, Crisco frosting holds its shape better in warmer temperatures, making it ideal for detailed decorations and outdoor events. It’s also perfect for those who prefer a less rich, more neutral-flavored frosting that can easily be enhanced with vanilla, almond, or other extracts.
Can You Make This Bakery Recipe Ahead Of Time?
Yes, you can definitely make this bakery recipe with Crisco frosting ahead of time. The cake layers can be baked a day or two in advance and stored in an airtight container at room temperature or in the refrigerator. The Crisco frosting can also be prepared early and kept in the fridge for up to a week. Before using, let the frosting sit at room temperature and beat it again to restore its fluffy texture. Assembled cakes can be made a day ahead and stored in the fridge until ready to serve.
How Do You Store A Cake With Crisco Frosting?
To store a cake with Crisco frosting, keep it in an airtight container or cover it well with plastic wrap to prevent it from drying out. It can be left at room temperature for up to two days, as Crisco frosting is more stable than butter-based versions. If you need to store it longer, place it in the refrigerator, where it will stay fresh for up to five days. For even longer storage, you can freeze the frosted cake for up to two months — just be sure to thaw it in the refrigerator overnight before serving.
Can You Add Flavors Or Colors To Crisco Frosting?
Absolutely, Crisco frosting is very versatile and easy to customize. You can add extracts like vanilla, almond, lemon, or coconut to enhance its flavor. If you’d like to tint the frosting, gel or paste food coloring works best, as it won’t alter the texture or make it too runny. Always add coloring gradually and mix thoroughly until you reach the desired shade. This makes Crisco frosting perfect for themed cakes, colorful cupcakes, and festive holiday treats.
Why Is It Important To Use Room Temperature Ingredients?
Using room-temperature ingredients is essential for achieving a smooth, even cake batter and fluffy frosting. When ingredients like butter, eggs, and milk are at room temperature, they mix together more easily, creating a consistent texture without lumps. In the frosting, room-temperature Crisco ensures a silky, lump-free finish. This small step can greatly improve the overall quality of your bakery recipe, resulting in a tender cake and perfectly creamy frosting.
Final Words
This Tasty Bakery Recipe with Crisco Frosting is the perfect treat to brighten any celebration or casual gathering. The light, fluffy texture of the cake pairs beautifully with the rich, creamy Crisco frosting, delivering a classic, nostalgic flavor everyone will love.
Whether you stick to the original or add your own twists with flavor variations and decorations, this recipe is simple, dependable, and absolutely delicious. It’s a go-to dessert that’s easy to prepare yet impressive enough to share. Next time you’re craving a homemade sweet, give this recipe a try — you’ll be surprised how quickly it becomes a family favorite!