

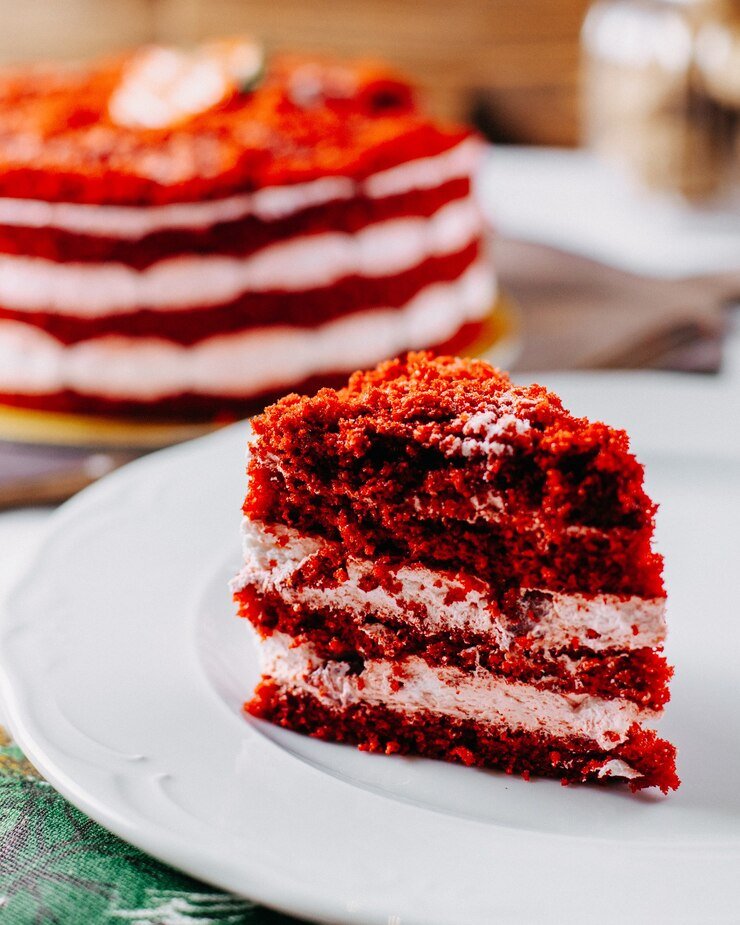
Red Velvet Cake is a classic dessert that has won the hearts of many with its rich flavor and striking appearance. Known for its vibrant red color and smooth, velvety texture, this cake combines the subtle cocoa taste with a hint of tanginess from buttermilk or vinegar, making it uniquely delicious.
Often layered with creamy cream cheese frosting, Red Velvet Cake is a favorite at celebrations, from birthdays to weddings. Its beautiful deep red hue not only makes it visually appealing but also adds a sense of luxury and indulgence.
Whether you’re baking it at home or enjoying a slice from your favorite bakery, Red Velvet Cake offers a perfect balance of sweetness and texture that keeps people coming back for more. This dessert’s charm lies in its simplicity and the comforting nostalgia it brings, making it a timeless treat for any occasion.
History of Red Velvet Cake
Red Velvet Cake has a rich and fascinating history dating back to the early 20th century in the United States. Originally, its subtle red color came from the natural reaction between cocoa powder and acidic ingredients like buttermilk.
The bright red hue became popular later with the introduction of food coloring. Over time, Red Velvet Cake grew in fame as a luxurious and festive dessert, beloved for its unique flavor and striking appearance.
Origins and Early Popularity
The history of Red Velvet Cake dates back to the early 20th century, though its exact origins are a bit mysterious. Some food historians trace it to the 1920s and 1930s in the United States, where it gained popularity during the era of lavish cakes and desserts.
Originally, the cake’s red color came from the chemical reaction between natural cocoa powder and acidic ingredients like buttermilk or vinegar, which gave it a reddish tint rather than the bright red we see today. It was often considered a special treat because the ingredients were a bit more expensive than those in typical cakes.
The Rise of the Red Hue
The bright red color that defines Red Velvet Cake today became popular during the 1940s and 1950s when food coloring became more widely available. The cake’s vibrant color helped it stand out at parties and special events, contributing to its lasting fame.
The association with luxury and indulgence grew, especially when paired with the classic cream cheese frosting. Today, Red Velvet Cake is celebrated not only for its unique flavor but also for its rich history and cultural significance as a festive dessert.
Ingredients of Red Velvet Cake
The ingredients in Red Velvet Cake work together to create its signature taste and texture. From the rich cocoa powder and tangy buttermilk to the vibrant red food coloring, each component plays a crucial role. Moisture, flavor, and that iconic red hue come from a careful balance of simple yet specific ingredients. Understanding what goes into Red Velvet Cake helps appreciate why it’s such a beloved dessert.
Essential Ingredients
Red Velvet Cake is made with simple but carefully chosen ingredients that give it its unique flavor and texture. The base usually includes all-purpose flour and granulated sugar, which provide structure and sweetness.
Unsweetened cocoa powder adds a mild chocolate flavor without overpowering the cake. Buttermilk is key to the recipe, adding moisture and a slight tang that balances the sweetness perfectly. Vinegar is also used, reacting with baking soda to help the cake rise and create a tender crumb.
Color and Flavor Enhancers
The iconic red color mostly comes from red food coloring, though some recipes use natural alternatives like beet juice. Butter or oil adds richness and keeps the cake moist, while eggs give the cake structure and help it hold together. Vanilla extract is added to enhance the overall flavor and add warmth to the cake.
Classic Cream Cheese Frosting
No Red Velvet Cake is complete without its signature cream cheese frosting. Made with cream cheese, butter, powdered sugar, and vanilla, this frosting adds a creamy, tangy contrast that perfectly complements the soft, sweet cake layers.
Step-by-Step Instructions to Make Red Velvet Cake
Making a Red Velvet Cake from scratch might sound intimidating at first, but with easy-to-follow steps, it turns into a fun and satisfying kitchen adventure. This classic Southern dessert is known for its vibrant red color, tender crumb, and deliciously tangy cream cheese frosting. Follow the steps below to create your own show-stopping cake at home.
Ingredients and Equipment You’ll Need
Before you dive into baking, preparation is key. Start by gathering all your ingredients and tools. For the dry ingredients, you’ll need all-purpose flour, granulated sugar, cocoa powder, baking soda, and salt. These will provide the structure and flavor base for your cake.
Next, the wet ingredients include buttermilk for moisture and tang, vegetable oil for a soft crumb, eggs for binding, and a mix of red food coloring, vinegar, and vanilla extract to enhance color and flavor. Don’t forget your cream cheese frosting ingredients: cream cheese, butter, powdered sugar, and vanilla extract.
You’ll also need two 9-inch round cake pans, parchment paper, a couple of mixing bowls, a mixer, and a wire cooling rack. Having everything set out before you begin makes the process smooth and stress-free.
Step 1: Preheat and Prepare Your Pans
Before you begin mixing, it’s important to preheat your oven to 350°F (175°C). Preheating ensures that your cake begins baking at the correct temperature, which helps it rise properly and bake evenly. While the oven warms up, you can prepare your cake pans. Grease two 9-inch round pans with butter or non-stick spray, and then line the bottoms with parchment paper.
This step is crucial for preventing the cakes from sticking to the pan, making them easier to remove later. Smoothly releasing the layers will also give you a more polished-looking cake, perfect for frosting and decorating.
Step 2: Mix the Dry Ingredients
In a large mixing bowl, combine your dry ingredients: all-purpose flour, granulated sugar, cocoa powder, baking soda, and salt. It’s best to sift these ingredients first to remove any lumps and ensure even distribution. The cocoa powder adds a subtle chocolate flavor to the cake, which balances the tanginess of the buttermilk and vinegar later on.
Stir the sifted ingredients gently using a whisk or spoon, just enough to combine them evenly. This step lays the groundwork for your cake’s structure and flavor, so don’t rush it. Properly mixed dry ingredients will help your batter turn out consistent and smooth when combined with the wet mixture.
Step 3: Whisk the Wet Ingredients
In a separate medium-sized bowl, add the buttermilk, vegetable oil, eggs, red food coloring, white vinegar, and vanilla extract. Whisk everything together until the mixture is smooth and consistent in color and texture. The red food coloring gives the cake its signature hue, while the vinegar and buttermilk add both moisture and a slightly tangy taste that’s characteristic of red velvet.
The eggs provide structure and help hold the cake together. Using room temperature ingredients helps the mixture blend more evenly, reducing the risk of lumps. This wet mixture should look creamy and vibrant, with a deep red tone that stands out beautifully once baked.
Step 4: Combine Wet and Dry Mixtures
Now it’s time to bring everything together. Slowly add the dry ingredients into the bowl with the wet ingredients. You can use a mixer on low speed or fold the ingredients together by hand using a spatula. The key here is to mix gently and only until everything is just combined.
Overmixing at this stage can lead to a dense or rubbery cake, which you want to avoid. The batter should look smooth and uniform in color, without any streaks of flour. Take your time to scrape down the sides of the bowl to ensure all ingredients are incorporated. A well-mixed batter is essential for an evenly baked and tender cake.
Step 5: Pour and Bake the Cake
Divide the batter evenly between the two prepared cake pans. Use a spatula to level the tops so that the layers bake evenly and come out with a nice, flat surface. Place the pans in the center of your preheated oven and bake for 25 to 30 minutes. Every oven is a little different, so begin checking at the 25-minute mark.
Insert a toothpick into the center of each cake—if it comes out clean or with just a few moist crumbs, the cakes are done. Avoid opening the oven too early, as that can cause the cakes to sink in the middle. Once done, the cakes should be firm to the touch with a rich red color and a soft, springy texture.
Step 6: Let the Cakes Cool
After removing the cakes from the oven, let them rest in the pans for about 10 minutes. This brief cooling period allows the cakes to firm up slightly, making them easier to handle. After 10 minutes, carefully run a knife around the edges of the pans to loosen the cakes and gently turn them out onto a wire rack.
Let the layers cool completely before applying any frosting. Trying to frost warm cakes can cause the frosting to melt and slide off. A cool cake is essential for smooth, clean frosting application and a neat finished look. Give the layers at least an hour to cool fully at room temperature.
Step 7: Make the Cream Cheese Frosting
While your cakes are cooling, you can prepare the luscious cream cheese frosting. In a mixing bowl, beat the softened cream cheese and butter together until the mixture is creamy and lump-free. Once smooth, gradually add in the powdered sugar, one cup at a time, mixing well after each addition.
This step ensures a smooth consistency without clumps. Finally, stir in the vanilla extract to round out the flavor. You can adjust the amount of powdered sugar depending on how sweet or thick you want your frosting. If it’s too thick, add a splash of milk. If too thin, add a bit more sugar. This frosting is rich, slightly tangy, and the perfect complement to the mildly chocolatey red velvet cake.
Step 8: Assemble the Red Velvet Cake
To assemble your cake, start by placing one cooled cake layer on a serving plate or cake stand. Use a spatula to spread a generous layer of cream cheese frosting across the top. Make sure the frosting is even and reaches all the edges. Next, gently place the second cake layer on top, aligning it carefully so the sides match up.
Use the remaining frosting to cover the top and sides of the cake. For a smooth finish, use a bench scraper or offset spatula, or leave the frosting swirled for a more rustic, homemade look. This is the moment when your cake starts to look truly impressive—and irresistible.
Step 9: Decorate and Serve
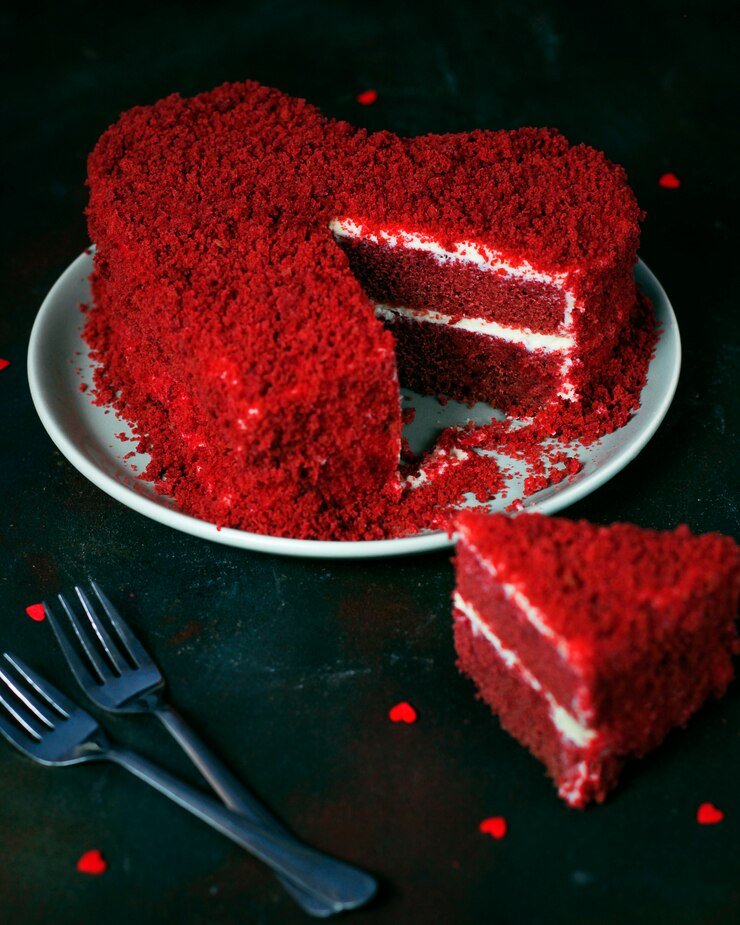
Now for the fun part—decorating your cake! If you trimmed the cake layers to level them, crumble the scraps and sprinkle them over the top or press them into the sides for a decorative and textured finish. You can also top your cake with chocolate shavings, fresh berries, or edible flowers for an elegant touch.
Get creative! Once decorated, your cake is ready to serve. Use a sharp knife to cut clean slices, and enjoy the perfect combination of moist red velvet cake and creamy frosting. This cake is ideal for birthdays, holidays, or any occasion that calls for something special and delicious.
Variations of Red Velvet Cake
Red Velvet Cake is a versatile dessert that can be enjoyed in many different forms. From adding chocolate chips or espresso for a flavor boost to experimenting with alternative frostings like whipped cream or coconut cream, there are plenty of ways to customize it. Whether as cupcakes, cheesecakes, or traditional layered cakes, these variations bring fresh twists to this classic favorite.
Classic Twists and Flavor Enhancements
While the traditional Red Velvet Cake is beloved for its rich, velvety texture and cream cheese frosting, many variations add exciting new flavors. Some recipes include chocolate chips for extra chocolate bursts or a touch of espresso powder to deepen the cocoa flavor without overwhelming the cake.
Alternative Frosting Options
Though cream cheese frosting is classic, other frostings like whipped cream, mascarpone, or buttercream offer different textures and tastes. For a dairy-free option, coconut cream frosting provides a delicious vegan alternative that complements the cake perfectly.
Unique Red Velvet Twists
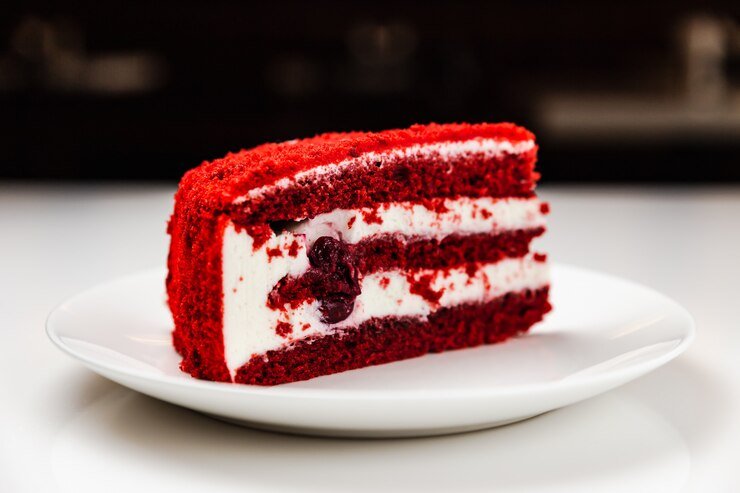
Beyond traditional cakes, red velvet cupcakes offer a fun, individual-sized treat. Red Velvet Cheesecake combines the cake’s flavors with creamy cheesecake layers, showcasing the versatility of this beloved dessert for any occasion.
Serving Suggestions and Presentation
Serving Red Velvet Cake is about more than just slicing and plating — it’s a chance to turn a delicious dessert into a memorable experience. Whether you’re presenting it at a casual family gathering or a festive celebration, the right serving ideas and thoughtful presentation can enhance both the look and taste. From classic pairings to creative plating touches, there are endless ways to make Red Velvet Cake shine.
Classic Serving Ideas
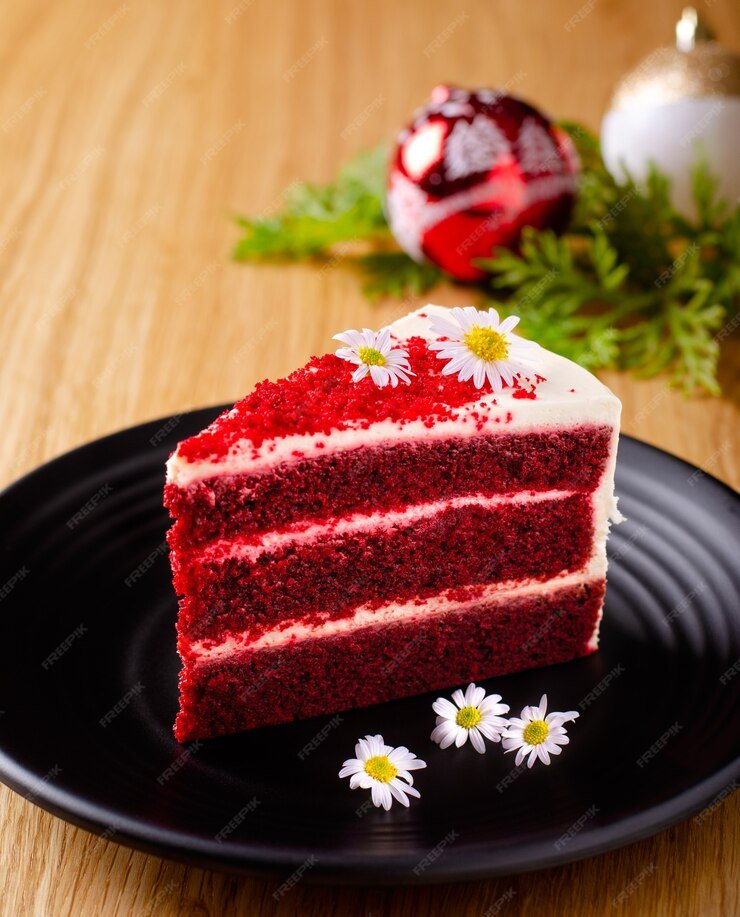
Red Velvet Cake is always a showstopper, but the way you serve it can make it even more special. The classic approach is to slice it into thick, even pieces and serve with a dollop of whipped cream or a scoop of vanilla ice cream. Fresh berries like strawberries or raspberries are a perfect garnish, adding a bright, fruity contrast to the cake’s rich flavor.
Creative Presentation Tips
For parties or holiday gatherings, Red Velvet Cupcakes are a fun and convenient option. Decorate them with piped cream cheese frosting and colorful sprinkles for a festive touch. You can also dress up your full-sized cake with chocolate shavings, edible flowers, or a light dusting of powdered sugar to give it an elegant finish.
Another great idea is to serve the cake as a layered trifle in glass cups, alternating pieces of cake, cream cheese frosting, and fresh berries for a beautiful, easy-to-serve dessert.
Best Drink Pairings
Pair your Red Velvet Cake with a cup of strong coffee, a glass of milk, or a sweet dessert wine to perfectly balance its rich, velvety flavor.
Common Mistakes and How to Avoid Them
Baking Red Velvet Cake can be simple, but a few common mistakes often affect its texture, flavor, and appearance. One frequent issue is overmixing the batter.
It’s tempting to keep stirring until the batter looks perfectly smooth, but doing so can lead to a dense, tough cake. The key is to mix the wet and dry ingredients just until they’re combined — a few small lumps are fine and will bake out.
Overmixing the Batter
One of the most common mistakes when making Red Velvet Cake is overmixing the batter. Stirring too much can lead to a dense, tough cake instead of the light, tender texture it’s known for. Mix the wet and dry ingredients just until combined — a few lumps are perfectly fine.
Incorrect Measuring of Ingredients
Baking is a science, and even small measurement errors can affect the final result. Too much flour can make the cake dry, while too little cocoa powder can weaken its signature flavor. Use proper measuring cups and level off ingredients for accuracy.
Skipping Buttermilk or Vinegar
Some people leave out buttermilk or vinegar, thinking they’re not important. These acidic ingredients react with baking soda, helping the cake rise and stay soft. Without them, your cake might turn out flat or dense.
Frosting a Warm Cake
Another easy mistake is frosting the cake while it’s still warm, which can cause the frosting to melt and slide off. Always let the cake cool completely before adding cream cheese frosting for the best texture and appearance.
Nutritional Information
Understanding the nutritional content of Red Velvet Cake can help you enjoy this classic treat while being mindful of your diet. While it’s a rich, indulgent dessert, knowing what’s in each slice makes it easier to balance with your daily intake.
Calories and Basic Breakdown
A typical slice of Red Velvet Cake with cream cheese frosting contains around 350 to 450 calories, depending on the recipe and portion size. Most of these calories come from fats and sugars, with the frosting contributing a significant amount. On average, one serving offers about 20 grams of fat, 40 to 50 grams of carbohydrates, and 3 to 5 grams of protein.
Vitamins, Minerals, and Considerations
Red Velvet Cake isn’t a significant source of vitamins or minerals, though it does provide small amounts of calcium from buttermilk and cream cheese, and a little iron from cocoa powder. However, it’s high in sugar and saturated fats, so it’s best enjoyed in moderation.
FAQs
What Makes Red Velvet Cake Different From Regular Chocolate Cake?
Red Velvet Cake stands out from regular chocolate cake because of its unique combination of flavors, texture, and signature red color. While it does contain cocoa powder, it uses much less than a traditional chocolate cake, giving it a subtle cocoa flavor rather than a rich, deep chocolate taste. It’s also made with buttermilk and a touch of vinegar, which react with baking soda to create a soft, tender crumb. The cream cheese frosting adds a tangy contrast to the lightly sweet cake, making it distinct in both flavor and appearance.
Why Is Vinegar Used In Red Velvet Cake?
Vinegar plays an important role in Red Velvet Cake by reacting with baking soda to help the cake rise and achieve its soft, fluffy texture. It also enhances the cake’s mild tanginess and supports the bright red color, especially when paired with cocoa powder.
Though you might not taste the vinegar directly, it helps balance the sweetness and creates a tender, moist crumb that’s essential to a good Red Velvet Cake.
Can You Make Red Velvet Cake Without Food Coloring?
Yes, you can absolutely make Red Velvet Cake without food coloring. Traditionally, the cake’s red hue came from the natural reaction between cocoa powder and acidic ingredients like buttermilk and vinegar, although this usually results in a subtle reddish-brown color. If you prefer a more vibrant, natural alternative, beet juice or pomegranate juice can be used as a dye, offering both color and added nutrients without artificial ingredients.
How Should You Store Red Velvet Cake?
To keep Red Velvet Cake fresh, it’s best to store it in an airtight container in the refrigerator, especially if it’s frosted with cream cheese frosting. The cake stays moist for about 4 to 5 days when properly stored. Before serving, let it sit at room temperature for 15 to 20 minutes to soften the frosting and enhance its flavor.
If you need to store it longer, you can freeze the unfrosted cake layers for up to three months, then thaw and frost when ready to enjoy.
What Is The Best Frosting For Red Velvet Cake?
The classic and most popular frosting for Red Velvet Cake is cream cheese frosting. Its smooth, tangy flavor perfectly complements the lightly sweet, cocoa-flavored cake. Made with cream cheese, butter, powdered sugar, and vanilla extract, it adds richness and a creamy texture to every bite.
If you’re looking for a lighter option, whipped cream frosting works well too. For dairy-free or vegan versions, coconut cream frosting or plant-based cream cheese substitutes can deliver great flavor while meeting dietary needs.
Conclusion
Red velvet cake is a timeless dessert loved for its rich flavor, striking color, and velvety texture. Whether served at birthdays, weddings, or casual gatherings, it never fails to impress both in taste and appearance. The combination of cocoa, buttermilk, and cream cheese frosting creates a perfect balance of sweetness and tanginess that makes every bite memorable.
With its interesting history and versatile recipe variations, red velvet cake continues to be a favorite for bakers and dessert lovers alike. Whether you stick to the classic recipe or try creative twists like cupcakes or cheesecakes, this indulgent treat is sure to brighten any occasion. Give it a try — you might just find your new favorite cake.