

If you’re looking for a healthy, tail-wagging way to spoil your pup, Homemade Pumpkin and Banana Dog Treat Recipes are the perfect solution. These treats aren’t just easy to make—they’re also packed with natural ingredients you probably already have in your kitchen. Pumpkin is great for digestion, while bananas offer a boost of potassium and fiber, making this combo both delicious and nutritious for your furry friend.
We all want to know exactly what’s going into our dogs’ food, and making treats at home gives you full control. No mystery fillers, no artificial preservatives—just wholesome, dog-friendly ingredients baked with love. Whether you’re rewarding good behavior, celebrating a special day, or just want to share something yummy with your best buddy, these treats are a hit.
In this guide, we’ll walk you through a few simple and satisfying Homemade Pumpkin and Banana Dog Treat Recipes that your pup will absolutely love. Let’s get baking!
Why Pumpkin and Banana?
Pumpkin and banana might sound like an unusual combo, but they’re a powerhouse pair when it comes to dog treats. Both ingredients are not only safe for dogs but also bring a host of health benefits that make them perfect for homemade goodies.
Pumpkin is a superfood for pups. It’s packed with fiber, which helps regulate your dog’s digestion and can ease both diarrhea and constipation. It’s also rich in vitamins A, C, and E, as well as iron and potassium—essential nutrients for your dog’s overall health.
Bananas, on the other hand, are naturally sweet and full of good stuff like potassium, vitamin B6, and vitamin C. They also contain fiber and magnesium, which support heart and muscle function. Plus, most dogs love the taste!
When combined, pumpkin and banana create a soft, flavorful base that’s perfect for baking dog treats. You get the benefits of both ingredients, along with a texture and taste dogs go crazy for. And since these fruits are gentle on the stomach, they’re a great option for pups with sensitive tummies.
Choosing pumpkin and banana for your dog treats means giving your furry friend something that’s both tasty and nourishing—without any unnecessary junk.
1. Classic Pumpkin and Banana Bites Recipe
If you’re looking for a homemade dog treat that’s healthy, easy to whip up, and totally pup-approved, these Classic Pumpkin and Banana Bites are a fantastic place to start. Made with just a few wholesome ingredients, this recipe is perfect for dog owners who want to avoid store-bought treats loaded with fillers and preservatives.
Both pumpkin and banana are rich in nutrients and naturally flavorful, so there’s no need for added sugar or artificial flavors. These treats are soft, chewy, and have just the right balance of texture and taste to keep your pup’s tail wagging. Whether you’re baking for a special occasion or just want to spoil your furry best friend, these bites are a simple and reliable option.
This recipe is great for dogs of all sizes and ages—just be sure to adjust the portion size based on your pup’s needs. You can even break them into smaller pieces for training treats. With ingredients you likely already have in your pantry, it doesn’t get more convenient than this.
Ingredients You’ll Need
To keep things simple and nutritious, here’s what you’ll need:
- 1 ripe banana, mashed
- 1/2 cup pure pumpkin puree (be sure it’s 100% pumpkin, not pie filling)
- 1 1/2 cups whole wheat flour
- 1 egg
Optional Add-ins (for extra flavor and nutrition)
- 1 tablespoon natural peanut butter – A favorite among most dogs, but make sure it’s xylitol-free
- 1/4 teaspoon ground cinnamon – Adds a warm, comforting aroma (safe in small amounts)
Each of these ingredients plays a helpful role. The banana adds natural sweetness and a soft texture, the pumpkin provides fiber and essential nutrients, and the egg binds everything together. The flour gives structure, making it easy to roll and cut the dough into fun shapes.
Step-by-Step Instructions
Follow these simple steps to create your own batch of delicious, homemade dog treats.
Step 1: Preheat and Prep
Start by preheating your oven to 350°F (175°C). Line a baking sheet with parchment paper or a silicone baking mat. This will help prevent the treats from sticking and make cleanup much easier.
Step 2: Mix the Wet Ingredients
In a large mixing bowl, mash the ripe banana with a fork until smooth. Add in the pumpkin puree and egg, stirring everything together until well blended. If you’re including peanut butter or cinnamon, mix those in now.
Step 3: Add the Dry Ingredients
Gradually stir in the flour until a soft dough begins to form. The dough should be firm enough to roll out without being too dry. If the mixture is too sticky, add more flour a tablespoon at a time. If it feels too dry or crumbly, a splash of water can help bring it together.
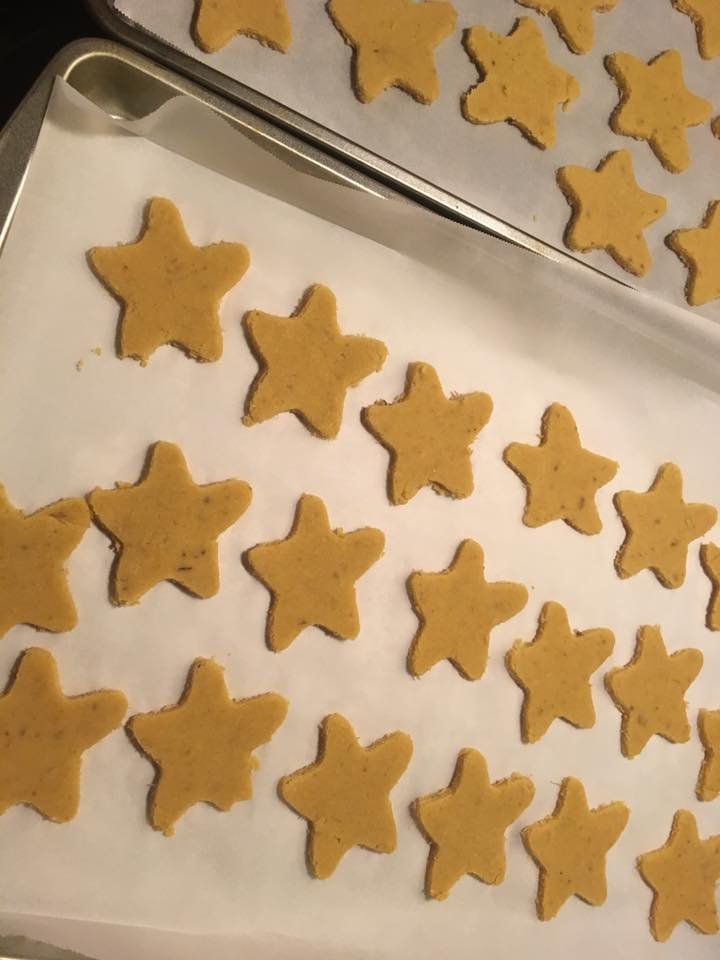
Step 4: Roll and Cut
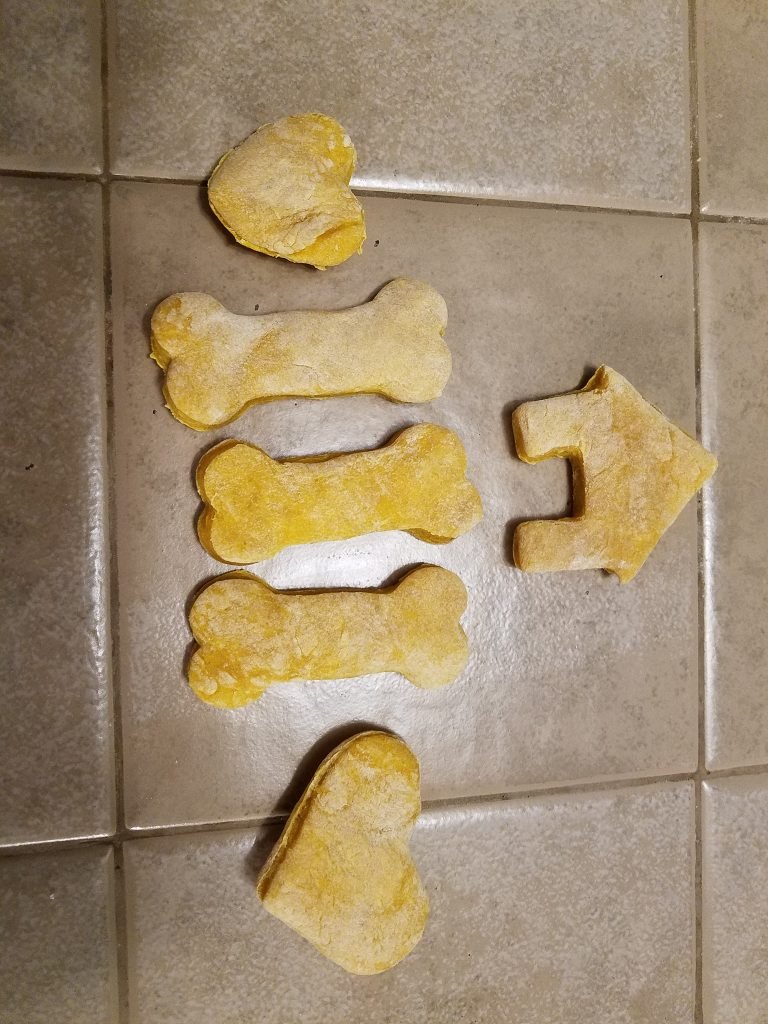
Lightly flour your countertop or cutting board, then roll out the dough to about 1/4-inch thickness. Use cookie cutters to create fun shapes like bones, hearts, or stars—or simply cut the dough into bite-sized squares using a knife or pizza cutter. Whatever shape you choose, your pup will love them just the same.
Step 5: Bake
Place the cut treats on your lined baking sheet, leaving a little space between each one. Bake in the preheated oven for 18 to 22 minutes, or until the edges are golden brown and the centers feel firm.
For softer treats, bake them for the lower end of the time range. If your dog prefers crunchier treats, you can leave them in a few minutes longer or let them sit in the turned-off oven as it cools.
Step 6: Cool and Store
Once the treats are done baking, transfer them to a wire rack and let them cool completely. This is important, as warm treats can become soggy if stored too soon. Once cooled, store them in an airtight container for up to 5 to 7 days on the counter or up to 2 weeks in the fridge. You can also freeze extras in a zip-top bag for up to 3 months—just thaw before serving.
2. Pumpkin and Banana Biscuits Recipe
If you’re looking for a homemade treat that’s a bit firmer and perfect for pups who love a satisfying crunch, these Pumpkin and Banana Biscuits are just the thing. They’re made with a short list of healthy ingredients, baked until golden, and have that satisfying snap your dog will love. Unlike soft treats, these biscuits hold their shape well, making them ideal for storing, traveling, or gifting to fellow dog parents.
What makes this recipe so great is how easy it is to put together—no fancy equipment, no weird ingredients, and everything comes together in one bowl. Plus, the aroma of pumpkin and banana baking in the oven? It’s heavenly (and your dog will agree).
Ingredients You’ll Need
Here’s what you’ll need for these crunchy dog biscuits:
- 1 ripe banana, mashed
- 1/2 cup pumpkin puree (100% pure, not pumpkin pie filling)
- 2 1/4 cups whole wheat flour
- 1 egg
- 2 tablespoons water (more if needed)
Optional Add-ins (completely safe and pup-approved):
- 1 tablespoon unsweetened peanut butter (xylitol-free only)
- 1/2 teaspoon ground cinnamon (optional, for a touch of warmth)
The ingredients are simple and natural. Pumpkin and banana both support healthy digestion, while the egg helps bind everything together. Whole wheat flour gives structure and crunch, turning this dough into biscuits your dog can really sink their teeth into.
How to Make Pumpkin and Banana Dog Biscuits
These biscuits come together quickly and bake into firm, crunchy treats your pup will beg for.
Step 1: Preheat the Oven
Start by preheating your oven to 325°F (165°C). This lower temperature helps the biscuits dry out slowly, making them crisp all the way through.
Step 2: Mix Wet Ingredients
In a large bowl, mash the banana until smooth. Add in the pumpkin puree and egg. Mix well to combine. If using peanut butter or cinnamon, add it in now and stir until evenly blended.
Step 3: Add the Flour
Gradually add the flour to the wet mixture, stirring as you go. The dough should start to come together into a firm, slightly tacky ball. If it’s too dry, add the water one tablespoon at a time until the dough holds together but isn’t sticky.
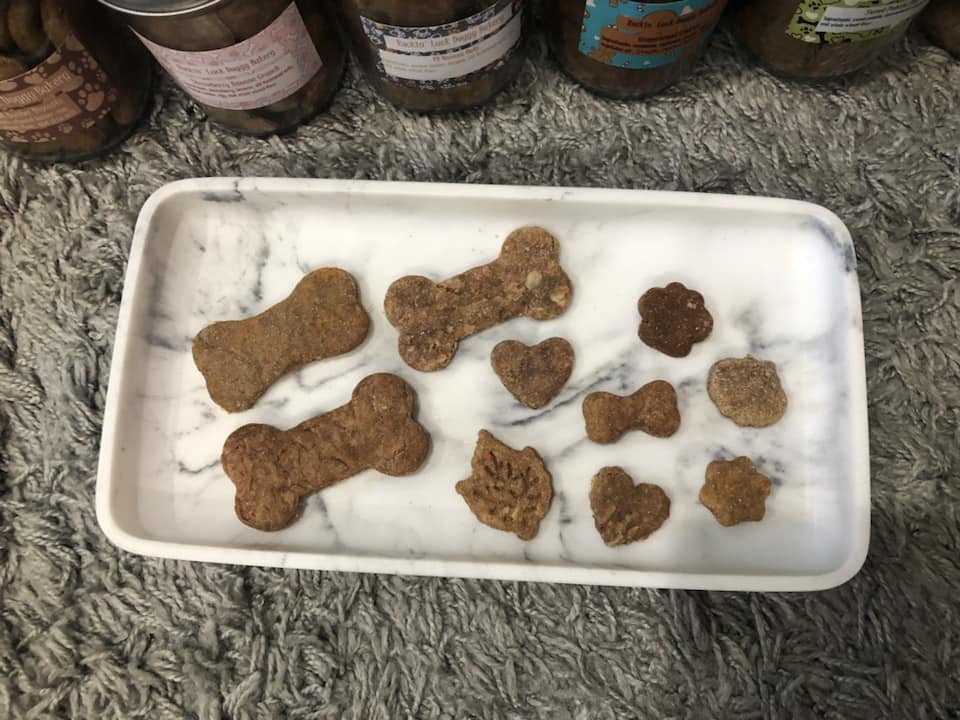
Step 4: Roll and Cut
Lightly flour your work surface and roll the dough out to about 1/4-inch thickness. Use your favorite cookie cutters—bone shapes are fun, but anything works. If you don’t have cookie cutters, simply cut the dough into squares or strips using a knife or pizza cutter.
Step 5: Bake Until Crisp
Place the cut-out biscuits on a parchment-lined baking sheet. Bake for 30 to 35 minutes, or until the biscuits are golden brown and fully set. The longer bake time helps them become nice and crunchy.
If you want them even harder (for longer shelf life or bigger dogs), you can turn the oven off after baking and leave the biscuits inside as the oven cools. This dehydrates them even further, almost like a dog biscuit from the store.
Step 6: Cool and Store
Let the biscuits cool completely on a wire rack before storing. Once cool, transfer them to an airtight container. They’ll stay fresh for 2 weeks at room temperature, or you can refrigerate or freeze them to keep them even longer.
3. Peanut Butter Banana Pumpkin Bars
If you’re searching for a soft, chewy dog treat that’s packed with wholesome ingredients and full of flavor, these Peanut Butter Banana Pumpkin Bars are a must-bake. These bars combine three classic canine favorites—pumpkin, banana, and peanut butter—into a moist and delicious treat that’s perfect for pups of all sizes and ages.
Unlike crunchy biscuits or dry store-bought snacks, these bars are baked soft, making them a great choice for senior dogs, puppies, or any pup who prefers a tender bite. They’re also super easy to break apart for training rewards or small nibbles throughout the day.
Made with simple pantry staples and no artificial junk, these bars are the perfect example of how a homemade treat can be both nutritious and downright irresistible.
Ingredients You’ll Need
Here’s everything you’ll need to make these healthy, flavorful bars:
- 1 ripe banana, mashed
- 1/2 cup pumpkin puree (100% pure pumpkin)
- 1/3 cup natural peanut butter (xylitol-free only)
- 1 egg
- 1 1/2 cups oat flour (or old-fashioned oats blended into a flour)
Optional Add-ins:
- 1 tablespoon honey – Adds a hint of natural sweetness (optional)
- 1/4 teaspoon ground cinnamon – For a cozy aroma (optional but dog-safe)
Each ingredient serves a purpose. The banana and pumpkin provide moisture and digestive benefits, while peanut butter brings protein and flavor. Oat flour makes the bars gluten-free and gentle on your dog’s tummy. The egg acts as a natural binder to hold it all together.
Step-by-Step Instructions
Follow these simple steps to create a batch of chewy bars your dog will love.
Step 1: Preheat Your Oven
Preheat your oven to 350°F (175°C). Line an 8×8-inch baking dish with parchment paper or lightly grease it to prevent sticking.
Step 2: Mix the Wet Ingredients
In a large bowl, mash the banana with a fork until smooth. Add in the pumpkin, peanut butter, and egg. Stir until well combined. If you’re using honey or cinnamon, now’s the time to mix them in.
Step 3: Stir in the Oat Flour
Gradually add the oat flour to the wet mixture, stirring until a thick batter forms. It should be spreadable but not too dry. If it feels overly thick, add a splash of water or a bit more pumpkin.
Step 4: Spread and Bake
Pour the batter into your prepared baking dish and spread it evenly with a spatula. Bake for 25 to 30 minutes, or until a toothpick inserted in the center comes out clean and the edges look set.
Step 5: Cool and Slice
Let the bars cool completely in the pan before removing. Once cooled, transfer to a cutting board and slice into small squares or rectangles, depending on the size of your dog.
4. No-Bake Pumpkin and Banana Treats
Sometimes you want to spoil your pup with something homemade, but the idea of turning on the oven feels like too much—especially during the warmer months. That’s where these No-Bake Pumpkin and Banana Treats come in. They’re quick, easy, and packed with nutritious ingredients, and the best part? No oven required!
These chilled bites are soft, chewy, and naturally sweet from banana and pumpkin. They’re perfect for dogs who prefer a softer texture, and they also make a great treat for pups with dental sensitivities. Because they’re refrigerated, they stay fresh and cool, making them a refreshing snack—especially on hot days.
Plus, with just a handful of ingredients and zero baking time, this recipe is perfect for busy pet parents who still want to make something special and healthy for their furry friends.
Simple Ingredients, Big Flavor
These treats are made from wholesome, pup-safe ingredients you probably already have in your pantry:
- 1 ripe banana, mashed
- 1/2 cup pumpkin puree (make sure it’s plain pumpkin, not pie filling)
- 1/4 cup natural peanut butter (must be xylitol-free)
- 2 1/2 cups rolled oats (divided)
- 1 tablespoon chia seeds or ground flaxseed (optional, for extra nutrients)
This combination creates a nutrient-rich snack filled with fiber, healthy fats, and natural sweetness. The oats give texture and help everything hold together, while the banana and pumpkin offer flavor and moisture. Peanut butter adds protein and a rich, nutty taste dogs love.
How to Make No-Bake Pumpkin and Banana Treats
These come together in less than 15 minutes—no oven, no mixer, no fuss.
Step 1: Prep the Ingredients
In a large mixing bowl, mash the banana until smooth. Add the pumpkin puree and peanut butter, and stir until fully combined. If you’re including chia seeds or flaxseed, mix those in now.
Step 2: Process the Oats
Take 1 1/2 cups of the oats and pulse them in a blender or food processor until they resemble a coarse flour. This helps the treats hold their shape better and gives them a smoother texture. Leave the remaining 1 cup of oats whole for a bit of crunch.
Step 3: Combine Everything
Add the processed oats and the whole oats to the wet mixture. Stir well until a thick, sticky dough forms. If it feels too wet, add a little more oats. If it’s too dry, a splash of water or extra pumpkin can help.
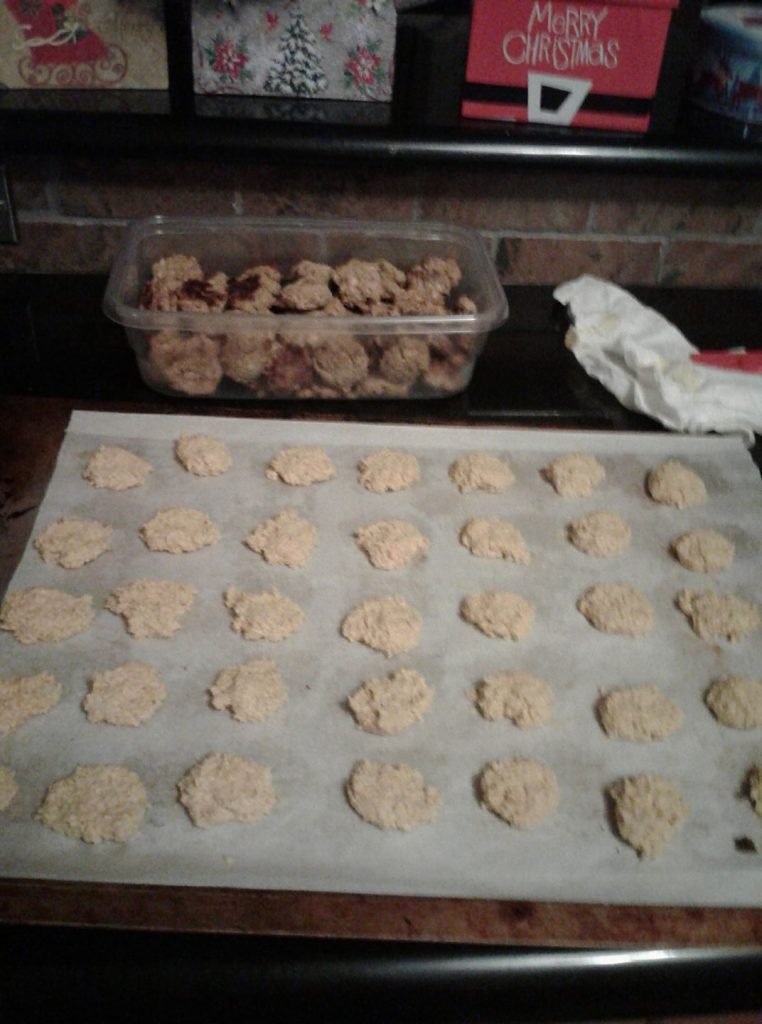
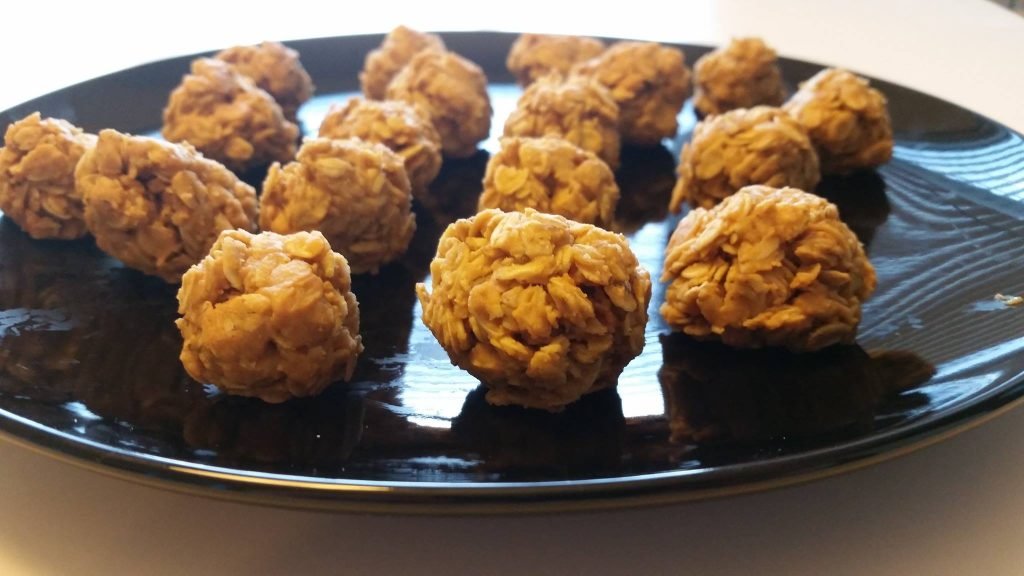
Step 4: Roll into Balls
Scoop out spoonfuls of the dough and roll them into bite-sized balls using your hands. You can make them as small or large as you like, depending on your dog’s size. Place them on a parchment-lined tray or plate.
Step 5: Chill to Set
Pop the tray in the fridge and let the treats set for at least 1 hour. After that, they’ll be firm enough to handle and ready to serve!
5. Frozen Pumpkin and Banana Pops
When the weather heats up, even our pups could use a little help cooling down. That’s where these Frozen Pumpkin and Banana Pops come in. They’re cool, refreshing, and made with just a few dog-safe ingredients. Best of all, they’re healthy and super easy to whip up!
Think of these as homemade pupsicles—cold, creamy, and absolutely irresistible to dogs. The combination of banana and pumpkin isn’t just tasty; it’s also gentle on your dog’s stomach and packed with nutrients. Whether your furry friend just got back from a long walk or is lounging in the backyard sun, these frozen treats will hit the spot.
The best part? No baking, no fancy tools—just a blender (or even a mixing bowl) and a few minutes of your time.
Why Dogs Love These Pops
Dogs love cold treats for the same reason we do—they’re refreshing! But unlike sugary human ice pops, these are made with simple, natural ingredients. They’re:
- Cooling: Perfect for hot summer days or after a play session.
- Nutritious: Packed with fiber, potassium, and antioxidants.
- Soothing: Great for dogs with sensitive stomachs or teething puppies.
Plus, they look adorable and are fun to make. If your pup has never tried a frozen treat before, get ready for a tail-wagging reaction!
Ingredients You’ll Need
This recipe keeps things simple and wholesome. Here’s what you’ll need:
- 1 ripe banana
- 1/2 cup pure pumpkin puree (not pumpkin pie filling)
- 1/4 cup plain Greek yogurt (unsweetened and unflavored)
- 1 tablespoon peanut butter (make sure it’s xylitol-free)
- A splash of water or low-sodium broth (optional, for easier blending)
Each of these ingredients is safe for dogs in moderation and contributes either flavor, texture, or nutrition. Greek yogurt adds a creamy texture and a dose of probiotics. Peanut butter gives protein and that nutty flavor dogs love.
How to Make Frozen Pumpkin and Banana Pops
Here’s a step-by-step guide to whipping up a batch of these frozen treats.
Step 1: Blend the Ingredients
In a blender or food processor, combine the banana, pumpkin puree, Greek yogurt, and peanut butter. Blend until smooth. If the mixture is too thick to blend, add a small splash of water or broth to thin it slightly.
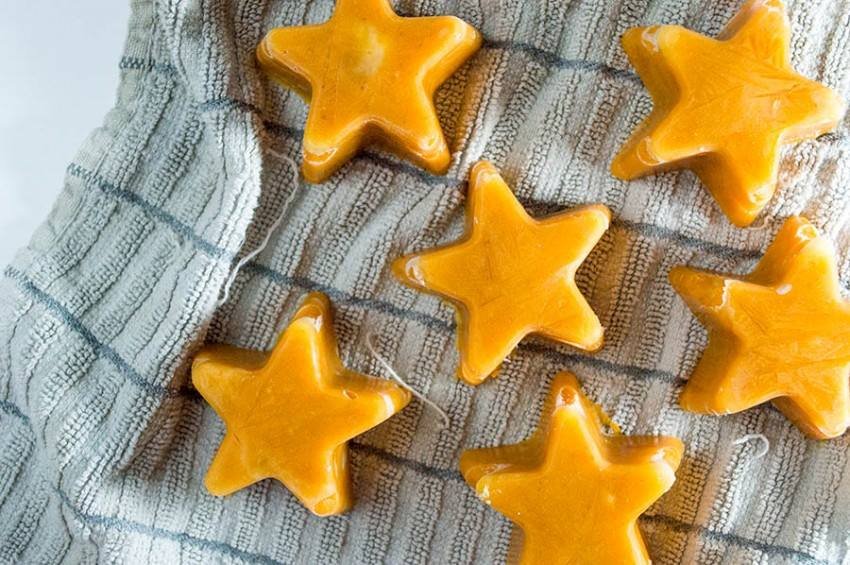
Step 2: Pour Into Molds
Once smooth, pour the mixture into silicone molds, ice cube trays, or small paper cups. If you’d like to make popsicle-style treats, insert a small dog biscuit or chew stick into each mold as a handle.
Step 3: Freeze
Place the molds in the freezer and freeze for at least 3-4 hours, or until fully solid. Overnight is best for firm pops.
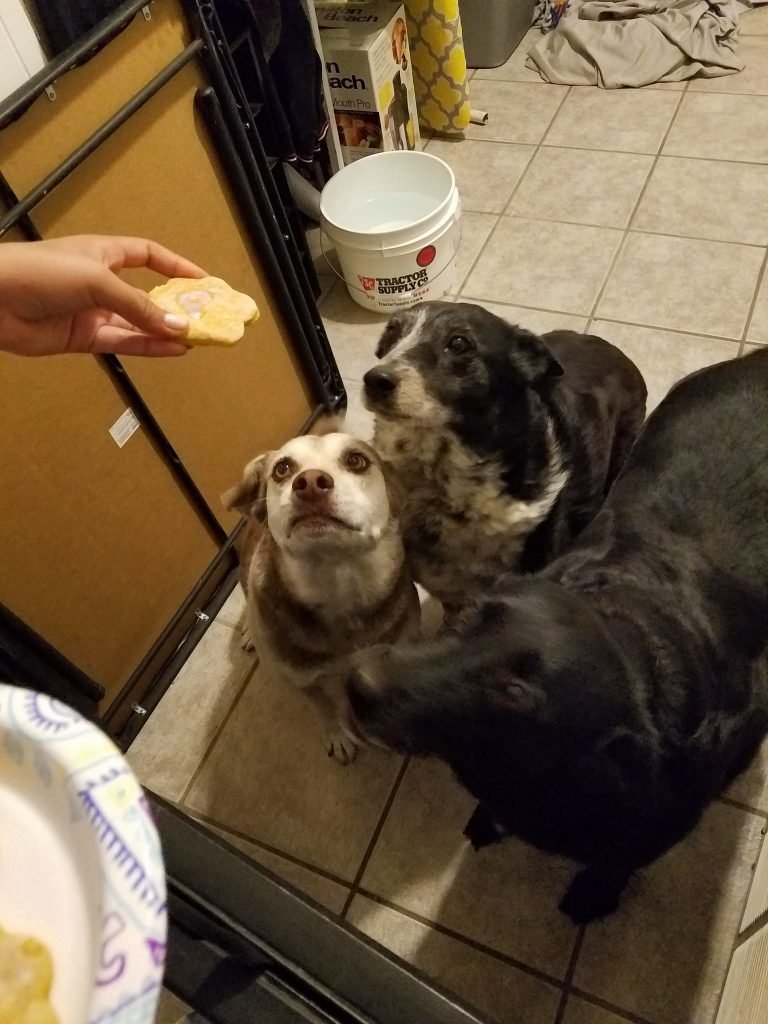
Step 4: Serve and Watch the Excitement
Once frozen, pop the treats out of the molds and offer one to your pup! Serve them outside or on an easy-to-clean surface, especially on warm days when they melt quickly.

Pumpkin and Banana Muffins Recipe
Looking for a homemade dog treat that feels like a little bakery moment for your pup? These Pumpkin and Banana Muffins are soft, moist, and packed with wholesome ingredients. They’re easy to make, store well, and feel like a special occasion every time you serve one.
Whether you’re celebrating a doggy birthday, need a post-walk snack, or just enjoy spoiling your four-legged best friend with something healthy and homemade, these muffins check all the boxes. They’re nutritious, simple, and—most importantly—pup-approved.
Made with real banana and pumpkin, these muffins deliver a natural sweetness that dogs love without any artificial stuff. Think of them as a better-for-them version of the baked goods you might enjoy with your morning coffee—only tailored for your furry buddy.
Ingredients You’ll Need
You don’t need anything fancy for this recipe—just a few dog-safe pantry staples:
- 1 ripe banana, mashed
- 1/2 cup pumpkin puree (100% pure pumpkin, no added sugars or spices)
- 2 eggs
- 1/4 cup natural peanut butter (xylitol-free only)
- 1 1/2 cups whole wheat flour (or oat flour for a gentler option)
- 1/2 teaspoon baking powder (optional, for fluffier muffins)
- 1/4 cup water or low-sodium broth, if needed to loosen the batter
Each ingredient has a purpose—banana and pumpkin bring moisture and natural sweetness, peanut butter adds healthy fats and flavor, and the flour gives structure. The result? A fluffy, satisfying muffin dogs love to sink their teeth into.
How to Make Pumpkin and Banana Muffins for Dogs
These muffins are as simple to bake as they are to devour.
Step 1: Preheat and Prep
Preheat your oven to 350°F (175°C). Line a muffin tin with paper liners or lightly grease each cup with a bit of coconut oil or non-stick spray.
Step 2: Mix the Wet Ingredients
In a large bowl, mash the banana until smooth. Stir in the pumpkin, peanut butter, and eggs. Mix until fully combined.
Step 3: Add Dry Ingredients
Add the flour and baking powder to the wet mixture. Stir well. If the batter feels too thick, add a splash of water or broth to loosen it up. The consistency should be like thick pancake batter.
Step 4: Scoop and Bake
Divide the batter evenly among the muffin cups. You can use a standard muffin tin or make mini muffins for smaller dogs or training treats.
Bake for 18–22 minutes (mini muffins may need less time), or until a toothpick comes out clean and the tops are lightly golden.
Step 5: Cool and Serve
Let the muffins cool completely before giving one to your dog. Warm muffins smell amazing to pups, but the steam can trap heat inside—always make sure it’s cool enough to eat safely!
Frequently Asked Questions
What Are the Benefits of Pumpkin and Banana for Dogs?
Pumpkin and banana are both nutrient-rich ingredients that offer several health benefits for your dog. Pumpkin is packed with fiber, which helps support healthy digestion and can relieve both constipation and diarrhea. It’s also low in calories and contains essential vitamins like A, C, and E, which support your dog’s immune system, skin, and coat health.
Bananas are naturally sweet and loaded with potassium, vitamin B6, and magnesium. These nutrients help maintain healthy muscles, nerves, and bones. They also provide a natural energy boost, making banana a great ingredient for an active pup’s snack.
Can You Use Canned Pumpkin Instead of Fresh Pumpkin?
Yes, you can use canned pumpkin in your homemade dog treats, but make sure it’s 100% pure pumpkin and not the canned pumpkin pie filling. Pumpkin pie filling contains added sugars and spices like nutmeg, which can be harmful to dogs. Pure canned pumpkin is a convenient, safe, and nutritious alternative to fresh pumpkin in dog treat recipes.
Are These Treats Safe for Dogs With Food Allergies?
Pumpkin and banana are generally considered safe for most dogs, even those with food sensitivities. However, it depends on what other ingredients you add to the treat. If your dog is allergic to common ingredients like wheat, you can use alternative flours like oat flour, rice flour, or coconut flour. Always check with your vet before introducing a new treat if your dog has known allergies.
How Should You Store Homemade Pumpkin and Banana Dog Treats?
To keep your homemade dog treats fresh, let them cool completely after baking and then store them in an airtight container. You can keep them at room temperature for up to one week. For longer storage, place them in the refrigerator for up to three weeks or freeze them for up to three months. Make sure to label them with the date to track freshness.
How Long Do Pumpkin and Banana Dog Treats Last?
Homemade pumpkin and banana dog treats typically last about 5 to 7 days when stored in a cool, dry place in an airtight container. If refrigerated, they can last up to three weeks. You can also freeze the treats and thaw them in small batches as needed, which helps prevent spoilage and waste.
Can You Make These Treats Without Baking?
Yes, you can create no-bake versions of pumpkin and banana dog treats. Simply mash the banana and pumpkin together and mix them with dog-safe oats or coconut flour to form small balls. Chill them in the fridge for a few hours until firm. These are great if you’re short on time or want to avoid using the oven.
What Other Ingredients Can You Add to These Treats?
You can add a variety of dog-friendly ingredients to enhance the flavor and nutrition of your treats. Popular options include peanut butter (make sure it’s xylitol-free), unsweetened applesauce, rolled oats, flaxseed, and a touch of cinnamon. Just be sure to avoid ingredients that are toxic to dogs like chocolate, raisins, grapes, and artificial sweeteners.
How Often Can You Give These Treats to Your Dog?
Homemade pumpkin and banana dog treats should be given in moderation and used as a snack or reward—not a meal replacement. Depending on your dog’s size and dietary needs, one or two treats per day is usually fine. Always monitor your dog for any signs of digestive upset when introducing a new treat into their routine.
Conclusion
Homemade pumpkin and banana dog treats are a healthy, easy, and cost-effective way to spoil your furry friend. Packed with fiber, vitamins, and natural sweetness, these treats support digestion, boost energy, and satisfy your dog’s cravings without added preservatives.
Whether you bake them or go for a no-bake version, you can feel confident knowing exactly what goes into each bite. With just a few simple ingredients and a little time, you can create a snack your pup will love—and you’ll feel great giving it to them.
Just remember to store them properly and offer them in moderation as part of a balanced diet. Your dog will thank you with tail wags and happy barks!