

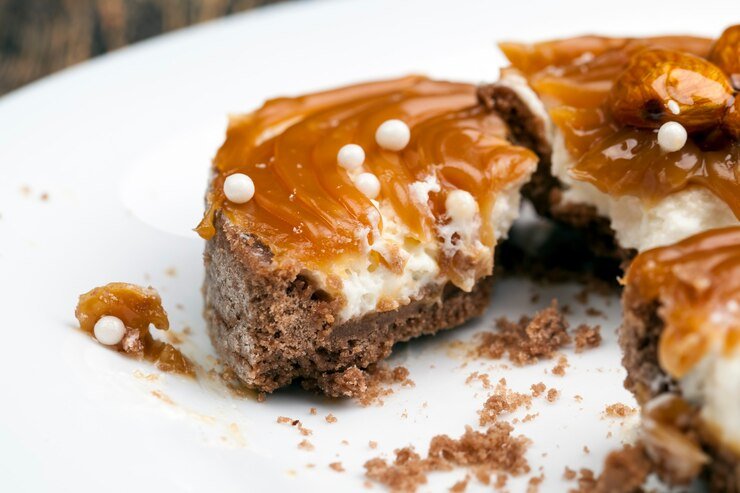
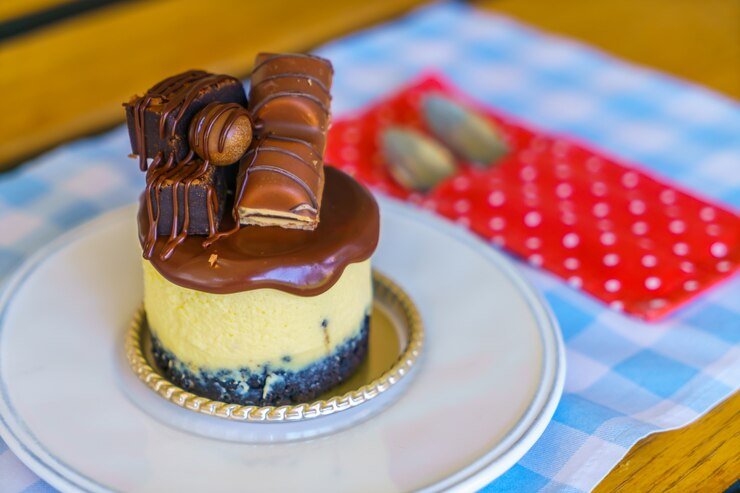
If you’re looking for a sweet treat that’s both easy to make and absolutely delicious, these No Bake Turtle Mini Cheesecakes are the perfect choice. Imagine creamy, rich cheesecake layered with gooey caramel, crunchy pecans, and a drizzle of chocolate — all in a convenient mini size. Best of all, there’s no oven needed, so you can whip them up quickly without heating up your kitchen.
Whether you’re hosting a party, need a quick dessert fix, or want to impress friends with a homemade treat, these No Bake Turtle Mini Cheesecakes hit the spot every time. The combination of smooth cheesecake, caramel, chocolate, and pecans brings classic turtle flavors into a fun and easy dessert that anyone can enjoy.
Plus, their bite-sized portions make them great for sharing or indulging just a little without guilt. Give these no bake delights a try and discover a new favorite dessert!
Ingredients
Creating the perfect No Bake Turtle Mini Cheesecakes starts with using the right ingredients. Each element plays a key role in building the rich, creamy texture and classic turtle flavor combination that makes this dessert so irresistible. From the crunchy pecans to the smooth caramel and chocolate drizzle, every ingredient adds its own special touch.
Crust Ingredients
For the crust, you’ll need finely crushed graham crackers combined with melted butter. This mix creates a sturdy yet crumbly base that holds the mini cheesecakes together while adding a subtle sweetness and crunch.
Cheesecake Filling
The creamy filling is made from softened cream cheese, powdered sugar, and heavy cream. These ingredients blend into a smooth, rich texture that’s light enough to balance the sweetness of the toppings.
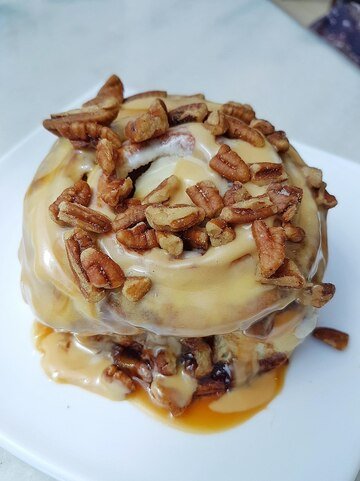
Turtle Toppings
The star flavors of turtle desserts come from gooey caramel sauce, chopped pecans, and melted chocolate. These toppings add the perfect combination of sweetness, crunch, and a touch of bitterness from the chocolate to round out the taste.
Optional Additions
You can customize your mini cheesecakes by swapping pecans for walnuts or adding a pinch of sea salt to the caramel for a salted caramel twist. Fresh whipped cream or a sprinkle of cinnamon can also enhance the overall flavor.
Equipment Needed
Making No Bake Turtle Mini Cheesecakes is simple, and you won’t need any fancy kitchen tools to get started. Having the right basic equipment on hand will help your process go smoothly and make assembling these delicious treats quick and easy.

Mixing Bowls
A couple of medium-sized mixing bowls are essential. One for combining the crust ingredients and another for whipping up the creamy cheesecake filling. Using separate bowls keeps everything organized and prevents flavors from mixing too early.
Hand Mixer or Stand Mixer
To achieve that smooth, fluffy cheesecake texture, a hand mixer or stand mixer is very helpful. It quickly blends the cream cheese, powdered sugar, and heavy cream into a creamy filling without lumps.
Mini Cheesecake Pan or Muffin Tin
For shaping the mini cheesecakes, a mini cheesecake pan with removable bottoms works perfectly. If you don’t have one, a regular muffin tin lined with paper liners will also do the trick, making it easy to pop the cheesecakes out after chilling.
Measuring Cups and Spoons
Accurate measurements ensure the perfect balance of flavors and textures. Having measuring cups and spoons on hand makes this step hassle-free.
Spoon or Piping Bag
To neatly fill the mini crusts, a spoon works fine, but a piping bag makes the process cleaner and faster, especially if you want a professional look.
Step-by-Step Instructions to Make No Bake Turtle Mini Cheesecakes
Making No Bake Turtle Mini Cheesecakes is easier than you might think. With just a few simple steps, you can create a delicious, creamy dessert that combines the classic flavors of turtles — caramel, pecans, and chocolate — all without turning on your oven. Follow this detailed guide to make perfect mini cheesecakes every time.
Step 1: Prepare the Crust
Start by making the crust, which forms the base of your mini cheesecakes. In a medium bowl, combine 1 1/2 cups of finely crushed graham crackers with 6 tablespoons of melted butter. Mix until the crumbs are evenly coated and hold together when pressed.
Using a mini cheesecake pan with removable bottoms or a muffin tin lined with paper liners, press about one tablespoon of the graham cracker mixture firmly into the bottom of each cup. Press down tightly to create a compact crust that will hold the cheesecake filling well. Once all the crusts are prepared, place the pan in the refrigerator to chill while you make the filling.
Step 2: Make the Cheesecake Filling
In a large mixing bowl, beat 16 ounces of softened cream cheese until smooth and creamy using a hand mixer or stand mixer. This step is easier if your cream cheese is at room temperature. Gradually add 3/4 cup of powdered sugar and continue mixing until fully combined.
Next, pour in 1 cup of heavy cream and beat on medium-high speed until stiff peaks form. This means the cream should hold its shape when you lift the beaters. Gently fold the whipped cream into the cream cheese mixture with a spatula, making sure to keep the filling light and fluffy. Be careful not to overmix, as this can cause the mixture to lose its airiness.
Step 3: Assemble the Mini Cheesecakes
Remove the crusts from the refrigerator and carefully spoon or pipe the cheesecake filling over each crust, filling the cups almost to the top. Using a piping bag helps make this process cleaner and creates a more polished look, but a spoon works perfectly fine as well.
Once filled, place the pan back in the refrigerator and chill for at least 4 hours or overnight. This chilling time allows the cheesecake filling to firm up and helps the flavors meld beautifully.
Step 4: Add the Turtle Toppings
After the cheesecakes have chilled, it’s time to add the signature turtle toppings. Start by drizzling about 2/3 cup of caramel sauce evenly over each mini cheesecake. Be generous to get that classic gooey caramel flavor in every bite.
Next, sprinkle chopped pecans on top of the caramel. About 1/2 cup of pecans is usually enough to add a nice crunchy texture without overwhelming the cheesecake.
Finally, melt 1/2 cup of semisweet or dark chocolate chips in the microwave or using a double boiler. Drizzle the melted chocolate over the pecans and caramel to complete the classic turtle look.
Step 5: Final Chill and Serve
After adding the toppings, pop the mini cheesecakes back into the refrigerator for about 15-30 minutes to let the chocolate set. Once the chocolate has hardened slightly, your No Bake Turtle Mini Cheesecakes are ready to enjoy.
For serving, you can leave them in the mini cheesecake pan or muffin tin for easy handling, or carefully remove each cheesecake and place it on a serving platter. If desired, garnish with an extra sprinkle of chopped pecans or a small dollop of whipped cream.
Tips for Best Results
To make sure your No Bake Turtle Mini Cheesecakes turn out perfectly every time, a few simple tips can go a long way. These tricks will help you achieve the best texture, flavor, and presentation for this delicious dessert.
Use Room Temperature Cream Cheese
For a smooth, lump-free cheesecake filling, make sure your cream cheese is at room temperature before mixing. This helps it blend easily with the other ingredients, creating a silky texture.
Chill Thoroughly
Since these cheesecakes don’t bake, chilling them for at least 4 hours or overnight is key. This allows the filling to firm up and the flavors to meld together, making every bite rich and satisfying.
Press the Crust Firmly
When preparing the crust, press it firmly into the pan or muffin liners. A compact crust prevents crumbling and keeps each mini cheesecake intact when you serve.
Be Generous with Toppings
Don’t be shy with the caramel, pecans, and chocolate drizzle. These toppings give the mini cheesecakes their signature turtle flavor and make them look irresistible.
Variations and Substitutions
One of the best things about No Bake Turtle Mini Cheesecakes is how easy they are to customize. Whether you have dietary preferences or just want to try something new, there are plenty of variations and substitutions you can make to suit your taste.
Nut Alternatives
If you’re not a fan of pecans or have a nut allergy, you can swap them out for walnuts, almonds, or even crushed pretzels for a salty crunch. For a nut-free version, toasted coconut flakes also add a nice texture.
Crust Options
While graham cracker crust is classic, you can switch things up by using crushed chocolate cookies, digestive biscuits, or even gluten-free crackers to fit dietary needs. Just make sure to adjust the sweetness accordingly.
Dairy-Free and Vegan
For a dairy-free version, use vegan cream cheese and coconut cream instead of heavy cream. There are also dairy-free caramel sauces and chocolate chips available that work perfectly in this recipe.
Flavor Twists
Add a pinch of cinnamon or espresso powder to the cheesecake filling for an extra layer of flavor. You can also drizzle with white chocolate instead of dark chocolate for a sweeter touch.
Storage and Serving Suggestions
Proper storage and serving can keep your No Bake Turtle Mini Cheesecakes fresh and delicious, making sure every bite tastes just as good as the first.
How to Store
Since these cheesecakes are no bake and contain dairy, it’s important to keep them refrigerated. Store them in an airtight container to prevent them from absorbing any fridge odors. They’ll stay fresh for up to 4-5 days. If you want to keep them longer, you can freeze the mini cheesecakes for up to 1 month. Just be sure to thaw them in the refrigerator overnight before serving to maintain their creamy texture.
Serving Tips
These mini cheesecakes are perfect as bite-sized treats at parties or family gatherings. For an extra touch, garnish with a sprinkle of chopped pecans or a drizzle of warm caramel sauce just before serving. You can also add a dollop of whipped cream or a fresh berry on top for a pop of color and added flavor.
Presentation Ideas
Serve them on a pretty platter or in decorative mini cupcake liners to make them look even more inviting. They’re also great for dessert buffets, gift boxes, or as a sweet surprise for someone special.
Frequently Asked Questions (FAQs)
What Are No Bake Turtle Mini Cheesecakes?
No Bake Turtle Mini Cheesecakes are bite-sized desserts that combine creamy cheesecake filling with the classic turtle flavors of caramel, pecans, and chocolate. Unlike traditional cheesecakes, these treats don’t require baking. Instead, they’re made by chilling a creamy mixture over a graham cracker crust until firm. This makes them quick and easy to prepare, perfect for anyone who wants a delicious dessert without turning on the oven.
How Long Do No Bake Turtle Mini Cheesecakes Need To Chill?
For the best texture and flavor, you should chill your No Bake Turtle Mini Cheesecakes for at least 4 hours, but overnight chilling is ideal. This resting time allows the cheesecake filling to firm up properly and helps the flavors meld together beautifully. Without enough chilling, the filling may be too soft and difficult to serve neatly.
Can I Make No Bake Turtle Mini Cheesecakes Ahead Of Time?
Absolutely! These mini cheesecakes are great for making ahead. You can prepare them a day or two before your event and keep them refrigerated until you’re ready to serve. Just be sure to store them in an airtight container to maintain freshness and prevent the toppings from drying out or absorbing odors from the fridge.
What Are The Best Substitutions For Pecans In This Recipe?
If you don’t have pecans or prefer something different, you can substitute with walnuts, almonds, or even crushed pretzels for a salty crunch. For those with nut allergies, toasted coconut flakes are a great nut-free alternative that still adds texture and flavor. Just make sure to adjust the amount depending on your preference.
How Should I Store Leftover No Bake Turtle Mini Cheesecakes?
Store any leftovers in an airtight container in the refrigerator. They will stay fresh for up to 4-5 days. If you want to keep them longer, you can freeze the cheesecakes for up to one month. When ready to eat, thaw them in the refrigerator overnight to maintain the creamy texture and delicious taste. Avoid leaving them out at room temperature for extended periods, as the dairy-based filling can spoil.
Conclusion
No Bake Turtle Mini Cheesecakes are the perfect blend of creamy, crunchy, and sweet flavors that come together effortlessly without turning on the oven. These bite-sized treats combine a rich cheesecake filling with a buttery crust, topped with gooey caramel, chocolate, and crunchy pecans for that classic turtle taste. They’re ideal for quick dessert fixes, parties, or anytime you want to impress without hassle.
Plus, their no-bake nature makes them super simple to prepare, even for beginners. Whether you’re making them for a special occasion or just a sweet craving, these mini cheesecakes deliver delicious satisfaction in every bite. Give this easy recipe a try and enjoy a delightful treat that everyone will love!