

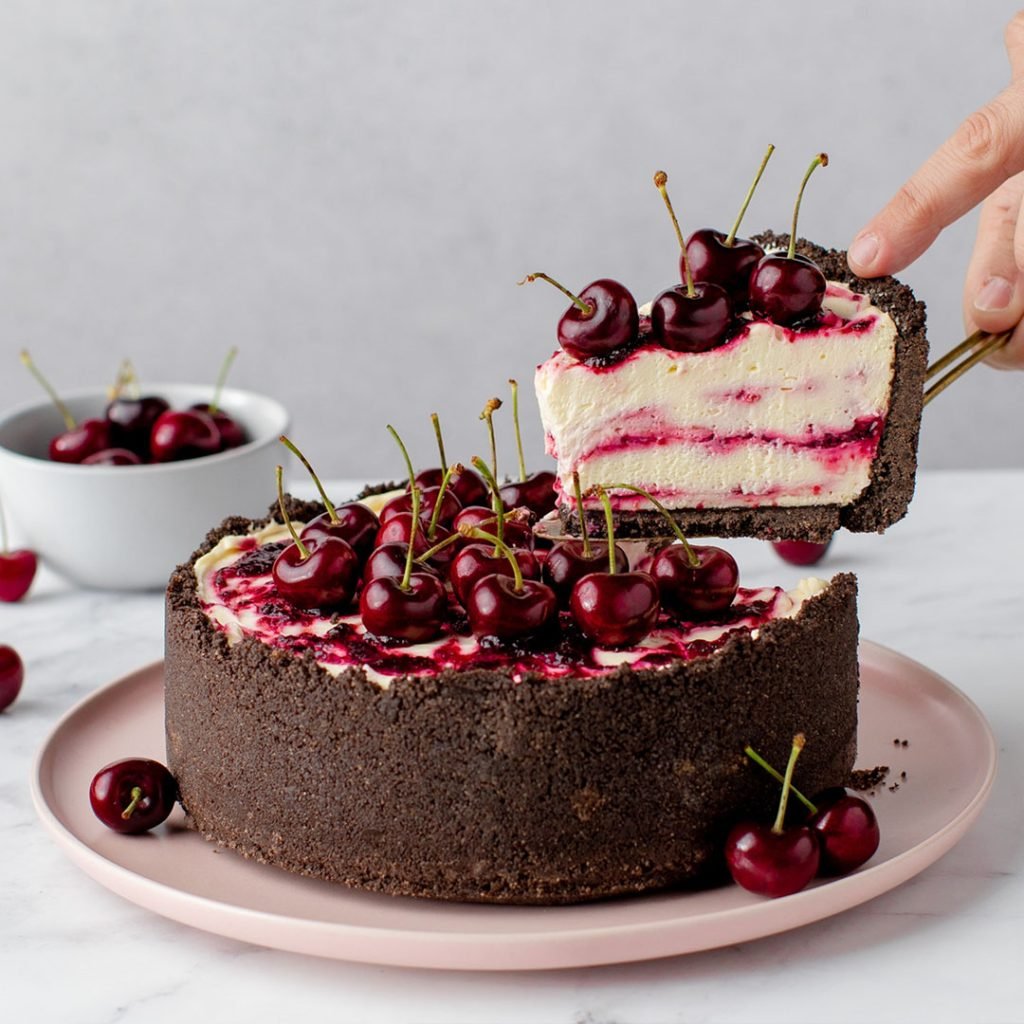
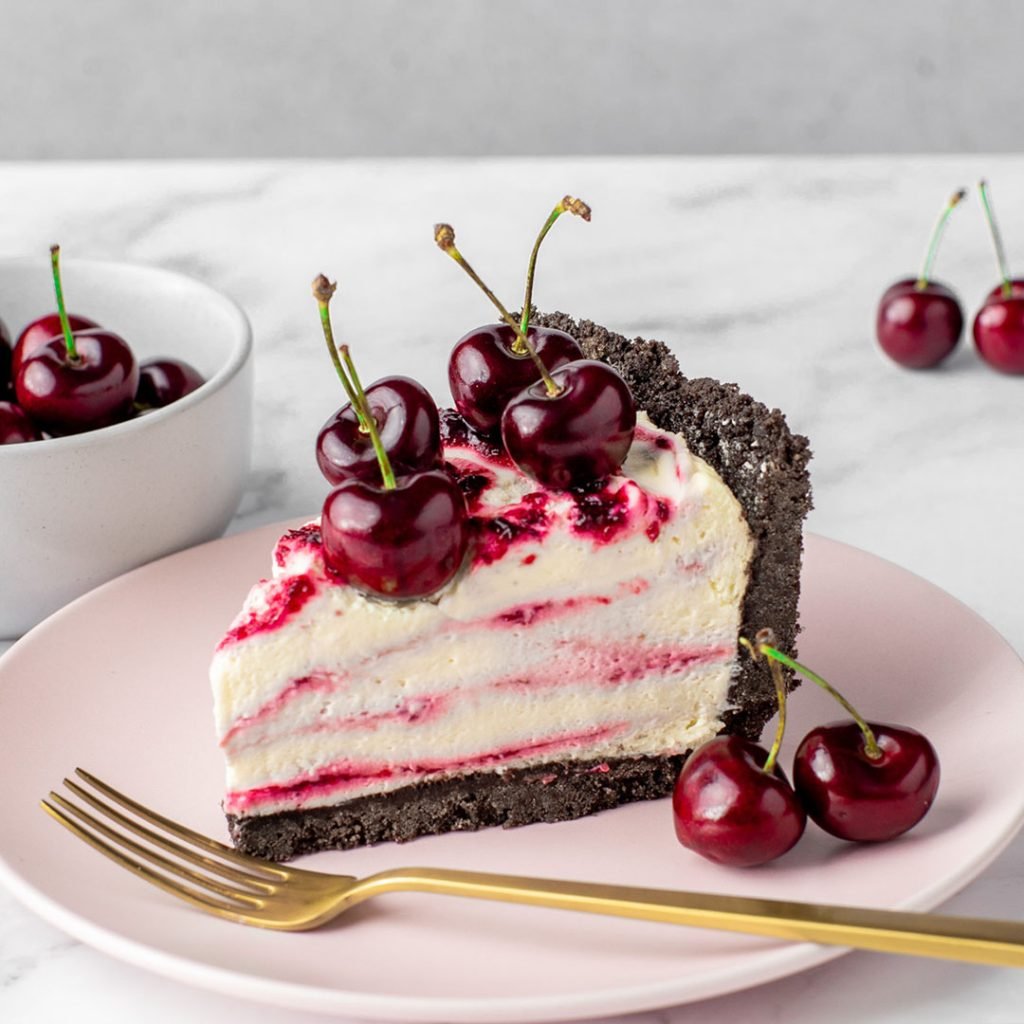
If you’re looking for a dessert that’s both delicious and easy to make, the No-Bake Cherry Ripple Cheesecake is a perfect choice. This delightful treat combines the creamy, smooth texture of cheesecake with the sweet, tangy burst of cherry ripples throughout, creating a beautiful and tasty dessert that requires no oven time.
Ideal for warm days when you want something refreshing without heating up the kitchen, this no-bake cheesecake is simple to prepare and impressively satisfying.
Whether you’re serving it for a family gathering, a casual get-together, or just a sweet treat to enjoy at home, this No-Bake Cherry Ripple Cheesecake brings together classic flavors with a vibrant cherry twist. Plus, its light, airy texture makes it a crowd-pleaser that’s easy to slice and serve. Get ready to indulge in this luscious, fuss-free dessert that everyone will love!
Ingredients
Creating the perfect No-Bake Cherry Ripple Cheesecake starts with gathering the right ingredients. Each component plays an important role in building the cheesecake’s creamy texture and signature cherry flavor. Below, you’ll find a breakdown of all the essentials you’ll need to make this refreshing dessert.
Base Ingredients
For the crust, you’ll need simple, classic ingredients that provide a firm and buttery foundation. Typically, crushed digestive biscuits or graham crackers are combined with melted butter to create a crumbly base that holds together perfectly. The buttery crumbs add richness and a slight crunch, balancing the smooth filling. Make sure to crush your biscuits finely for an even texture.
Cream Cheese Filling
The creamy filling is the heart of this cheesecake. You’ll need softened cream cheese for a smooth and luscious texture. Along with cream cheese, heavy whipping cream or double cream is whipped to add lightness and volume. Granulated sugar sweetens the filling just enough without overpowering the tanginess of the cream cheese. Vanilla extract is essential here — it enhances the overall flavor and brings warmth to the mixture.
Cherry Ripple Component
The star of this cheesecake is the cherry ripple. For an authentic ripple effect, you’ll need cherry pie filling or cherry preserves. This adds bursts of sweet and tart cherry flavor throughout the cheesecake. The cherries also create beautiful swirls in the creamy base that are as pleasing to the eye as they are to the palate. Some recipes suggest gently folding the cherry filling into the cream cheese mixture, while others layer it for a distinct ripple effect.
Optional Extras
To elevate your No-Bake Cherry Ripple Cheesecake, consider adding a few extras. Lemon juice or zest can brighten the filling and complement the cherries’ tartness. You might also sprinkle some chopped nuts or chocolate shavings on top before serving for added texture and flavor. Fresh cherries as garnish add a nice touch and make the dessert look even more inviting.
Equipment Needed

Making a No-Bake Cherry Ripple Cheesecake doesn’t require any fancy tools, but having the right equipment on hand will make the process smoother and ensure a perfect result. Below are the essential items you’ll need to prepare this delicious dessert effortlessly.
Mixing Bowls and Utensils
Start with a few medium to large mixing bowls to combine your ingredients. One bowl will be for crushing the biscuits and mixing the crust, while another is for whipping the cream cheese filling. Using separate bowls helps keep things organized and prevents cross-contamination of flavors. A sturdy spatula or wooden spoon is ideal for folding the cherry ripple into the cream cheese mixture without deflating the whipped cream.
Electric Mixer or Whisk
Whipping the cream and cream cheese to the right texture is key to a light and fluffy cheesecake filling. An electric hand mixer or stand mixer will save you time and effort, giving you smooth, lump-free cream cheese and perfectly whipped cream. If you don’t have a mixer, a manual whisk can work, but it will take more time and arm strength to achieve the same fluffy consistency.
Food Processor or Rolling Pin
To create the biscuit crust, you need finely crushed cookies or crackers. A food processor is the quickest way to get an even crumb texture. If you don’t have one, place the biscuits in a sealed plastic bag and crush them with a rolling pin. Either method works well, just make sure the crumbs are consistent for a sturdy base.
Springform Pan or Cake Ring
A springform pan is the best choice for assembling and serving your cheesecake. The removable sides make it easy to release the cake without damaging its delicate layers. If you don’t have a springform pan, a cake ring or even a regular cake pan lined with parchment paper will work, but be careful when removing the cheesecake to keep its shape intact.
Additional Tools
Other helpful tools include a spatula or offset spatula to smooth out the cheesecake surface, a measuring cup and spoons for accurate ingredient portions, and a small spoon for swirling the cherry ripple into the filling for that signature marbled look. Having these on hand will make assembling your cheesecake much easier.
Step-by-Step Instructions
Making the No-Bake Cherry Ripple Cheesecake is easier than you might think. With just a few simple steps, you’ll have a creamy, flavorful dessert that’s perfect for any occasion. Follow this detailed guide to ensure your cheesecake turns out beautifully every time.
Step 1 :Prepare the Biscuit Crust
Start by making the crust, which forms the sturdy base of your cheesecake. Begin by crushing your digestive biscuits or graham crackers into fine crumbs. You can do this using a food processor for quick results, or place the biscuits in a sealed plastic bag and crush them with a rolling pin.
Once crushed, transfer the crumbs to a bowl and mix them with melted butter until all the crumbs are evenly coated and the mixture feels like wet sand. Press this mixture firmly and evenly into the base of your springform pan. Use the back of a spoon or the bottom of a glass to compact it tightly, ensuring the crust holds together well. Place the crust in the refrigerator to chill and set while you prepare the filling.
Step 2 :Make the Cream Cheese Filling
Next, focus on the rich and creamy filling. Begin by beating the softened cream cheese in a mixing bowl using an electric mixer or hand whisk until smooth and free of lumps. Add granulated sugar and vanilla extract, then continue beating until the mixture is creamy and well combined.
In a separate chilled bowl, whip the heavy cream until soft peaks form. This lightens the cream cheese mixture and gives your cheesecake its signature fluffy texture. Gently fold the whipped cream into the cream cheese mixture using a spatula, being careful not to deflate the airy whipped cream. Mix until everything is just combined and smooth.
Step 3 :Incorporate the Cherry Ripple
Now comes the fun part—adding the cherry ripple! Take your cherry pie filling or cherry preserves and gently fold half of it into the cream cheese mixture. The goal is to create beautiful swirls, so don’t overmix. Save the remaining cherry filling for layering or topping later.
Step 4 :Assemble the Cheesecake
Remove the chilled crust from the refrigerator. Pour half of the cream cheese and cherry mixture over the crust, smoothing it out with a spatula. Add dollops of the reserved cherry filling on top and gently swirl it through with a knife or skewer to create a marbled effect.
Next, pour the remaining cream cheese mixture over the top, spreading it evenly. Finish by adding any leftover cherry filling on top and swirling it lightly again. This layering gives your cheesecake its signature ripple look and bursts of cherry flavor in every bite.
Step 5 :Chill and Set
Cover the cheesecake loosely with plastic wrap or foil and place it in the refrigerator. For the best results, chill the cheesecake for at least 4 to 6 hours, or overnight if possible. This resting time allows the flavors to meld and the cheesecake to set firmly, making it easier to slice and serve.
Step 6 :Serve and Enjoy
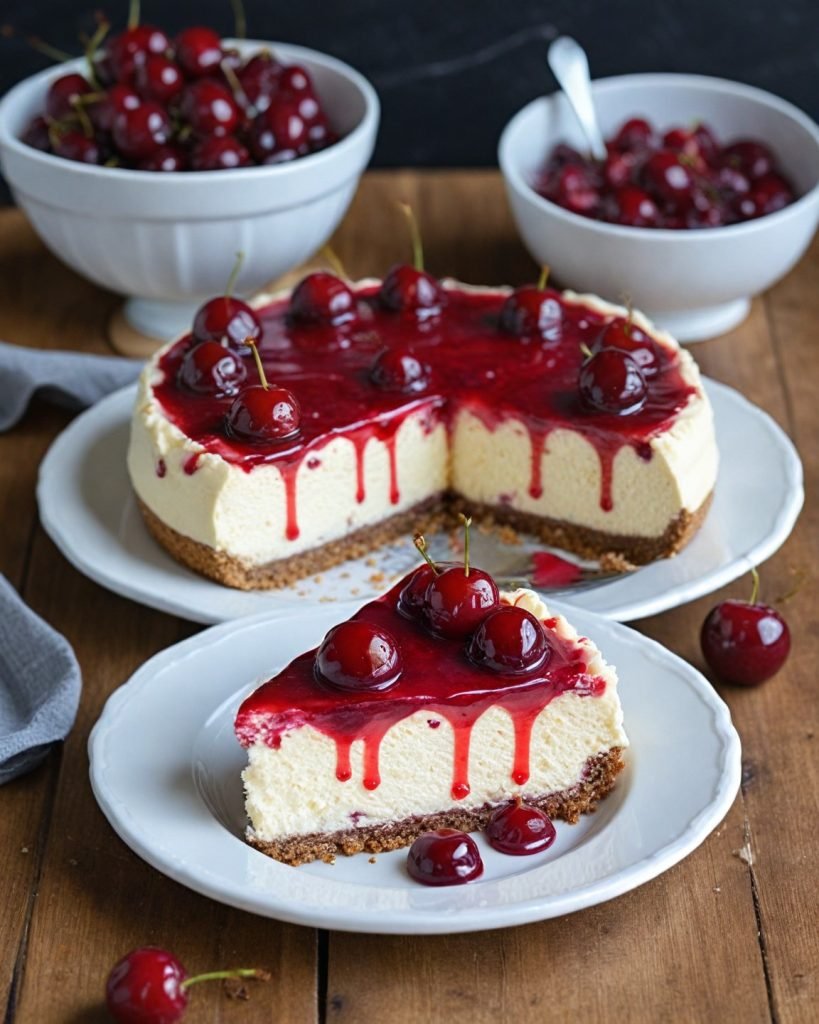
Before serving, remove the cheesecake from the springform pan carefully. You can garnish with fresh cherries, whipped cream, or even some toasted nuts for extra texture. Slice your No-Bake Cherry Ripple Cheesecake with a sharp knife dipped in hot water for clean cuts. Serve chilled and enjoy the creamy, fruity goodness in every bite!
Tips and Tricks
Making a No-Bake Cherry Ripple Cheesecake is simple, but a few helpful tips can ensure your dessert turns out perfect every time. Whether you’re a beginner or experienced baker, these tricks will help you achieve the best texture, flavor, and presentation.
Use Room Temperature Ingredients
One key tip is to use room temperature cream cheese and heavy cream before mixing. Softened cream cheese blends more smoothly with the other ingredients, preventing lumps in your filling. If the cream cheese is too cold, you may end up with a gritty texture, which affects the cheesecake’s creaminess. Let your ingredients sit out for about 30 minutes before starting to prepare your cheesecake.
Don’t Overmix the Filling
While mixing is important for a smooth filling, overmixing can cause your cheesecake to become dense or lose its lightness. When folding whipped cream into the cream cheese mixture, be gentle and use a spatula to incorporate it slowly. This helps maintain the fluffy texture that makes no-bake cheesecakes so delightful.
Chill the Crust Thoroughly
Chilling the biscuit crust before adding the filling helps it set firmly, preventing it from becoming soggy once the filling is poured on. Press the crust tightly into the pan to ensure it holds together well. If you have time, chill the crust in the refrigerator for at least 30 minutes before assembly.
Create Beautiful Cherry Ripples
For the signature ripple effect, fold the cherry filling gently into the cheesecake mixture instead of stirring vigorously. When layering, use a skewer or knife to swirl the cherries lightly through the filling. This creates a lovely marbled look and ensures each bite has a burst of cherry flavor.
Let It Chill Long Enough
Patience is key with no-bake cheesecakes. Allow your cheesecake to chill in the refrigerator for a minimum of 4 hours, but overnight is ideal. This resting period helps the filling set firmly and allows the flavors to meld together beautifully, resulting in a creamier and more flavorful dessert.
Variations and Substitutions

One of the best parts of making a No-Bake Cherry Ripple Cheesecake is how easy it is to customize. Whether you’re looking to experiment with new flavors, accommodate dietary needs, or just use what you have on hand, these variations and substitutions make it simple to tailor the recipe to your preferences.
Different Fruit Fillings
While cherry is classic and delicious, you can easily switch things up by using other fruit fillings. Blueberry, raspberry, or strawberry pie fillings are excellent alternatives and create equally beautiful ripple effects. If you prefer a tangy twist, try lemon curd or mixed berry compote. Just make sure the filling you choose has a similar texture so it blends well with the cheesecake base.
Alternative Crust Options
Graham crackers and digestive biscuits are the go-to choices for the crust, but there’s plenty of room for creativity here. Try using chocolate cookies, vanilla wafers, or even pretzels for a sweet and salty contrast. For a gluten-free option, choose gluten-free cookies or oats. Just remember to combine them with melted butter and press them firmly into your pan for the right consistency.
Dairy-Free and Vegan Versions
If you’re avoiding dairy, you can easily make a dairy-free version of this cheesecake. Use vegan cream cheese and a plant-based whipped topping made from coconut cream or almond milk. Make sure to check labels to ensure all your ingredients are vegan-friendly. The flavor and texture may vary slightly, but you’ll still get a rich, creamy result without any dairy.
Sugar Substitutes
For a lower-sugar version, consider swapping granulated sugar with alternatives like stevia, erythritol, or monk fruit sweetener. These options can reduce the overall sugar content while still providing the sweetness needed in the filling. Keep in mind that sugar substitutes vary in strength, so adjust amounts according to taste.
Adding Texture and Toppings
Want to elevate your cheesecake even more? Consider adding a layer of crushed nuts, chocolate shavings, or coconut flakes on top before serving. These additions provide extra texture and visual appeal. You can also drizzle a bit of melted chocolate or extra fruit sauce over each slice for a decadent finish.
Frequently Asked Questions
How Long Does It Take For A No-Bake Cherry Ripple Cheesecake To Set?
You should allow at least 4 to 6 hours of chill time in the refrigerator for the cheesecake to fully set. However, for the best texture and structure, chilling it overnight is ideal. This helps the filling firm up properly and ensures clean, smooth slices when serving.
Can You Use Fresh Cherries Instead Of Canned Filling?
Yes, you can use fresh cherries to make your own homemade ripple. Just cook them down with a bit of sugar and lemon juice to create a jam-like consistency. Let the mixture cool completely before swirling it into the cheesecake to avoid melting the filling.
What Type Of Cream Cheese Works Best For This Recipe?
Full-fat, block-style cream cheese works best for a no-bake cheesecake. It provides the right firmness and creamy texture. Avoid using whipped or spreadable cream cheese, as these types contain more moisture and air, which can prevent the cheesecake from setting correctly.
Can You Freeze A No-Bake Cherry Ripple Cheesecake?
Yes, you can freeze it for up to 1 month. Wrap the cheesecake tightly in plastic wrap and then in foil before freezing. When ready to enjoy, let it thaw in the refrigerator for several hours or overnight. Freezing is a great option if you’re prepping the dessert in advance for a special occasion.
What Can You Use Instead Of Graham Crackers For The Crust?
You can substitute graham crackers with digestive biscuits, vanilla wafers, chocolate cookies, or even crushed pretzels for a sweet-and-salty variation. Just make sure to mix your crumbs with melted butter and press the crust firmly into your pan so it holds together.
Is Whipping Cream Necessary In A No-Bake Cheesecake?
Yes, whipping cream is an essential ingredient for this no-bake cheesecake. It adds volume and helps create that light, airy texture. If you skip it, the filling may be too dense. Be sure to whip the cream to soft peaks and gently fold it into the cream cheese mixture to maintain the fluffiness.
Conclusion
The No-Bake Cherry Ripple Cheesecake is the perfect blend of simplicity and indulgence. With its creamy filling, vibrant cherry swirls, and buttery crust, this dessert delivers big flavor without turning on the oven. Whether you’re making it for a celebration, family gathering, or just to satisfy a sweet craving, it’s sure to impress.
Plus, it’s easy to customize with different fruits or crusts, making it a versatile favorite in any kitchen. Best of all, it’s beginner-friendly and stress-free to prepare. Once you try it, this no-bake treat might just become a go-to in your dessert rotation. Enjoy every smooth, cherry-filled bite—you’ve earned it!