

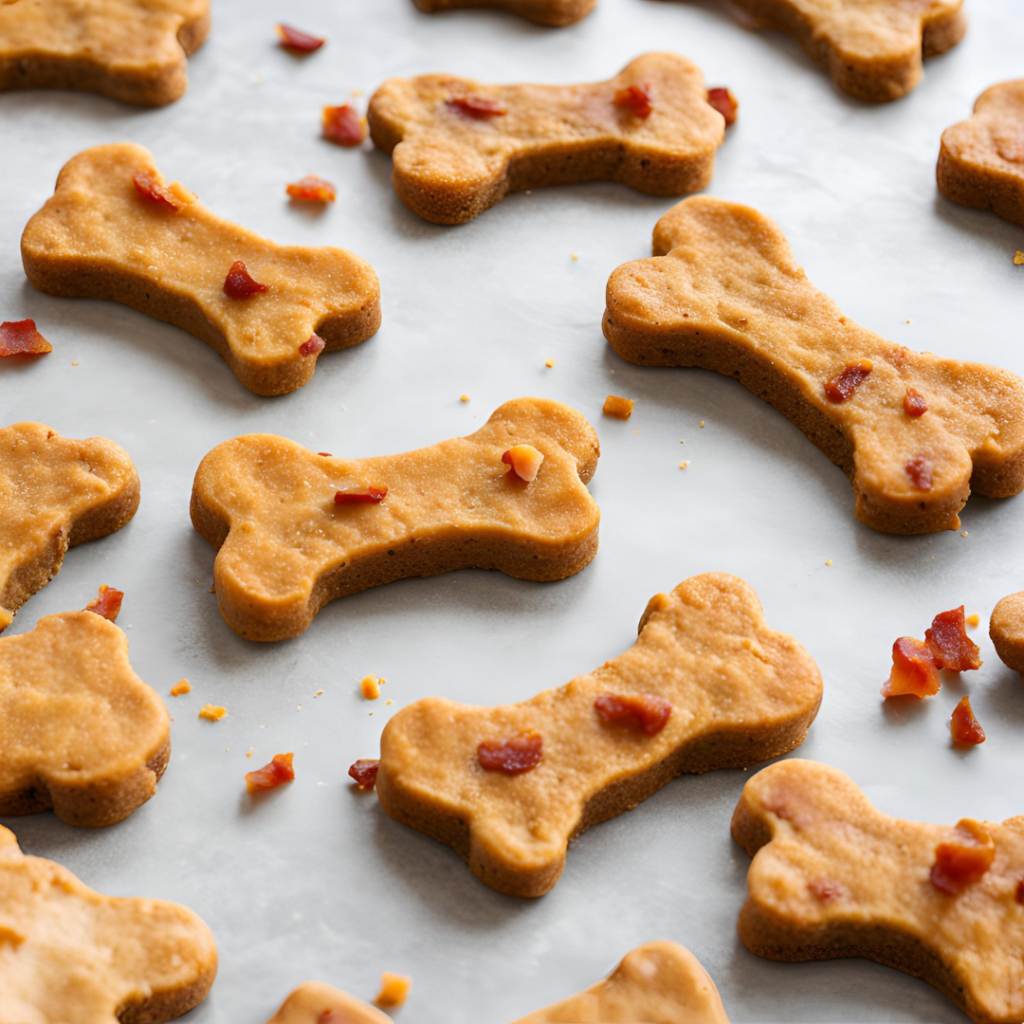
If you’re a dog owner, you know how much your furry friend loves a tasty treat. But have you ever thought about making Homemade Bacon Cheddar Dog Treats for them? Not only are these treats a hit with dogs, but they’re also incredibly easy to make at home with just a few simple ingredients.
Plus, you get the peace of mind knowing exactly what’s going into your pup’s snacks. The combination of crispy bacon and savory cheddar is irresistible, and your dog will be wagging their tail in delight with every bite.
Whether you’re looking for a way to reward good behavior or simply want to spoil your pet with something special, these Homemade Bacon Cheddar Dog Treats are sure to become a favorite. So, let’s roll up our sleeves and make something your dog will love — a treat that’s healthy, flavorful, and made with love!
Ingredients You’ll Need for Homemade Bacon Cheddar Dog Treats
When it comes to baking Homemade Bacon Cheddar Dog Treats, the key is to use simple, dog-safe ingredients that deliver that irresistible flavor while also being nutritious for your furry friend. The best part is that many of these ingredients are likely already in your kitchen, so you can whip up a batch of treats in no time. Here’s a breakdown of the ingredients you’ll need to create the perfect doggie snack.
Bacon
Bacon is undoubtedly the highlight of this treat. Dogs love its salty, savory flavor, and it pairs wonderfully with cheddar for a tasty combo. When choosing bacon, opt for nitrate-free, preservative-free bacon. This is especially important to avoid any harmful additives that could upset your dog’s stomach or health in the long run.
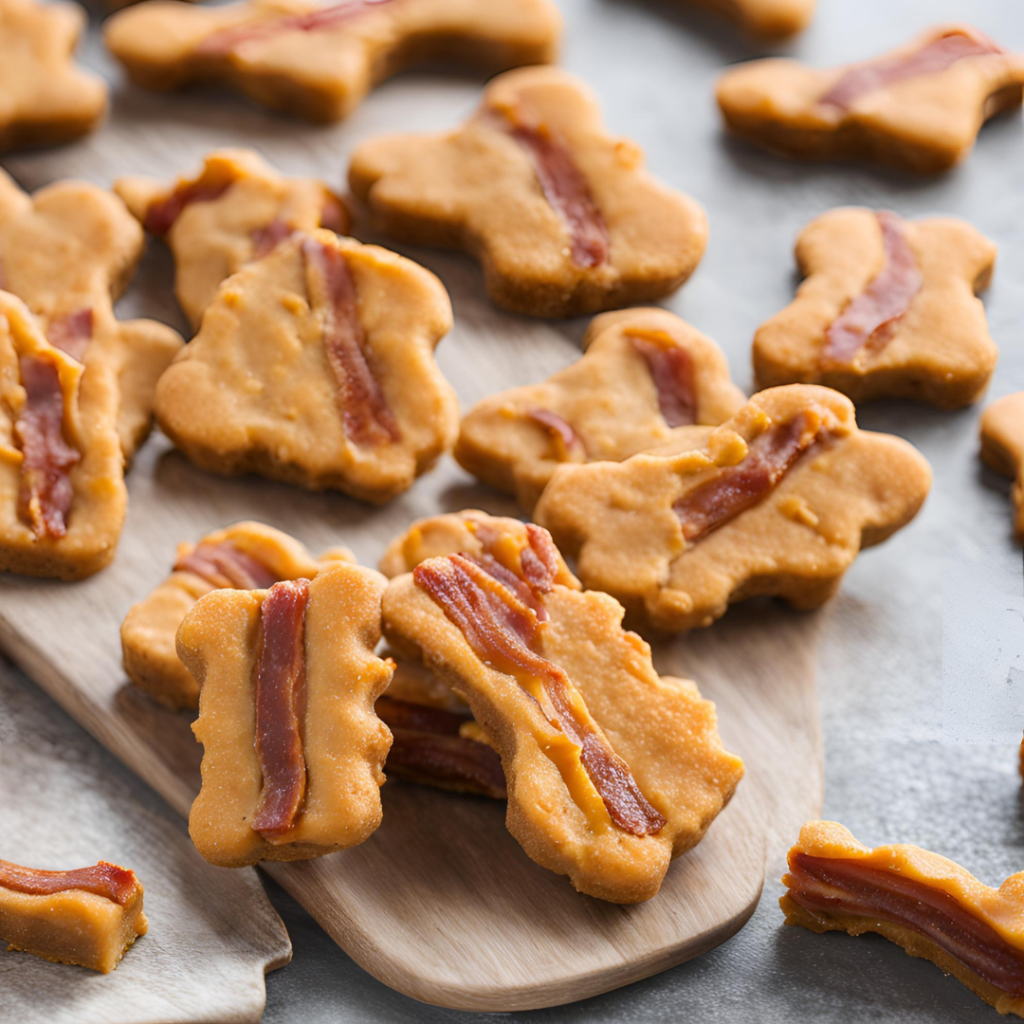
You can either cook up fresh bacon yourself or buy pre-cooked bacon to save time. Just make sure to crumble it into small, bite-sized pieces so your dog can enjoy it in every bite of the treat.
Cheddar Cheese
Cheddar cheese is the perfect partner for bacon in these treats. It adds a creamy, rich texture and an appealing flavor that dogs can’t resist. Choose sharp cheddar for a stronger flavor, or mild cheddar if your dog is sensitive to richer tastes.
Cheese is packed with protein and calcium, which are essential for your dog’s health. However, keep in mind that some dogs can be sensitive to dairy, so if you know your dog has a dairy intolerance, consider substituting with a dairy-free cheese or reducing the amount used in the recipe.
Whole Wheat Flour
Whole wheat flour provides structure to your Homemade Bacon Cheddar Dog Treats while also offering a healthy serving of fiber. Fiber is great for your dog’s digestive system, and whole wheat flour contains more nutrients compared to refined white flour. It’s a simple, wholesome option that gives the treats a pleasant, chewy texture.
If your dog is sensitive to wheat, you can use gluten-free flour alternatives such as oat flour or rice flour, which are just as dog-friendly and will give the treats a slightly different texture.
Rolled Oats
Adding rolled oats is a great way to incorporate more fiber into your treats. They help bind the ingredients together and create a more textured treat that your dog will enjoy. Oats are also a good source of vitamins, minerals, and antioxidants that contribute to your dog’s overall health.
Additionally, oats are gentle on your dog’s stomach and are often used in homemade dog food recipes for dogs with sensitive tummies. The addition of oats ensures the treats are easy on your dog’s digestive system, making them an ideal choice for pups with sensitive stomachs.
Egg
Eggs are an essential ingredient in most dog treat recipes, and these Homemade Bacon Cheddar Dog Treats are no exception. Eggs help bind the dough together, making it easier to roll and cut into shapes. They also provide an excellent source of protein and essential amino acids that contribute to healthy muscles and tissues.
Eggs are rich in vitamins and minerals such as vitamin A, B vitamins, and riboflavin, which support your dog’s overall health. Plus, they help give your treats a golden color and slight crunch, making them even more appetizing to your dog.
Chicken or Beef Broth
While water can certainly be used to mix the dough, adding chicken or beef broth gives the treats extra flavor. This also ensures the dough stays moist and easy to work with, without making the treats too dry. The broth’s savory taste pairs perfectly with the bacon and cheddar, amplifying the overall flavor profile.
Make sure to use low-sodium, dog-safe broth without any added onions or garlic, as these ingredients can be toxic to dogs. If you’re making your own broth, stick to the basics: water, chicken (or beef), and a few simple herbs that are safe for dogs.
Coconut Oil
Coconut oil is a fantastic addition to homemade dog treats, as it provides healthy fats that can support your dog’s coat and skin health. Coconut oil also has antimicrobial properties that help support your dog’s immune system. When mixed into the dough, coconut oil helps keep the treats soft and chewy, while also providing a subtle richness that pairs well with the bacon and cheddar flavors.
Use unrefined coconut oil, which retains all of its natural benefits and has a mild, pleasant aroma. If your dog doesn’t enjoy the taste of coconut, you can substitute the coconut oil with another healthy fat like olive oil or flaxseed oil.
Parsley
Adding a small amount of parsley to your Homemade Bacon Cheddar Dog Treats might seem like an afterthought, but it’s actually a clever addition. Not only does parsley contribute a fresh, herby flavor, but it also has a number of health benefits for your dog. Parsley is known for its ability to help freshen your dog’s breath, support their digestive system, and even reduce inflammation.
Just be sure to use parsley in moderation, as too much can be harmful to dogs in large quantities. A small sprinkle in the dough is more than enough to reap the benefits.
Step-by-Step Instructions

Making Homemade Bacon Cheddar Dog Treats from scratch is simpler than you might think! By following a few easy steps, you can create delicious, nutritious snacks that your dog will absolutely love. Whether you’re a seasoned baker or a beginner, this recipe is designed to be straightforward and fun. Let’s dive into the step-by-step instructions and get started on baking treats your dog will adore.
Prepare Your Ingredients and Preheat the Oven
Before you get started with the mixing, make sure you have all your ingredients ready to go. Take a moment to measure out each ingredient so that everything is within arm’s reach during the baking process. It’s also a good idea to preheat your oven to 350°F (175°C), so it’s ready when you are. This ensures your treats will bake evenly and achieve the perfect golden brown color.
Cook the Bacon
The bacon is the star of the show, so it’s important to cook it right. Start by frying or baking the bacon until it’s crispy. If you’re frying, cook the bacon over medium heat until it’s crispy and well-done. Alternatively, you can bake the bacon in the oven at 400°F (200°C) for about 15-20 minutes until it’s crispy.
Once the bacon is cooked, let it cool for a few minutes before chopping it into small pieces. These small bacon bits will be sprinkled throughout the dough to give your treats that irresistible bacon flavor.
Mix the Dry Ingredients
In a large mixing bowl, combine the dry ingredients. Start with the whole wheat flour and rolled oats. Stir them together to ensure they are evenly distributed. These ingredients will form the base of your dough and give it a solid structure. Next, add a pinch of parsley for a hint of freshness and to help your dog’s breath smell great. The parsley also has antioxidant properties, making it a great addition to your dog’s diet.
If you’re using gluten-free flour, now is the time to add it in place of the whole wheat flour. Just make sure the flour is evenly mixed with the oats before moving on to the next step.
Add the Wet Ingredients
In a separate bowl, crack one egg and whisk it until it’s well-beaten. The egg serves as the binding agent that will help the dough come together. Once the egg is whisked, add the shredded cheddar cheese, crumbled bacon bits, and coconut oil to the bowl. The coconut oil will add a nice richness to the dough while keeping it soft and chewy once baked.
Now, slowly add a bit of chicken or beef broth into the wet mixture. You want the consistency to be firm but pliable, so don’t add too much broth at once. Start with about 1/4 cup of broth and add more if needed. The moisture will help the dough hold together and make it easier to work with.
Combine the Wet and Dry Ingredients
Now it’s time to combine the wet and dry ingredients. Gradually pour the wet mixture into the bowl with the dry ingredients while stirring with a spoon or your hands. Keep mixing until the dough comes together. If the dough feels too dry, add a little more broth, one tablespoon at a time. If it’s too sticky, sprinkle in a little more flour.
Once everything is mixed and the dough has reached a workable consistency, it’s time to roll it out.
Roll and Cut the Dough
Place the dough on a lightly floured surface. Using a rolling pin, roll the dough out to about 1/4-inch thickness. You don’t want it too thin, as the treats could burn or break easily, but you also don’t want it too thick, or they won’t bake evenly.
Next, use a cookie cutter to cut the dough into fun shapes! You can go with classic bone shapes, or get creative with paws, hearts, or any other shapes your dog might enjoy. If you don’t have a cookie cutter, you can simply use a knife to cut the dough into squares or rectangles. Make sure the pieces are small enough to be a safe size for your dog to enjoy.
Bake the Treats
Once your treats are cut into shape, arrange them on a baking sheet lined with parchment paper. This prevents the treats from sticking and makes cleanup a breeze. Place the baking sheet in the preheated oven and bake the treats for about 20-25 minutes, or until they’re golden brown and crispy. If you’re making larger treats, you may need to bake them for a bit longer, so be sure to check for doneness.
To check if the treats are done, give one a light tap. If it sounds hollow and feels firm to the touch, it’s time to take them out of the oven. Let them cool on the baking sheet for a few minutes before transferring them to a wire rack to cool completely. Cooling is crucial, as it helps them firm up and ensures your dog won’t burn their mouth on a hot treat.
Store the Treats
After the treats are fully cooled, store them in an airtight container. You can keep them on the counter for up to a week or store them in the fridge to keep them fresh for up to two weeks. If you’d like to extend their shelf life, you can freeze the treats for several months. Simply place them in a freezer-safe bag or container, and thaw them as needed.
Tips for Perfect Bacon Cheddar Dog Treats
Making Homemade Bacon Cheddar Dog Treats is a fun and rewarding experience, but there are a few tips and tricks you can follow to ensure they turn out perfectly every time. Whether you’re a first-time baker or a seasoned pro, these tips will help you create the best treats for your pup.
Choose Quality Bacon
The flavor of your treats depends heavily on the bacon, so it’s essential to pick high-quality, dog-safe bacon. Look for nitrate-free bacon without added preservatives or artificial ingredients. Cook the bacon until it’s crispy, and remember to let it cool before chopping it into small pieces. The bacon bits should be small enough to be evenly distributed throughout the dough for a consistent taste in every bite.
Adjust the Flour for Texture
The flour you use can significantly affect the texture of your treats. Whole wheat flour is a great choice for providing structure and fiber, but if your dog has sensitivities, consider using gluten-free alternatives like oat flour or rice flour. Just keep in mind that different flours may require slight adjustments in the amount of liquid, so be mindful of the dough’s consistency.
Watch the Dough Consistency
When mixing the dough, it’s important to achieve the right consistency. The dough should be firm but pliable, not too sticky or dry. If it’s too sticky, add a little more flour; if it’s too dry, add a splash more broth. Don’t be afraid to get your hands in there to knead the dough and check the texture—it’ll make a big difference in the final result.
Roll the Dough Evenly
For evenly baked treats, make sure to roll the dough out to a consistent thickness. Aim for about 1/4-inch thick to ensure they bake properly without being too soft or too hard. If the dough is too thick, the treats might not cook through properly. If it’s too thin, they could burn quickly. Using a rolling pin helps achieve an even thickness for uniform baking.
Keep an Eye on Baking Time
Baking time may vary depending on the size of the treats. Smaller treats will bake faster, while larger ones may need extra time. Be sure to check the treats after 20 minutes and adjust the time as necessary. You’ll know they’re done when they turn golden brown and feel firm to the touch. If you’re unsure, err on the side of overbaking slightly to ensure they dry out completely.
Cool Completely Before Storing
Allow the treats to cool completely on a wire rack after baking. This step is essential for getting that crispy, crunchy texture. Once cooled, store the treats in an airtight container to keep them fresh. You can even freeze them for long-term storage.
People Also Asked
What Are Homemade Bacon Cheddar Dog Treats?
Homemade Bacon Cheddar Dog Treats are a delicious and nutritious snack made with simple, dog-safe ingredients. The main components of these treats are crispy bacon, shredded cheddar cheese, and whole wheat flour (or an alternative for gluten-sensitive dogs).
The treats are baked to perfection, resulting in a crunchy texture that most dogs find irresistible. These homemade snacks offer a healthier alternative to store-bought treats, with the added benefit of knowing exactly what’s in them.
Can I Use Regular Bacon for These Dog Treats?
Yes, you can use regular bacon for these treats, but it’s important to choose a high-quality, dog-safe bacon. Opt for nitrate-free, preservative-free bacon without added artificial ingredients or excess salt.
Too much salt can be harmful to dogs, so it’s best to cook the bacon thoroughly and drain excess grease before using it in your recipe. The key is moderation—small bits of bacon are enough to give the treats a rich, savory flavor.
Are Bacon Cheddar Dog Treats Safe for Dogs with Sensitive Stomachs?
If your dog has a sensitive stomach, you should take a few precautions before giving them Homemade Bacon Cheddar Dog Treats. Start by using a lean, low-fat bacon to prevent any gastrointestinal upset. You can also substitute regular cheddar cheese with a mild, lactose-free variety to avoid potential tummy issues.
Additionally, if your dog is prone to food allergies, consider using a gluten-free flour blend instead of whole wheat flour. Always introduce new treats gradually and watch for any signs of digestive discomfort.
How Long Do Homemade Bacon Cheddar Dog Treats Last?
Homemade Bacon Cheddar Dog Treats typically last about a week if stored in an airtight container at room temperature. To extend their freshness, you can store them in the refrigerator for up to two weeks.
If you want to keep them even longer, freezing the treats is a great option. Just place them in a freezer-safe container or bag, and they can last for up to three months. When you’re ready to use them, simply thaw and serve.
Can I Use a Different Type of Cheese in This Recipe?
While cheddar cheese is a popular choice because of its strong flavor, you can certainly experiment with different types of cheese for your dog treats. Some good alternatives include mozzarella, which is mild and easy to digest, or cottage cheese for a lighter option.
Just make sure the cheese you use is dog-safe and doesn’t contain any harmful additives, like garlic or onion powder. Remember that cheese is high in fat, so use it in moderation.
Are Bacon Cheddar Dog Treats Good for Training?
Yes! Homemade Bacon Cheddar Dog Treats can be great for training, especially because of their irresistible smell and taste. Dogs are more likely to pay attention and follow commands when they know a tasty reward is on the way.
The small, crunchy size of these treats makes them perfect for training sessions without being too filling. Just make sure the portions are small to avoid overfeeding your pup during training.
How Do I Know When the Dog Treats Are Fully Baked?
To check if your Homemade Bacon Cheddar Dog Treats are fully baked, you can gently press on the center of one. If it feels firm and slightly crisp, they are ready.
Additionally, look for a golden-brown color on the edges. Baking times can vary based on the size and thickness of the treats, so keep an eye on them during the last few minutes of baking. If you’re unsure, you can always test one by tapping it lightly—it should sound hollow when fully baked.
Can I Make These Dog Treats Without Bacon?
If your dog doesn’t eat bacon or you prefer to leave it out, you can still make tasty and nutritious treats. Substitute the bacon with another protein source, such as cooked chicken or turkey, to keep the flavor up while maintaining a dog-friendly recipe.
You could also use bacon-flavored dog-safe alternatives available at pet stores for a similar taste without the actual bacon. Just make sure that any replacement ingredients are safe for your dog.
Conclusion
Homemade Bacon Cheddar Dog Treats are a simple, tasty, and healthy snack your dog will love. By using high-quality ingredients like crispy bacon, cheddar cheese, and whole wheat flour, you can create a nutritious treat that’s free from artificial preservatives and additives.
Not only do these homemade treats offer a more wholesome alternative to store-bought options, but they’re also customizable for dogs with dietary restrictions. Whether you’re using lean bacon or gluten-free flour, these treats can easily be adapted to suit your dog’s needs.
The best part? You get to know exactly what goes into every bite. With a few easy steps and a little love, you can treat your furry friend to a batch of delicious, crunchy snacks they’ll enjoy for days. Give it a try and watch your dog’s tail wag in delight!