

Looking for a healthy and simple way to spoil your pup? This Easy Whole Wheat Dog Treats Homemade Recipe is just what you need. If you’ve ever glanced at the ingredients on store-bought dog treats, you’ve probably seen a list of things you can’t pronounce. That’s why making your own treats at home is such a great option—it’s quick, affordable, and gives you full control over what goes into your dog’s body.
This recipe uses wholesome, everyday ingredients like whole wheat flour, natural peanut butter, and eggs to create tasty treats your furry friend will love. No weird additives, no mystery fillers—just clean, dog-approved goodness. Whether you’re a seasoned pet parent or new to baking for your dog, you’ll appreciate how straightforward and reliable this recipe is.
With this Easy Whole Wheat Dog Treats Homemade Recipe, you’ll feel good knowing your dog is getting a snack that’s as nutritious as it is delicious. Ready to get baking?
Ingredients for Whole Wheat Dog Treats
Before you dive into baking, it’s essential to gather the right ingredients. The beauty of homemade dog treats is how simple and wholesome they can be. With just a few pantry staples, you can whip up a healthy batch of goodies your pup will love. These treats skip the preservatives and questionable fillers, keeping things natural and dog-safe.
Whole Wheat Flour
Whole wheat flour is the base of this recipe and provides more nutrients than all-purpose flour. It’s packed with fiber and contains essential vitamins and minerals like B-vitamins, iron, and magnesium. It also gives the treats a heartier texture dogs enjoy. If your dog has a wheat sensitivity, you can swap it with oat flour or rice flour—but for most pups, whole wheat is a great choice.
Natural Peanut Butter
Dogs go crazy for peanut butter! Just make sure it’s natural and xylitol-free, as xylitol is highly toxic to dogs. Peanut butter not only adds flavor but also provides healthy fats and protein. Stick to unsalted, unsweetened varieties for the healthiest option.
Eggs
Eggs are a great binder and source of protein, vitamins, and minerals. They help hold the dough together while adding a nutritional boost to every bite. Plus, dogs usually have no problem digesting cooked eggs, making them a safe and beneficial addition.
Water or Low-Sodium Broth
To bring the dough together, you’ll need some moisture. Water works perfectly fine, but you can level it up by using a low-sodium chicken or beef broth for added flavor. Always check the label to ensure it’s free of onion or garlic, which can be harmful to dogs.
Optional Add-ins
If you want to personalize your dog’s treats, consider adding a few extras like:
- Pumpkin puree – great for digestion
- Grated carrots or sweet potatoes – for a vitamin boost
- Oats – for extra fiber and texture
Keep it simple, and always double-check that any add-ins are dog-safe. You don’t need anything fancy to make a healthy, tasty snack for your pup.
Tools You’ll Need
One of the best things about making homemade dog treats is that you don’t need any fancy gadgets or equipment. In fact, you probably already have most of the tools sitting in your kitchen. Let’s go over the basic tools you’ll need to whip up your batch of Easy Whole Wheat Dog Treats Homemade Recipe—no special baking skills required!
Mixing Bowl
A large mixing bowl is essential for combining your ingredients. Since you’ll be working with thick dough, choose a bowl that gives you enough space to stir and mix without ingredients spilling over the sides.
Wooden Spoon or Silicone Spatula
You’ll need a sturdy spoon or spatula to mix your ingredients thoroughly. A silicone spatula works well for scraping the sides of the bowl and ensuring everything is evenly combined.
Rolling Pin
Once your dough is ready, a rolling pin will help you flatten it out to the perfect thickness. Aim for about ¼ inch thickness for treats that are easy for your pup to chew and enjoy.
Cookie Cutters (Optional but Fun!)
If you want to make your dog treats extra cute, use cookie cutters in fun shapes like bones, paws, or hearts. While this step is optional, it’s a fun way to personalize your treats and make them Instagram-worthy!
Baking Sheet
A standard baking sheet is perfect for laying out your treats before popping them into the oven. You can line it with parchment paper to prevent sticking and make cleanup easier.
Measuring Cups and Spoons
Accuracy matters, especially when baking. Use measuring cups and spoons to ensure the right ratio of ingredients so your treats come out just right every time.
Oven Mitts and Cooling Rack
Once the treats are done baking, you’ll need oven mitts to safely remove the hot tray from the oven. Transfer the treats to a cooling rack to let them cool completely before giving them to your dog.
Step-by-Step Instructions

Ready to get baking? Making your own dog treats at home is not only easy—it’s also a great way to make sure your pup is getting wholesome, safe ingredients. With this Easy Whole Wheat Dog Treats Homemade Recipe, you can skip the store-bought stuff and make a batch of tasty snacks your dog will love. Let’s walk through each step together so you can feel confident from start to finish.
Step 1: Preheat Your Oven
Start by setting your oven to 350°F (175°C). It’s always best to preheat before you begin mixing, so the oven is hot and ready by the time your dough is shaped and ready to go. This ensures even baking and the right texture for your treats.
Step 2: Gather and Measure Your Ingredients
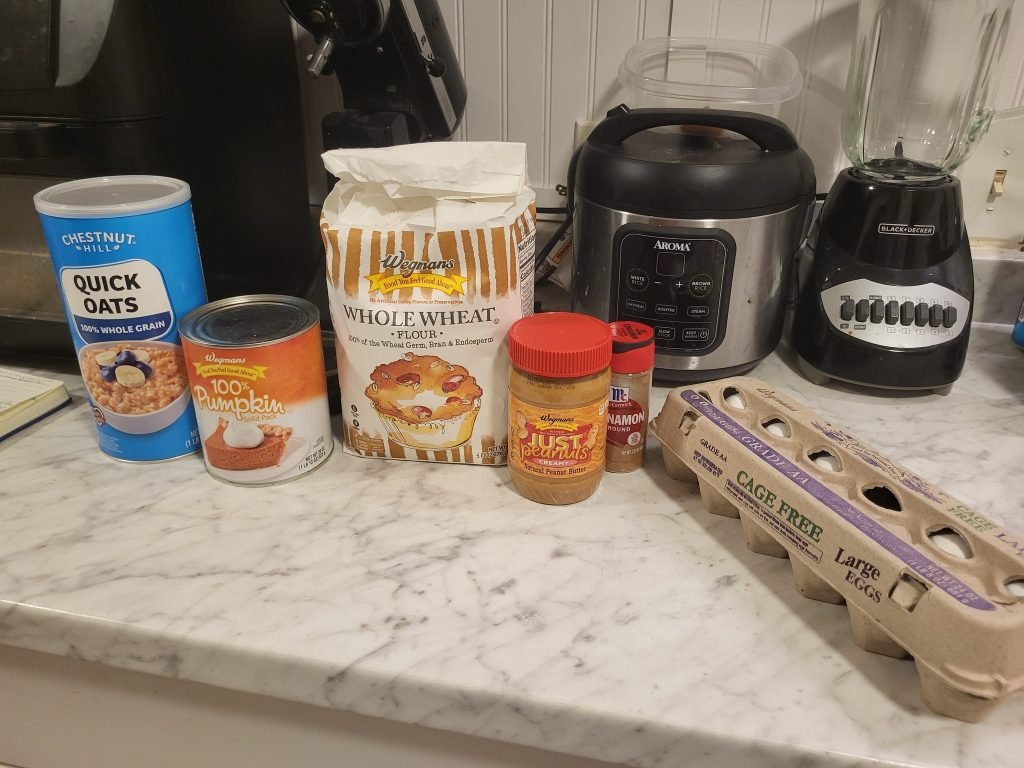
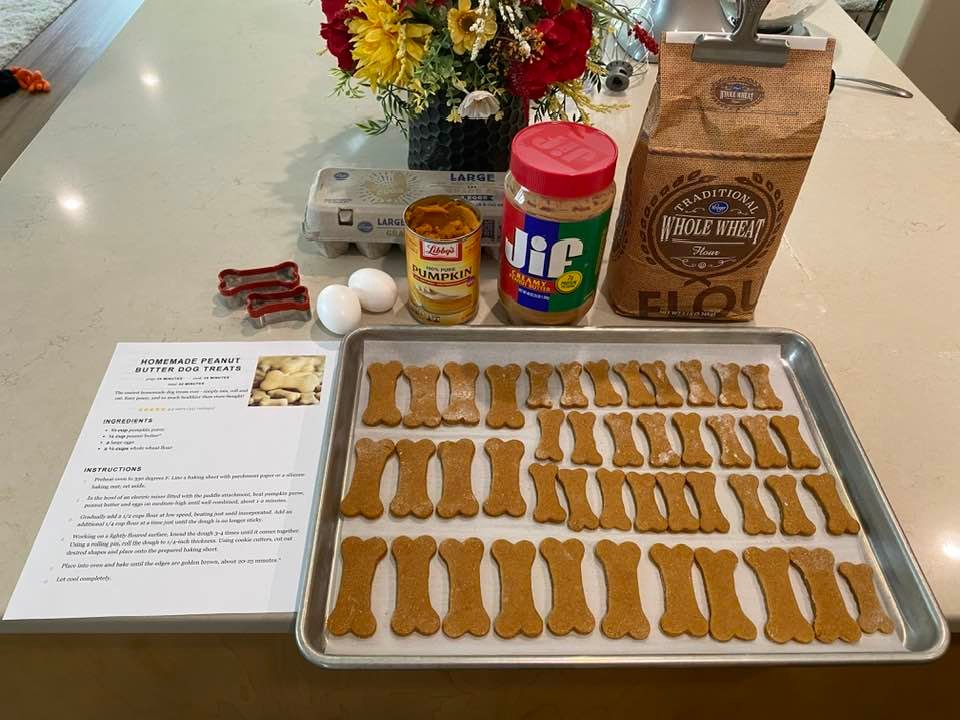
Before you dive into mixing, take a moment to gather all your ingredients and tools. For this recipe, you’ll need:
- 2 cups whole wheat flour
- 1/2 cup natural peanut butter (make sure it’s xylitol-free)
- 2 eggs
- About 1/4 cup water or low-sodium broth
Having everything pre-measured and ready will make the process smoother and help you avoid any mid-recipe surprises.
Step 3: Mix the Wet Ingredients First
In a large mixing bowl, crack both eggs and add in the peanut butter. Stir them together with a sturdy spoon or silicone spatula. If your peanut butter is a little thick or hard to stir, try microwaving it for about 10–15 seconds to soften it. Mix until the eggs and peanut butter are smooth and fully combined.
Step 4: Add the Flour
Next, gradually add the whole wheat flour to the wet mixture. You’ll want to do this a little at a time, stirring as you go. As the flour gets worked in, the mixture will become thick and doughy—this is exactly what you want. Keep mixing until all the flour is incorporated and a dough begins to form.
Step 5: Add Water or Broth for Consistency
To bring the dough together, slowly pour in your water or broth. Start with just a couple tablespoons and add more as needed. The goal is to get a firm but workable dough—something you can roll out without it crumbling or sticking too much. If your dough gets too wet, sprinkle in a little more flour until it reaches the right texture.
Step 6: Knead the Dough
Lightly flour your countertop or a clean surface and transfer the dough from your bowl. Gently knead it by hand for about one to two minutes. This helps smooth out the dough and makes it easier to roll. If it sticks to your hands, dust the surface and your hands with a little more flour.
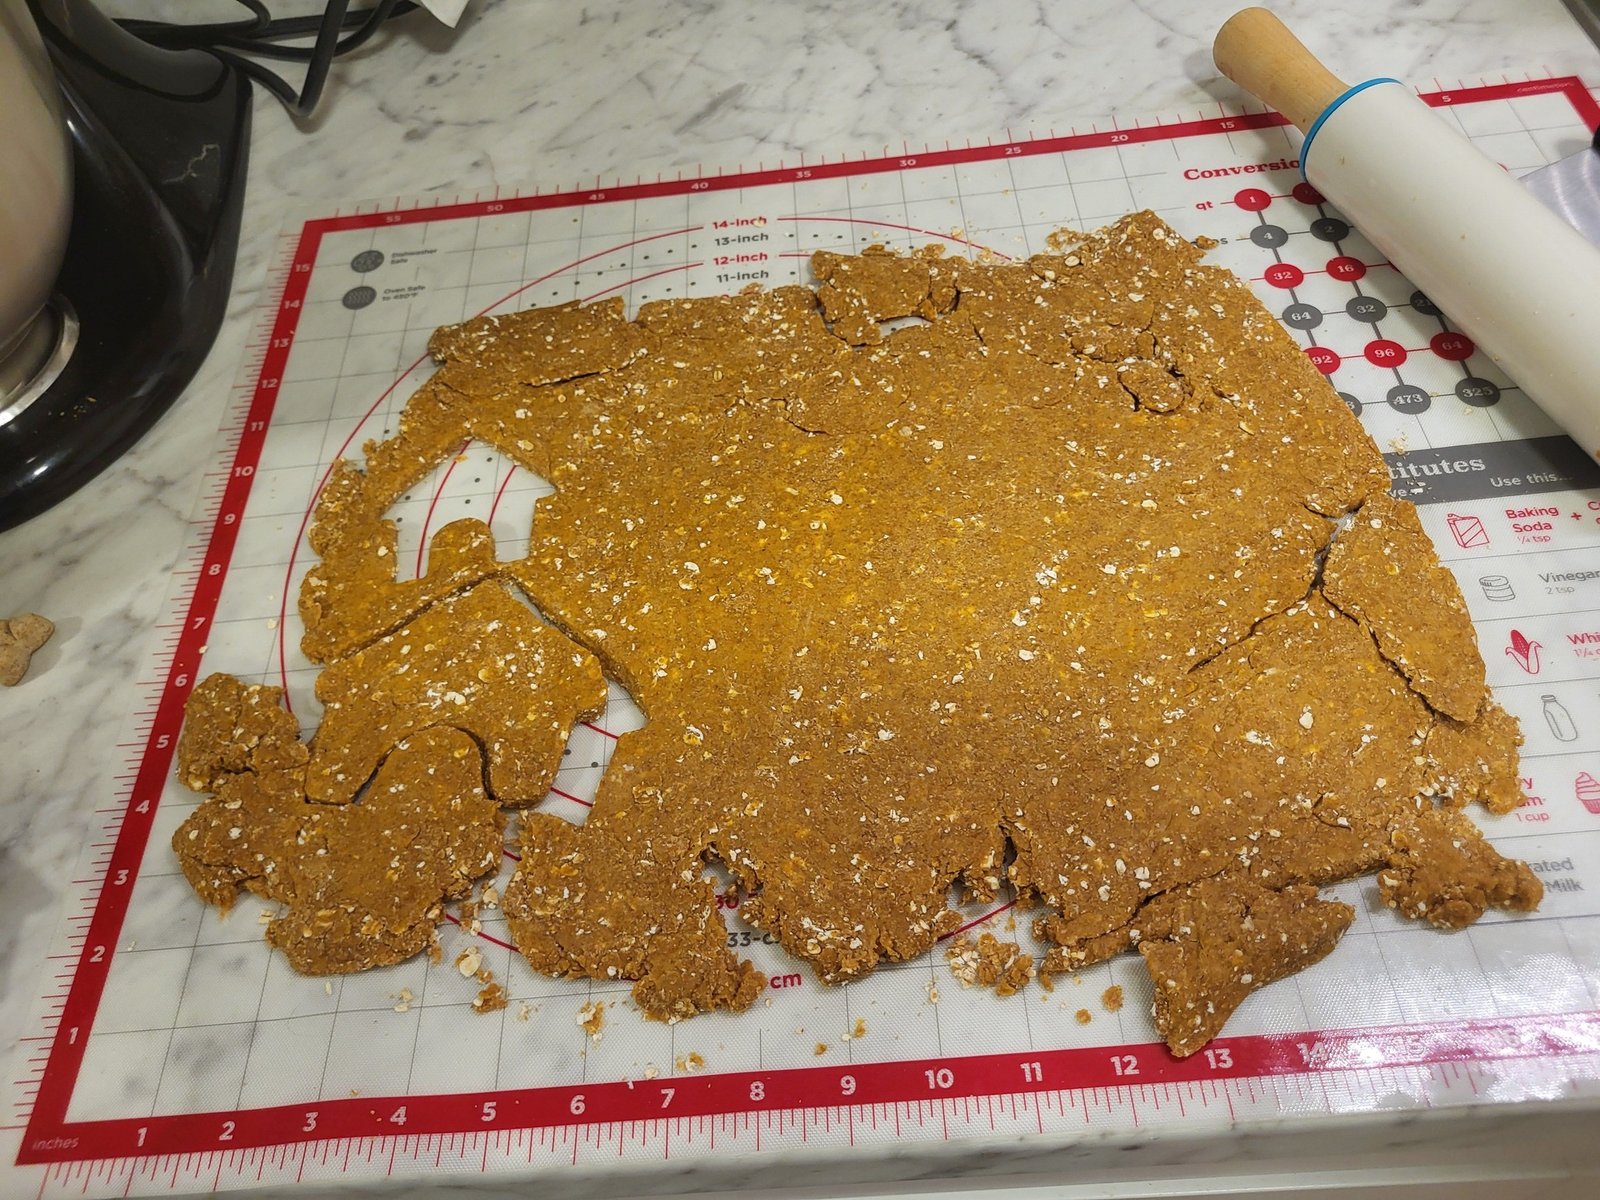
Step 7: Roll It Out
Once the dough is smooth, grab your rolling pin and roll it out to about 1/4 inch thickness. Try to keep the thickness even across the whole dough to ensure the treats bake uniformly. If you don’t have a rolling pin, a smooth glass or water bottle can work in a pinch.
Step 8: Cut the Treats
Here’s where you can have a little fun. Use cookie cutters in cute shapes—like bones, hearts, or paws—to cut out your dog treats. If you don’t have cutters, just use a knife or pizza cutter to slice the dough into squares or rectangles. Your dog won’t care about the shape—they’ll care about the taste!
Step 9: Prepare Your Baking Sheet
Place a sheet of parchment paper on a baking tray to prevent sticking. Arrange your cutouts on the tray, leaving a small gap between each. They won’t spread much while baking, so you can fit quite a few on one pan.
Step 10: Bake to Golden Perfection
Place the tray into your preheated oven and bake for 15 to 20 minutes. You’ll know they’re done when the edges are golden brown and the treats are firm to the touch. If your dog likes crunchy treats, leave them in a few extra minutes, but keep a close eye so they don’t burn.
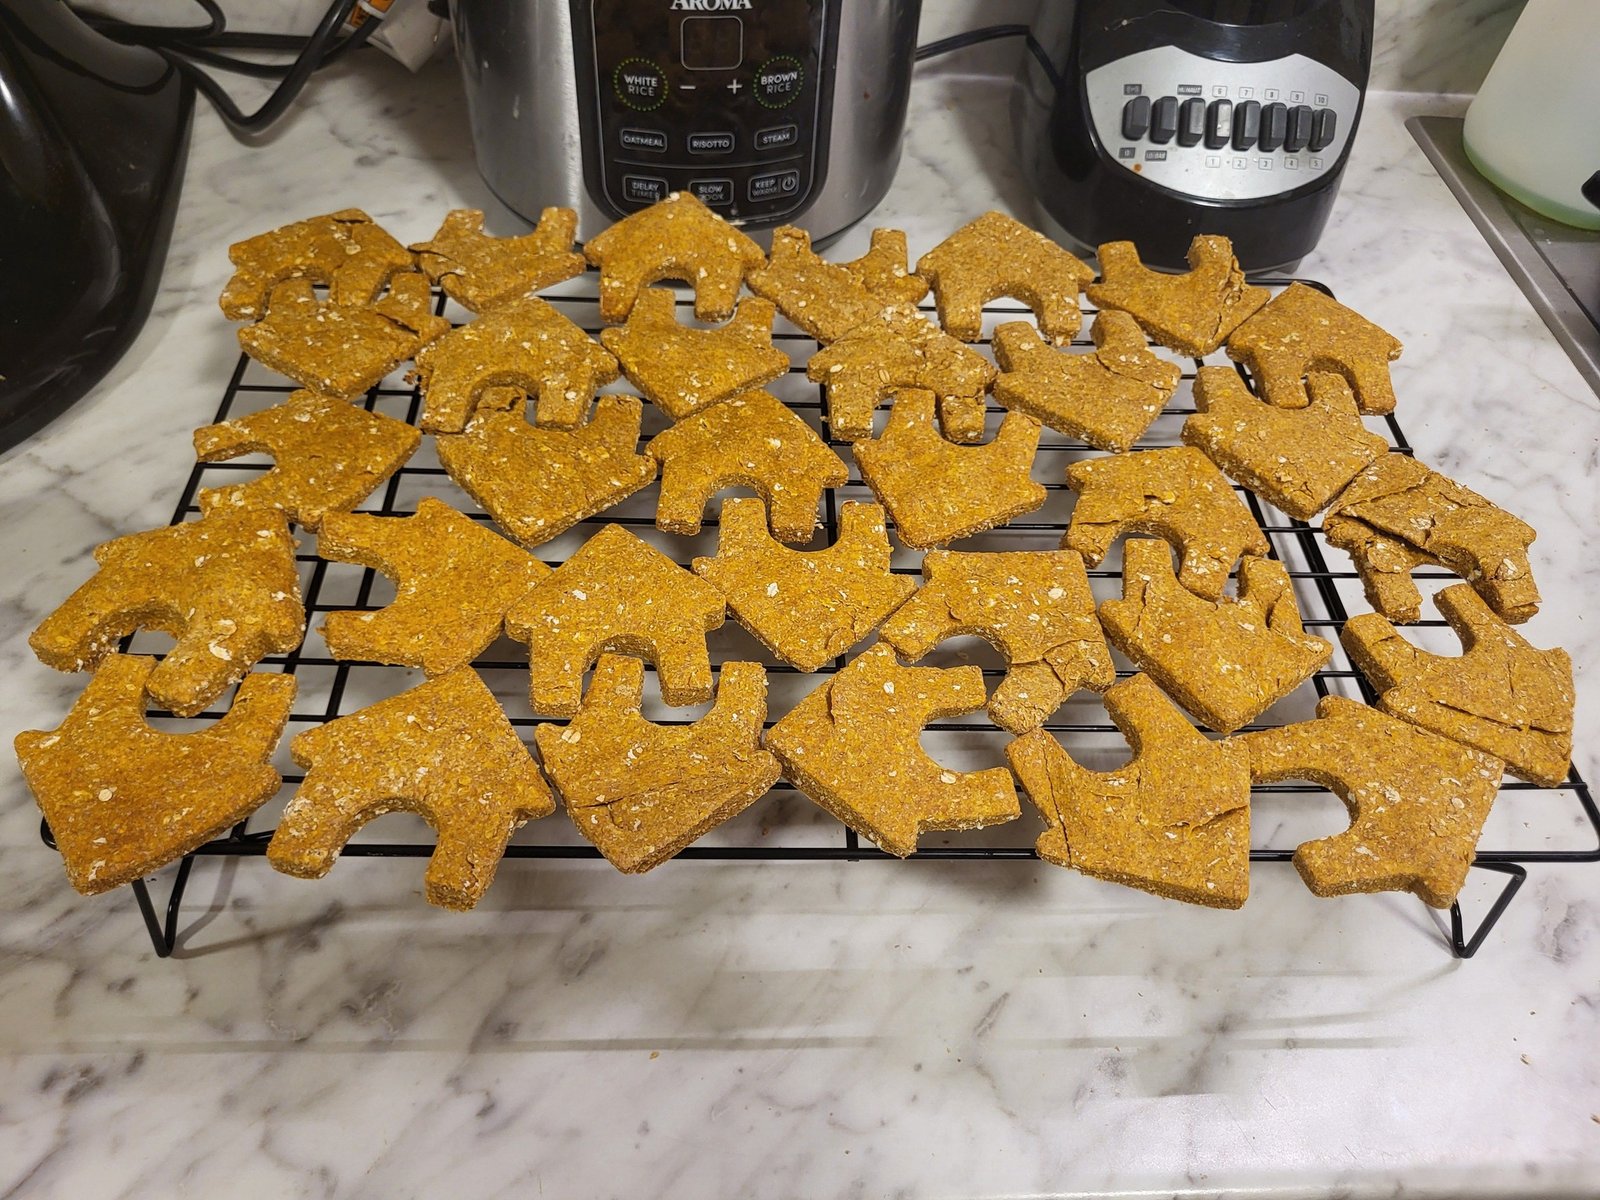
Step 11: Let Them Cool
After baking, use oven mitts to carefully remove the tray and set it on a cooling rack. Let the treats cool on the tray for about 5 minutes, then transfer them to a wire rack to cool completely. This step is important—treats that are still warm can be too soft or hot for your dog to safely enjoy.
Step 12: Store and Serve
Once the treats are fully cooled, you can store them in an airtight container. They’ll stay fresh for about a week at room temperature or up to 2–3 weeks if stored in the refrigerator. For longer storage, freeze them in a zip-top bag and take out a few at a time when needed.
Now comes the best part—serving! Hand one to your pup and watch their eyes light up. You made these with love, and they’ll know it with every bite.
Tips for Success

Want your Easy Whole Wheat Dog Treats Homemade Recipe to turn out perfectly every time? A few simple tips can make a big difference. Whether you’re baking dog treats for the first time or you’re a seasoned pet chef, these pointers will help you get the best results—plus a very happy pup.
Use Dog-Safe Ingredients
Always double-check your ingredients before getting started. Make sure your peanut butter does not contain xylitol, a sugar substitute that’s extremely toxic to dogs. Also, avoid using broths with added onions, garlic, or high sodium content—opt for low-sodium, dog-safe versions when possible.
Watch the Dough Texture
The dough should be firm but pliable—not too sticky and not too dry. If it’s crumbly, add a bit more water or broth. If it’s too sticky, sprinkle in a little more flour. The right consistency will make rolling and cutting much easier and prevent frustration.
Flour Your Work Surface
Lightly flouring your countertop or cutting board before kneading and rolling helps prevent sticking. You don’t need much—just enough to keep things smooth. You can also lightly dust your rolling pin and cookie cutters to make the process even easier.
Choose the Right Thickness
Aim for about 1/4-inch thickness when rolling out your dough. This gives the treats a satisfying texture that’s not too soft or too crunchy. If you prefer crunchy biscuits, bake them a bit longer and roll them slightly thinner.
Let Treats Cool Completely
Patience is key! Allow the treats to cool fully before offering them to your dog or storing them. Cooling helps them firm up and also ensures they won’t mold as quickly if stored at room temperature.
Store Properly for Freshness
Keep your homemade dog treats in an airtight container in a cool, dry place. For longer shelf life, refrigerate or freeze them. Just thaw a few at a time as needed so your dog always has fresh snacks on hand.
Test with a Small Batch First
If your dog has a sensitive stomach or allergies, consider starting with a half-batch and monitor how they respond before making a full batch.
By following these simple tips, you’ll have a smoother baking experience—and your dog will get fresh, delicious treats made with love.
Are Whole Wheat Treats Safe for All Dogs?
Whole wheat treats can be a healthy and tasty option for many dogs, but they’re not ideal for every pup. Most dogs digest whole wheat just fine, and it offers a good source of fiber, B vitamins, and minerals. However, if your dog has a wheat allergy or gluten sensitivity, whole wheat should be avoided. Signs of an intolerance might include itching, ear infections, or digestive upset like gas or loose stools. If you’re unsure whether your dog can tolerate wheat, it’s always a good idea to check with your vet before introducing it into their diet.
For dogs with sensitivities, there are plenty of alternatives—you can substitute whole wheat flour with oat flour, rice flour, or even chickpea flour in most homemade recipes. These options are gentler on the stomach and still create delicious, crunchy treats. The key is to know your dog’s individual needs. If your pup has no wheat issues, this Easy Whole Wheat Dog Treats Homemade Recipe can be a wholesome part of their treat rotation. Just remember: moderation is important. Treats should make up only a small portion of your dog’s overall diet.
People Also Asked
Can You Use All-Purpose Flour Instead of Whole Wheat Flour?
Yes, you can substitute all-purpose flour for whole wheat flour if needed, but it’s important to understand the difference. Whole wheat flour is more nutritious and contains more fiber, which can be beneficial for your dog’s digestion. All-purpose flour is more processed and may not offer the same health benefits. If your dog doesn’t have any dietary restrictions, whole wheat is the better option. However, for dogs with wheat sensitivities, you may want to use grain-free alternatives like oat or rice flour.
How Long Do Homemade Whole Wheat Dog Treats Last?
Homemade whole wheat dog treats typically last up to one week when stored in an airtight container at room temperature. For longer freshness, you can refrigerate them for up to three weeks or freeze them for up to three months. Always let the treats cool completely before storing to prevent moisture buildup, which can lead to mold.
Is Peanut Butter Safe for Dogs in This Recipe?
Yes, peanut butter is safe for most dogs and adds flavor and healthy fats. However, make sure it’s xylitol-free, as xylitol is toxic to dogs. Choose a natural peanut butter with no added sugar, salt, or artificial sweeteners. If your dog has a peanut allergy, you can substitute it with unsweetened pumpkin puree or mashed banana.
Can Puppies Eat Whole Wheat Dog Treats?
Puppies can eat whole wheat dog treats in moderation, as long as they don’t have a wheat allergy. Keep in mind that puppies have smaller stomachs and sensitive digestive systems, so introduce treats slowly. Break the treats into smaller pieces and use them as rewards during training. Always consult your vet before adding new treats to your puppy’s diet.
How Many Treats Can You Give Your Dog Per Day?
Treats should only make up 10% or less of your dog’s daily caloric intake. The number of treats you can give depends on your dog’s size, age, and activity level. For small dogs, one or two small treats a day is usually enough. Larger dogs can handle more, but always monitor for weight gain or digestive upset.
Can You Add Other Ingredients Like Carrots or Pumpkin?
Absolutely! You can customize your homemade dog treats with dog-safe ingredients like shredded carrots, unsweetened pumpkin puree, or even blueberries. These add-ins can enhance flavor and nutrition. Just be careful not to add too much moisture, and adjust the flour if needed to maintain a dough-like consistency.
Why Is My Dough Too Sticky or Too Dry?
If your dough is too sticky, it may need a little more flour. Add it slowly, one tablespoon at a time, until the dough is workable. On the flip side, if the dough is too dry and crumbly, add a little more water or broth, just a teaspoon at a time. The goal is a firm, smooth dough that rolls out easily and holds its shape when cut.
Can You Make These Treats Without Eggs?
Yes, you can make egg-free dog treats by using simple substitutes. Unsweetened applesauce, mashed banana, or ground flaxseed mixed with water are great options. For each egg, use 1/4 cup of applesauce or 1 tablespoon of flaxseed meal mixed with 3 tablespoons of water. These alternatives help bind the dough and still keep the treats tasty and healthy.
Final Words
Making your own Easy Whole Wheat Dog Treats Homemade Recipe is not only simple—it’s also a great way to show your dog a little extra love. With wholesome ingredients, minimal prep time, and the ability to customize based on your pup’s preferences, these treats are a healthier alternative to store-bought options.
Plus, you’ll know exactly what’s going into their snacks—no hidden additives or preservatives. Whether you’re baking for a special occasion or just because, your furry friend will appreciate the homemade touch. Just remember to store them properly, keep portion sizes in check, and enjoy those happy tail wags every time you reach for the treat jar.
Give it a try—you might find this becomes a fun and rewarding part of your weekly routine. Ready to bake some tail-wagging goodness? Your pup will thank you for it!