
Looking for a fun and healthy way to treat your furry friend? These DIY Apple and Oat Dog Treats are the perfect solution! Made with simple, wholesome ingredients, these treats are easy to prepare and packed with nutrients that your dog will love.
Apples are a great source of fiber and vitamins, while oats provide a natural energy boost and promote healthy digestion. Whether you’re trying to cut down on store-bought treats or just want to make something special for your dog, these homemade goodies will have tails wagging in no time.
The best part? You know exactly what’s going into these treats, so you can feel confident about what your dog is eating. Plus, making DIY Apple and Oat Dog Treats at home is a great bonding activity for you and your pup. So, let’s get started and whip up some delicious, dog-approved snacks!
Ingredients You’ll Need for DIY Apple and Oat Dog Treats

Making DIY Apple and Oat Dog Treats is simple, and the best part is you only need a few wholesome ingredients to get started. These treats are packed with nutrition, and they’re a great way to spoil your dog with something tasty yet healthy. Here’s what you’ll need:
Apples (1-2 medium-sized)
Apples are the star ingredient in these treats! They provide natural sweetness, fiber, and essential vitamins like A and C. Choose apples that are dog-friendly, like Red Delicious or Fuji, and avoid any that are too tart. Be sure to remove the seeds and core, as they can be harmful to dogs. The soft, fleshy part of the apple is what you’ll use in the recipe.
Oats (1 ½ cups)
Oats are a fantastic source of fiber and promote good digestion in dogs. They also give the treats a great texture, making them both chewy and crunchy. You can use rolled oats or instant oats, but be sure to use plain oats without any added sugar or flavoring. Oats are naturally gluten-free, but make sure they’re certified gluten-free if your dog has sensitivities.
Whole Wheat Flour (1 cup)
Whole wheat flour is often used in homemade dog treats to provide structure and hold everything together. It’s high in fiber and contains essential nutrients like B vitamins. However, if your dog has a wheat or gluten allergy, you can substitute whole wheat flour with a gluten-free flour alternative, such as oat flour or rice flour.
Egg (1 large)
An egg acts as a binder, helping to hold the dough together and giving your treats a nice texture. It also adds protein, which is important for your dog’s overall health. Plus, eggs are packed with amino acids, vitamins, and minerals that benefit your pup.
Cinnamon (½ teaspoon)
A pinch of cinnamon adds a little extra flavor and aroma to these treats. It also has antioxidant properties and can help with digestion. Just make sure to use a small amount, as too much cinnamon can be irritating for some dogs.
Water (1/4 cup)
You’ll need a bit of water to help bring the dough together. Depending on the consistency of your dough, you may need to adjust the amount slightly, so the dough is easy to roll out but not too sticky.
That’s all! These simple ingredients combine to make a treat that’s both nutritious and tasty for your dog. Plus, they’re all ingredients that are safe for your pup to enjoy in moderation. So, gather your supplies and get ready to treat your dog to something special!
Step-by-Step Instructions for DIY Apple and Oat Dog Treats

Making DIY Apple and Oat Dog Treats is a fun and easy process that doesn’t require any fancy equipment. With just a few simple ingredients, you can create delicious, nutritious snacks for your dog. Here’s a step-by-step guide to making these tasty treats:
Step 1: Preheat Your Oven
Before you begin preparing the dough, it’s important to preheat your oven to 350°F (175°C). This ensures that the oven is at the right temperature when your treats are ready to bake. It also helps to prevent any delays once you’re done mixing the ingredients.
Step 2: Prepare the Apples
Start by washing and peeling the apples to remove any pesticides or chemicals on the skin. After peeling, core the apples and remove the seeds, as these can be harmful to dogs.
Once cored, chop the apples into small, bite-sized pieces. You don’t need to worry about them being perfect because you’ll be blending them with the oats later.
For added convenience, you can even use an apple slicer to make the process faster!
Step 3: Blend the Apples
Place the chopped apples in a food processor or blender and pulse until finely chopped or pureed. If you don’t have a food processor, you can also use a potato masher or fork to mash the apples manually.
If the mixture is too chunky, don’t worry! Some texture is fine, but ensure there’s enough moisture in the apples to help bind the dough together later.
Step 4: Mix the Dry Ingredients
In a large mixing bowl, combine the rolled oats and whole wheat flour. Stir these dry ingredients together to ensure they’re evenly distributed. The oats will give the treats a hearty texture, while the flour will help provide structure and make the dough easier to handle.
Step 5: Add the Wet Ingredients
Next, add the mashed apples to the dry ingredients. Crack the egg into the bowl as well. The egg will help bind everything together, creating a dough that’s easy to work with. Sprinkle in the cinnamon for a subtle flavor boost, and pour in about 1/4 cup of water to help with mixing.
Use a spoon or your hands to stir the mixture, combining all the ingredients until the dough comes together. If the dough is too dry and crumbly, add a little more water (1 tablespoon at a time) until you achieve a workable consistency. If it’s too wet, add more flour until the dough firms up.
Step 6: Roll Out the Dough
Once the dough is ready, lightly flour your work surface to prevent the dough from sticking. Take a rolling pin and roll out the dough to about 1/4 inch thick. This thickness ensures the treats aren’t too soft or too hard for your dog to chew.
If you don’t have a rolling pin, you can simply use your hands to flatten the dough.
Step 7: Cut the Treats
Now it’s time to shape the treats! Use a cookie cutter to cut the dough into fun shapes like bones, stars, or circles. If you don’t have a cookie cutter, you can simply use a knife to cut the dough into squares or rectangles.
Place each shaped piece onto a baking sheet lined with parchment paper. Make sure to leave some space between each treat, as they will expand a little during baking.
Step 8: Bake the Treats
Pop your baking sheet into the preheated oven and bake the treats for 20-25 minutes, or until they turn golden brown. The exact time may vary depending on your oven and the size of the treats, so keep an eye on them.
When they’re done, the treats should be firm and crunchy. If you want a softer texture, you can bake them for a shorter time or let them cool down outside the oven.
Step 9: Cool the Treats
Once baked, remove the treats from the oven and let them cool completely on a wire rack. It’s important to let them cool to room temperature to ensure they’re safe for your dog to eat and to prevent burns.
Step 10: Store the Treats
Once your DIY Apple and Oat Dog Treats have cooled, store them in an airtight container. You can keep them at room temperature for up to a week, or store them in the fridge for up to two weeks to maintain their freshness.
For longer storage, you can freeze them in a Ziploc bag or airtight container and thaw them as needed.
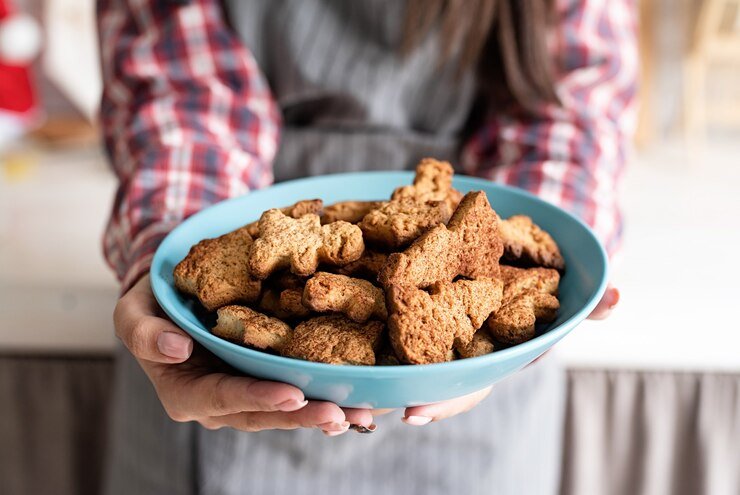
Enjoy watching your dog enjoy these tasty, homemade treats! By following these easy steps, you can treat your dog to a nutritious snack that’s free from artificial preservatives and additives. Plus, you’ll know exactly what’s in every bite!
FAQs
What Are Carrot Apple Dog Cookies?
Carrot apple dog cookies are a nutritious and tasty homemade treat for your dog, made using fresh carrots, apples, and dog-safe ingredients like whole wheat flour and eggs. These cookies are packed with vitamins and fiber from the carrots and apples, promoting healthy digestion and overall wellness for your dog.
They’re a perfect snack for dogs who love fresh, natural flavors and offer a low-fat alternative to store-bought treats. Plus, you get to control the ingredients, ensuring there are no artificial additives or preservatives.
Can I Use Any Type of Apple for Carrot Apple Dog Cookies?
Yes, you can use any variety of apple that you prefer, but some apples may be sweeter and better suited for baking. Apples like Fuji, Gala, or Red Delicious are excellent choices due to their mild sweetness. Avoid using apples with seeds or cores, as these can be harmful to your dog. It’s also important to remove the skin if your dog is sensitive to it. Stick with fresh, pesticide-free apples for the healthiest option.
Are Carrot Apple Dog Cookies Safe for Dogs?
Carrot apple dog cookies are generally safe for dogs when made with dog-friendly ingredients. The main components, like apples, carrots, eggs, and whole wheat flour, are all safe and nutritious for most dogs. However, as with any treat, moderation is key.
Always check for any food allergies your dog might have before giving them new treats. Avoid using ingredients that are toxic to dogs, such as raisins or xylitol, and keep the cookies portioned appropriately to prevent overfeeding.
How Long Can I Store Carrot Apple Dog Cookies?
Carrot apple dog cookies can be stored in an airtight container for up to one week at room temperature. If you want to keep them fresh for a longer period, you can refrigerate them for up to two weeks. For even longer storage, freezing the cookies is an excellent option.
Simply place them in a freezer-safe bag or container, and they will last for several months. Be sure to thaw them before giving them to your dog.
Can I Substitute the Whole Wheat Flour in This Recipe?
Yes, you can substitute whole wheat flour in the carrot apple dog cookies recipe if your dog has a sensitivity or allergy to gluten or wheat. Some good alternatives include oat flour, brown rice flour, or coconut flour.
When substituting, keep in mind that these flours have different textures and absorb liquids differently, so you may need to adjust the amount of liquid in your recipe. Always check with your vet if you’re unsure about using a new ingredient.
Can I Add Other Vegetables to Carrot Apple Dog Cookies?
Yes, you can easily customize carrot apple dog cookies by adding other dog-safe vegetables. Sweet potatoes, pumpkin, or zucchini are great options that blend well with the carrots and apples.
Just ensure that any added vegetable is safe for dogs and doesn’t introduce any harmful ingredients. If you’re adding additional vegetables, you may need to adjust the amount of flour or liquid to get the right dough consistency.
How Do I Know When Carrot Apple Dog Cookies Are Done Baking?
Carrot apple dog cookies typically bake for about 20-25 minutes at 350°F (175°C), but the exact baking time can vary depending on your oven and the thickness of the cookies.
You’ll know they’re done when the edges turn golden brown and the cookies become firm. If you want a chewier texture, you can bake them for a slightly shorter time. Let the cookies cool completely on a wire rack before serving them to your dog.
Can I Make Carrot Apple Dog Cookies for a Special Occasion?
Absolutely! Carrot apple dog cookies are a great homemade treat for special occasions like your dog’s birthday or a holiday celebration. You can shape the cookies using dog-themed cookie cutters, making them extra festive.
Just make sure to keep the ingredients dog-friendly and stick to the recipe’s guidelines to ensure the treats are healthy and safe. These cookies are a fun way to show your dog some extra love during special moments!
Conclusion
Carrot Apple Dog Cookies are a wholesome and tasty treat that you can easily make at home for your dog. With simple ingredients like fresh carrots, apples, and whole wheat flour, these cookies offer a nutritious snack full of vitamins and fiber to support your dog’s health.
Whether you’re baking for a special occasion or just because, you can feel good knowing exactly what’s going into the treats you’re giving your furry friend. Plus, the ability to customize the recipe with different vegetables or flours means you can make them suitable for dogs with dietary restrictions or preferences.
Remember to store the cookies properly to keep them fresh and always serve them in moderation to maintain a healthy balance in your dog’s diet. By making these homemade treats, you’re not only rewarding your dog with something delicious but also ensuring they get the best, most natural ingredients possible.
Enjoy watching your dog enjoy these tasty, homemade snacks!