

Here’s an introduction for Cream Cheese Icing for Pumpkin Cake, written in a natural, real tone and within 150–180 words:
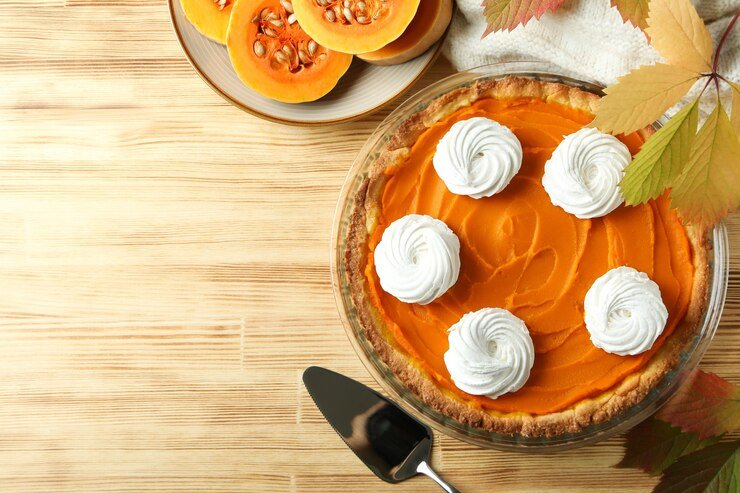
There’s something undeniably comforting about the combination of warm pumpkin spice and rich cream cheese frosting. If you’re baking a moist, flavorful pumpkin cake, then cream cheese icing isn’t just an option—it’s the perfect finishing touch. This cream cheese icing for pumpkin cake brings just the right amount of sweetness with a subtle tang that pairs beautifully with the earthy notes of cinnamon, nutmeg, and cloves in the cake. It’s smooth, creamy, and incredibly easy to make, even if you’re not an experienced baker.
Whether you’re preparing a simple sheet cake for a weeknight dessert or a layered centerpiece for a holiday gathering, this frosting elevates your pumpkin cake to something truly special. Best of all, it can be made ahead, customized with extra flavors like vanilla or maple, and spread thick for that classic bakery-style finish. If you’re craving a cozy, homemade treat, this icing is exactly what your pumpkin cake needs.
Ingredients
When making cream cheese icing for pumpkin cake, it’s all about balancing tang, sweetness, and creaminess. Each ingredient plays a role in bringing out the best flavor and texture to complement the spiced pumpkin base. Let’s take a closer look at what you’ll need for a classic and delicious cream cheese icing.
Cream Cheese
The star of this frosting is, of course, cream cheese. Choose full-fat, block-style cream cheese—not the whipped or spreadable kinds in tubs. It gives the icing a rich, dense consistency and that signature tangy flavor. Make sure it’s softened to room temperature to ensure a smooth, lump-free texture when mixed.
Unsalted Butter
Butter adds richness and helps with structure. It also balances the tang of the cream cheese. Use unsalted butter so you can control the overall saltiness of the icing. Like the cream cheese, it should be softened to room temperature for easy blending.
Powdered Sugar
Also known as confectioners’ sugar, this is what gives your icing its sweetness and smooth, fluffy texture. It dissolves easily and adds volume. Sift the powdered sugar beforehand if it’s clumpy, especially if you want an ultra-smooth result. You can adjust the amount slightly depending on how sweet or thick you want your icing.
Vanilla Extract
Vanilla rounds out the flavors and adds warmth and depth to the icing. Even a small amount makes a noticeable difference. Use pure vanilla extract if possible for the best taste, though imitation will work in a pinch.
Optional Add-Ins
If you want to get creative, there are a few extras you can include. A pinch of cinnamon or nutmeg can add warmth that complements pumpkin cake perfectly. For an autumn twist, try a splash of maple syrup or a bit of orange zest. These additions aren’t necessary, but they can give your icing a unique and seasonal flair.
Equipment Needed
Making the perfect cream cheese icing for your pumpkin cake requires a few essential kitchen tools. Fortunately, you don’t need any fancy equipment to achieve smooth, fluffy frosting. Let’s go through what you’ll need to ensure your icing turns out just right.
Stand Mixer or Hand Mixer
While you can certainly make cream cheese icing by hand, a stand mixer or hand mixer is highly recommended for the best texture. A stand mixer, like a KitchenAid, will allow you to mix the ingredients quickly and efficiently, ensuring a smooth and creamy consistency.
If you don’t have a stand mixer, a hand mixer will work just as well. The key is to use an electric mixer to beat the cream cheese and butter until they’re light and fluffy, which helps to avoid lumps in your icing.
Mixing Bowl
A medium or large mixing bowl is needed to combine all the ingredients. A stainless steel or glass bowl is best, as these materials allow for easy mixing and don’t react with the ingredients.
Make sure the bowl is large enough to accommodate the cream cheese, butter, powdered sugar, and any additional ingredients, as this helps in keeping things neat while you mix.
Spatula or Spoon
You’ll need a spatula to scrape down the sides of your bowl during mixing. This ensures that everything is evenly incorporated, especially when you’re adding powdered sugar.
A spatula is also handy for spreading the icing onto the pumpkin cake once it’s prepared. If you’re using a hand mixer, a spoon will help you get the mixture started before the beaters come into play.
Sifter or Fine Mesh Strainer
If your powdered sugar has clumps or you want to ensure a silky smooth texture, using a sifter or fine mesh strainer is a great idea. Sifting the powdered sugar before adding it to the mixing bowl will prevent any lumps from forming in your icing and ensures that it will be fluffy and smooth.
Measuring Cups and Spoons
Accurate measurements are essential for getting the perfect consistency and taste for your cream cheese icing. Use measuring cups for the cream cheese and butter and measuring spoons for the vanilla extract and any optional add-ins like cinnamon or maple syrup. This ensures your icing will have the right balance of flavors and texture.
Plastic Wrap or Parchment Paper (Optional)
If you plan to store your icing or need to chill it briefly before spreading, you may want to cover it with plastic wrap or parchment paper. This helps keep the surface from drying out. If you plan to make your icing ahead of time, covering it ensures it stays fresh in the fridge until you’re ready to use it.
Instructions Step by Step
Making cream cheese icing for pumpkin cake is a simple process, and with just a few easy steps, you’ll have a smooth, creamy frosting that perfectly complements your cake. Follow these instructions to achieve the perfect balance of sweetness and tanginess in your icing.
Step 1: Prepare Your Ingredients
Start by ensuring that all of your ingredients are at room temperature. This is essential for achieving a smooth and lump-free icing. Take the cream cheese and butter out of the fridge about 30 minutes before you begin. Softened butter and cream cheese blend together more easily, giving you the best texture.
Measure out all of your ingredients: 8 oz. of cream cheese, 1/2 cup of unsalted butter, 3-4 cups of powdered sugar (depending on your desired sweetness and consistency), and 1 tsp of vanilla extract.
Step 2: Beat the Cream Cheese and Butter Together
In a large mixing bowl, combine the softened cream cheese and butter. Using a stand mixer or hand mixer, beat the two ingredients on medium speed until they are smooth, creamy, and fully combined. This step is crucial for getting rid of any lumps and achieving a fluffy texture. It should take about 2-3 minutes of mixing. The mixture should be light and airy by the time you’re done.
Step 3: Add Vanilla Extract
Once the cream cheese and butter are fully blended, add the vanilla extract. This step adds depth to the flavor of your icing, balancing the sweetness and tang. Mix it in for another 30 seconds until fully incorporated. At this point, you’ll start to notice the flavor coming together.
Step 4: Gradually Add Powdered Sugar
Now it’s time to add the powdered sugar. Start by adding 1 cup of powdered sugar at a time. Use a low speed on your mixer to avoid a powdered sugar cloud. After each addition, beat the mixture until smooth. Gradually adding the powdered sugar ensures the icing doesn’t become too thick or lumpy. Once all the sugar is incorporated, taste the icing and see if it’s sweet enough for your liking. If not, you can add a little more, but don’t overdo it, as it can affect the consistency.
Step 5: Adjust the Consistency
After all the powdered sugar is mixed in, you may find that the icing is too thick for your liking. If that’s the case, add a small amount of milk or heavy cream (about 1-2 tablespoons at a time) and mix it in until the icing reaches your desired consistency. If you want a thicker icing for piping or a more spreadable one, you can adjust by adding a little more powdered sugar or liquid as needed.
Step 6: Check for Smoothness
Once everything is mixed, give the icing a final check. It should be smooth, light, and fluffy. If you see any lumps, you can use a spatula to gently stir and smooth them out.
A good tip is to use a rubber spatula to scrape the sides of the bowl to ensure that every bit of cream cheese and sugar is incorporated. At this point, the icing should have a soft, spreadable consistency that will spread easily over your pumpkin cake.
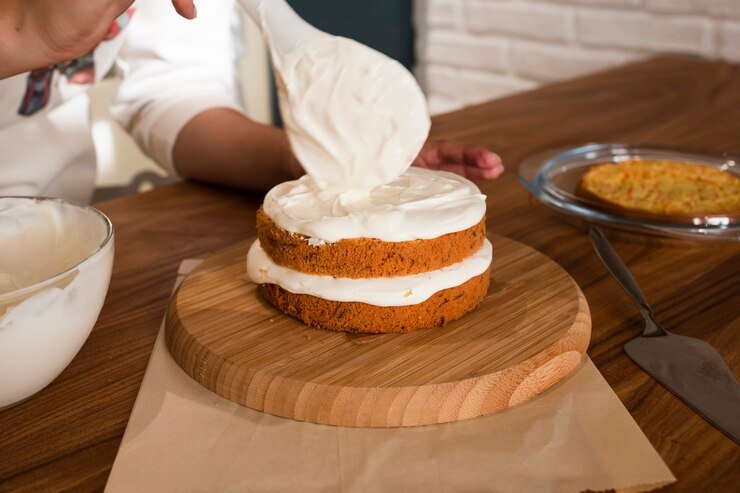
Step 7: Frost the Pumpkin Cake
Now that your cream cheese icing is ready, it’s time to frost your pumpkin cake. Make sure your pumpkin cake has cooled completely before applying the icing. If you frost the cake while it’s still warm, the icing may melt and slide off. Use an offset spatula or a butter knife to spread a generous layer of icing on top of the cake, starting from the center and working your way out. You can also pipe the icing onto the cake if you prefer a decorative look.
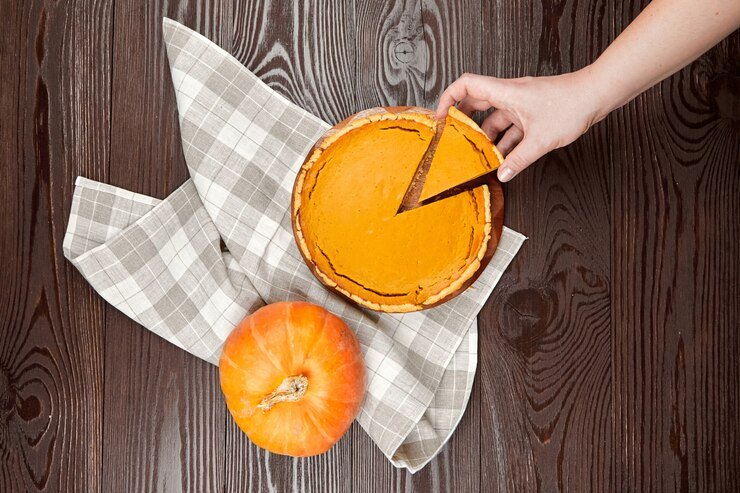
Step 8: Enjoy!
Once your cake is frosted, you’re ready to enjoy the delicious combination of pumpkin cake and creamy, tangy icing. Slice it up, serve, and savor the flavors! If you have any leftover icing, store it in an airtight container in the refrigerator for up to 3-4 days. It can be reused for other cakes, cupcakes, or even as a dip for fresh fruit.
Tips for Best Results
To achieve the best possible cream cheese icing for your pumpkin cake, a few tips can make all the difference. These little tricks will help you get a smooth, creamy, and flavorful icing that complements your cake perfectly. Follow these tips for a flawless result every time.
Use Room Temperature Ingredients
The key to smooth, lump-free cream cheese icing is using room temperature ingredients. Both the cream cheese and butter should be softened before mixing. Cold ingredients can lead to a lumpy or uneven texture, making it difficult to achieve the fluffy consistency you want.
Leave your butter and cream cheese out for at least 30 minutes before you start preparing the icing, or microwave them for a few seconds to soften them quickly. This simple step ensures that the ingredients will blend together effortlessly.
Sift the Powdered Sugar
Sifting your powdered sugar before adding it to the mixture is a great way to prevent lumps from forming in the icing. If your powdered sugar is not sifted, it can create clumps that are hard to break up and can result in a grainy texture.
By sifting it, you ensure a smooth, velvety finish for your icing. A fine mesh strainer or a sifter will work perfectly for this task.
Beat the Cream Cheese and Butter Well
To get the smoothest cream cheese icing, it’s essential to beat the cream cheese and butter together for a few minutes. Use a stand mixer or hand mixer to ensure you get enough air into the mixture, making it light and fluffy.
Don’t rush this step; make sure the cream cheese and butter are fully incorporated and smooth before moving on to the next step. This helps in achieving the desired consistency for your icing.
Add Powdered Sugar Gradually
Instead of adding all the powdered sugar at once, gradually add it in increments. Start with one cup, then beat until it’s fully incorporated before adding the next cup. This prevents the icing from becoming too thick or too sweet too quickly.
By adding the sugar gradually, you can better control the sweetness and consistency of the icing. You can always adjust the amount of powdered sugar based on your preference.
Adjust the Consistency to Your Liking
Depending on whether you want a spreadable or pipeable icing, adjusting the consistency is essential. If your icing is too thick, add a tablespoon of milk or heavy cream at a time until it reaches the desired consistency.
For a thicker consistency, add more powdered sugar. It’s all about finding the balance that works for you, so don’t hesitate to make small adjustments as needed.
Chill the Icing for Better Texture
If you find that your cream cheese icing is too soft for spreading or piping, you can refrigerate it for a short time. Chill the icing in the fridge for about 15-20 minutes to firm it up. This is especially helpful if you’re using it for piping intricate designs on your pumpkin cake. Just make sure to mix it well after refrigerating to restore the smooth texture before using it.
Flavor Variations
While classic cream cheese icing is a crowd-pleaser on pumpkin cake, there are plenty of creative flavor variations you can try to elevate your dessert. These simple tweaks can enhance the flavor profile and offer a fresh twist to this already delicious frosting. Whether you prefer a touch of spice, sweetness, or even a bit of tang, here are some exciting ways to customize your cream cheese icing.
Add Cinnamon or Nutmeg for Extra Spice
If you’re a fan of fall spices, adding cinnamon or nutmeg to your cream cheese icing is an excellent way to bring in more warmth and depth. A teaspoon of cinnamon or a pinch of nutmeg will complement the flavors of the pumpkin cake beautifully.
You can even combine both spices for a richer, more aromatic icing that ties in perfectly with the pumpkin flavor. This variation gives your icing a cozy, spiced finish that’s perfect for autumn desserts.
Infuse the Icing with Maple Syrup
For a deliciously sweet and slightly earthy twist, try adding a tablespoon or two of pure maple syrup to your cream cheese icing. Maple syrup pairs wonderfully with pumpkin and adds a natural sweetness that enhances the overall flavor.
Not only will it give the icing a beautiful golden hue, but it will also make it taste like something out of a fall-themed bakery. Be sure to adjust the powdered sugar quantity slightly if needed, as maple syrup adds some moisture to the icing.
Try Orange Zest for a Citrus Touch
Citrus zest is a fantastic way to cut through the richness of the cream cheese icing and give it a fresh, zesty kick. Adding orange zest, in particular, complements the pumpkin flavor perfectly, offering a light, refreshing balance to the dense, spiced cake.
Simply grate the zest of one orange and mix it into your icing for a burst of citrus flavor. It brightens up the frosting and adds a fragrant, aromatic quality that pairs perfectly with the pumpkin cake.
Incorporate Brown Sugar for Caramel Notes
If you love the warm, comforting flavor of caramel, brown sugar can be a game-changer for your cream cheese icing. Swap some of the powdered sugar for an equal amount of light or dark brown sugar to introduce a rich, molasses-like flavor.
The brown sugar will add a subtle caramel undertone that perfectly complements the pumpkin cake. Be sure to mix the brown sugar well to ensure smoothness, as it can sometimes have clumps.
Add a Splash of Bourbon or Rum
For a more indulgent variation, you can add a splash of bourbon or rum to your cream cheese icing. This addition brings out a depth of flavor with a slight boozy kick, making it a perfect pairing for special occasions or holiday gatherings. Just a teaspoon or two will suffice to infuse the icing with that warm, rich flavor. This variation adds sophistication and is sure to impress guests who enjoy a bit of extra flair in their desserts.
Make-Ahead and Storage Tips
Making cream cheese icing for pumpkin cake in advance can save you time on the day you plan to serve your dessert. It’s easy to prepare, store, and refrigerate ahead of time, ensuring that your frosting is fresh and ready whenever you need it. Proper storage is key to maintaining the flavor and texture of your icing, so here are some essential tips to help you store and use your icing effectively.
How Far in Advance Can I Make Cream Cheese Icing?
You can make cream cheese icing for pumpkin cake up to two days in advance. Prepare the icing as directed and store it in an airtight container in the refrigerator. This allows the flavors to meld together and makes the icing even more flavorful when you’re ready to use it. Just be sure to give it a good stir before applying it to your pumpkin cake to ensure it’s smooth and spreadable.
Storing Leftover Cream Cheese Icing
If you have any leftover icing after frosting your pumpkin cake, it’s important to store it properly to maintain its freshness. Transfer the leftover icing to an airtight container and place it in the refrigerator. It will stay good for up to 3-4 days. Make sure the container is sealed tightly to prevent the icing from absorbing any odors from the fridge, which could affect the taste.
Freezing Cream Cheese Icing
If you want to make your cream cheese icing even further in advance, freezing is a great option. You can freeze cream cheese icing for up to 3 months. Simply transfer the icing into a freezer-safe container or a resealable freezer bag.
Be sure to label the container with the date so you can easily track how long it’s been stored. When you’re ready to use it, thaw it in the refrigerator overnight, then give it a good mix to restore its smooth texture before spreading it on your pumpkin cake.
Thawing and Reusing Icing
When thawing your frozen cream cheese icing, it’s essential to let it thaw slowly in the fridge to prevent it from becoming too runny. Once fully thawed, stir the icing thoroughly to reintroduce the smooth, creamy texture.
If it seems a little too thick after thawing, you can add a tiny splash of milk or cream to loosen it up. Keep in mind that while frozen icing retains its flavor well, the texture may slightly change after thawing, so it’s important to adjust as needed.
Tips for Fresh Frosting
If you plan to store your frosting for a long time before use, consider making it fresh on the day of serving. While making it ahead is certainly convenient, fresh frosting will give your pumpkin cake the best texture and flavor.
If you’re making it in advance, keep in mind that you can also prep the frosting ingredients (soften cream cheese and butter) and store them in the fridge until you’re ready to mix them. This ensures a smooth, fresh result.
Frequently Asked Questions
How Do I Make Cream Cheese Icing for Pumpkin Cake?
To make the perfect cream cheese icing for pumpkin cake, you’ll need cream cheese, butter, powdered sugar, vanilla extract, and a pinch of salt. Start by softening the cream cheese and butter to room temperature. Beat them together until smooth and creamy.
Gradually add the powdered sugar and mix until it’s fully incorporated. Stir in the vanilla extract and salt, and continue mixing until the icing is smooth and fluffy. This simple recipe yields the ideal consistency to spread over your pumpkin cake!
Can I Make Cream Cheese Icing for Pumpkin Cake in Advance?
Yes, you can make cream cheese icing for pumpkin cake up to two days in advance. Simply store it in an airtight container in the refrigerator. When you’re ready to use it, allow the icing to come to room temperature and give it a good stir. This allows the flavors to develop, and the icing will still be just as smooth and delicious when applied to your cake.
How Do I Fix Runny Cream Cheese Icing?
If your cream cheese icing for pumpkin cake turns out runny, it could be due to too much moisture in the cream cheese or butter. To fix this, add a little more powdered sugar, a tablespoon at a time, until the icing thickens to your desired consistency. If you prefer a thicker texture, you can also chill the icing in the refrigerator for about 15-20 minutes before frosting your cake.
Can I Add Flavors to the Cream Cheese Icing?
Yes, you can customize the flavor of your cream cheese icing by adding spices or other ingredients. To enhance the fall flavors of your pumpkin cake, consider adding ground cinnamon, nutmeg, or even a touch of maple syrup to your icing. Orange zest or vanilla extract also work beautifully and can provide a subtle but delicious twist. Play around with these variations to create a flavor profile that complements your pumpkin cake perfectly.
How Should I Store Leftover Cream Cheese Icing?
Leftover cream cheese icing for pumpkin cake should be stored in an airtight container in the refrigerator. It will stay fresh for up to 3-4 days. When you’re ready to use it again, bring it to room temperature and stir it to restore its smooth texture. If you’ve frozen the icing, it can last up to 3 months in the freezer, and you’ll just need to thaw it in the refrigerator overnight before using it.
Conclusion
cream cheese icing for pumpkin cake is the perfect finishing touch for this fall favorite. With its rich, smooth texture and subtle tang, it complements the warmth and sweetness of the pumpkin cake wonderfully. Whether you make it ahead or prepare it fresh, the simple ingredients and easy preparation ensure a delicious result every time.
Customize it with spices or other flavorings to suit your taste, and enjoy a beautifully frosted cake that will wow your family and friends. With the right storage and a few simple tips, you can keep your cream cheese icing fresh for multiple uses, making it a convenient and versatile addition to your baking repertoire.