

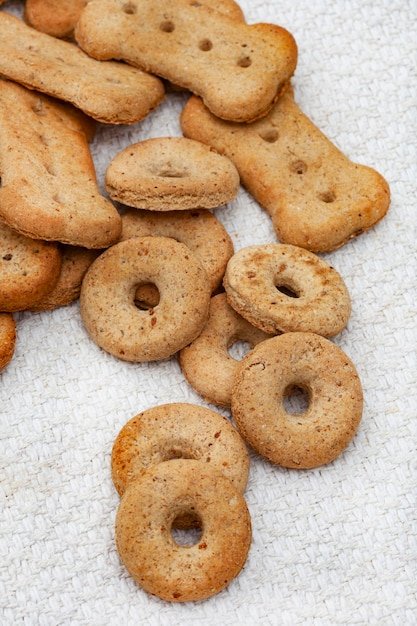
Looking for a fun and flavorful way to treat your pup? You’ve come to the right place. Bacon dog biscuits are a tail-wagging favorite for dogs of all sizes—and making them at home is easier than you might think. Whether you’re baking for a special occasion or just want to spoil your furry friend with something homemade, these recipes are packed with love and dog-approved ingredients.
In this guide, we’ve rounded up the 20 Best Bacon Dog Biscuits Recipes that are both simple to make and packed with savory goodness. From classic crunchy treats to soft, chewy bites, there’s something here for every dog’s taste and texture preference. You’ll also find recipes that cater to dietary needs, using wholesome ingredients like oats, sweet potatoes, and even peanut butter.
If you want to ditch store-bought snacks and try something fresh from your kitchen, these bacon biscuits are a delicious place to start. Let’s get baking!
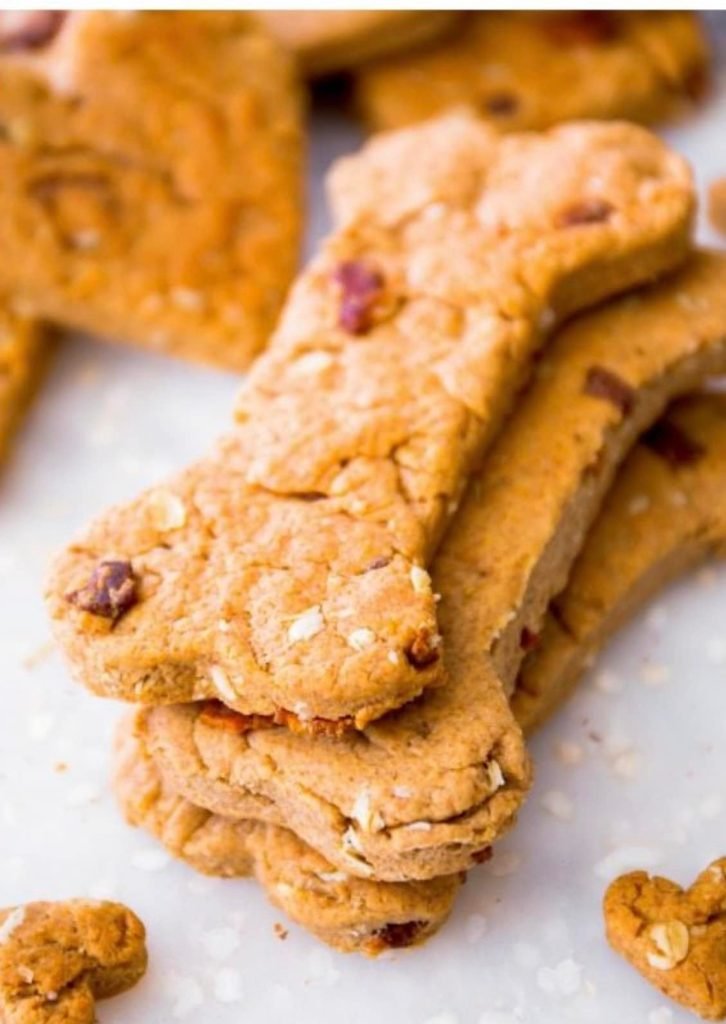
1. Classic Bacon Biscuits
There’s nothing quite like the smell of freshly baked bacon treats wafting through the kitchen—especially when they’re made just for your dog. These classic bacon biscuits are crunchy, savory, and filled with ingredients that are both safe and satisfying for pups. Whether you’re a seasoned baker or a complete beginner, this simple recipe is a great way to create homemade love in the form of treats.
Follow this step-by-step guide to make a batch of delicious, dog-friendly bacon biscuits that your pup will go crazy for.
Ingredients You’ll Need:
Before you start baking, gather these simple ingredients:
- 1 cup cooked bacon, finely chopped (no seasoning or added sugars)
- 2 ½ cups whole wheat flour (or oat flour for a gluten-free version)
- 1 egg
- ½ cup low-sodium chicken broth or water
- ¼ cup unsweetened applesauce (for moisture and natural sweetness)
- Optional: 1 tablespoon dried parsley (helps with doggie breath)
Make sure the bacon is cooked thoroughly and crumbled into small pieces. You want it to blend well into the dough.
Step 1: Preheat and Prep
Start by preheating your oven to 350°F (175°C). Line a baking sheet with parchment paper or a silicone baking mat for easy cleanup and non-stick baking.
Step 2: Mix Dry Ingredients
In a large mixing bowl, combine the whole wheat flour and parsley (if using). Stir them together until evenly distributed. The flour provides the structure for the biscuit, while the parsley gives a little freshness.
Step 3: Add the Wet Ingredients
In a separate bowl, whisk together the egg, chicken broth, and unsweetened applesauce. Once combined, slowly pour the wet mixture into the dry ingredients while stirring with a wooden spoon or spatula.
This part might get a bit sticky—that’s a good sign! If the dough feels too dry, add a tablespoon of broth at a time until it holds together. If it’s too wet, sprinkle in a little more flour.
Step 4: Fold in the Bacon
Once your dough has a good, firm consistency, fold in the crumbled bacon pieces. Distribute them evenly so that every bite has some bacon goodness. Be sure not to over-mix—just enough to work the bacon into the dough.
Your dog might already be hovering in the kitchen at this point!
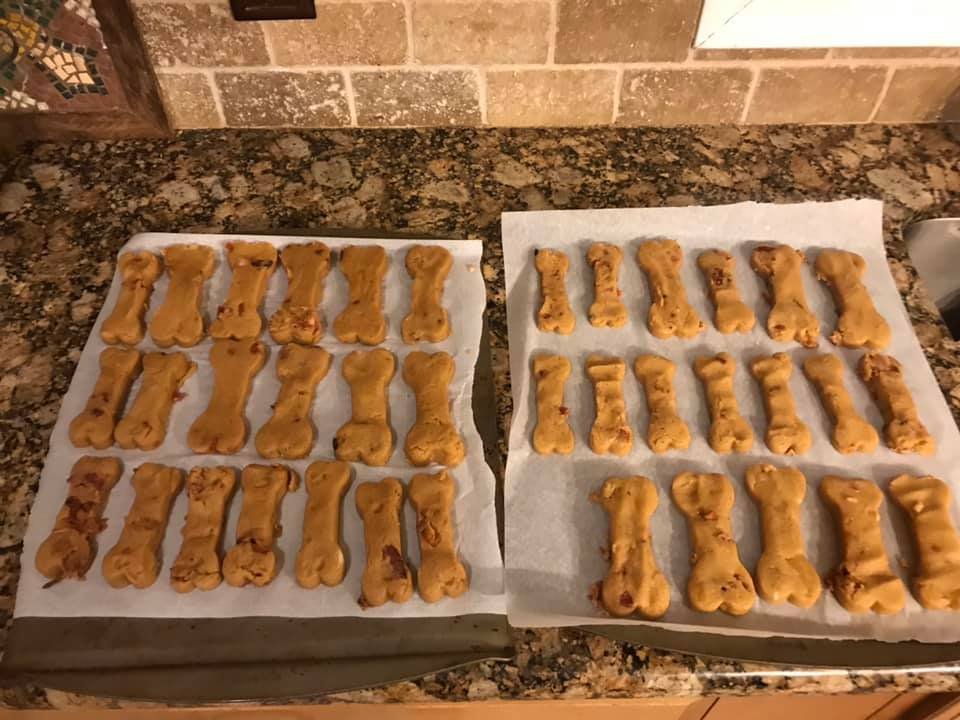
Step 5: Roll Out the Dough
Dust a clean surface with a little flour and roll out the dough to about ¼ inch thick. Use your favorite dog bone cookie cutter—or any fun shape you like—to cut out the biscuits.
If you don’t have a cutter, you can simply slice the dough into squares or rectangles using a knife or pizza cutter. Your dog won’t mind the shape, we promise.
Step 6: Bake to Perfection
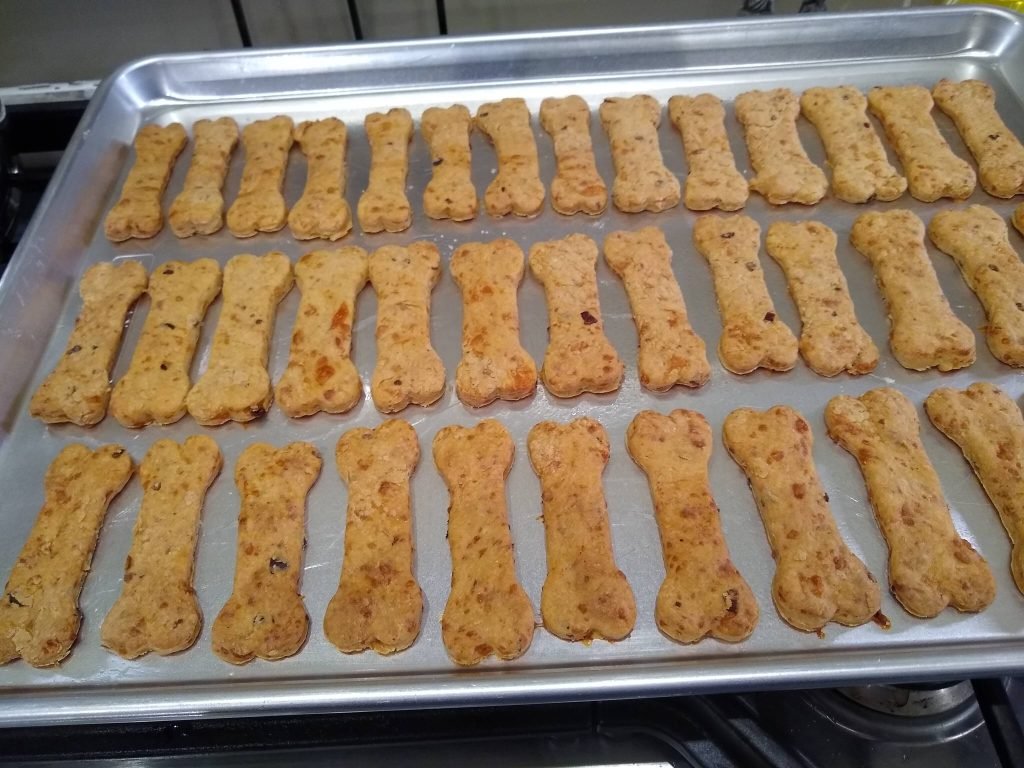
Place the biscuits onto your lined baking sheet, making sure they don’t touch. Bake in the preheated oven for 18 to 22 minutes, or until the edges are golden brown.
For extra crunch, turn off the oven and let the biscuits sit inside for another 1–2 hours as the oven cools. This dries them out further and gives them a crispier texture dogs love.
Step 7: Cool and Store
Remove the biscuits from the oven and let them cool completely on a wire rack. Once cool, transfer them to an airtight container or a zip-top bag. Store at room temperature for up to 7 days, or refrigerate for up to 2 weeks. You can also freeze them for longer storage—just thaw a few when needed.
Making your own dog treats is not just rewarding—it’s also a great way to control what goes into your pup’s belly. This classic bacon biscuit recipe is perfect for everyday rewards, training sessions, or just showing your dog a little extra love. Once you see how easy it is to make these at home, you may never go back to store-bought treats again.
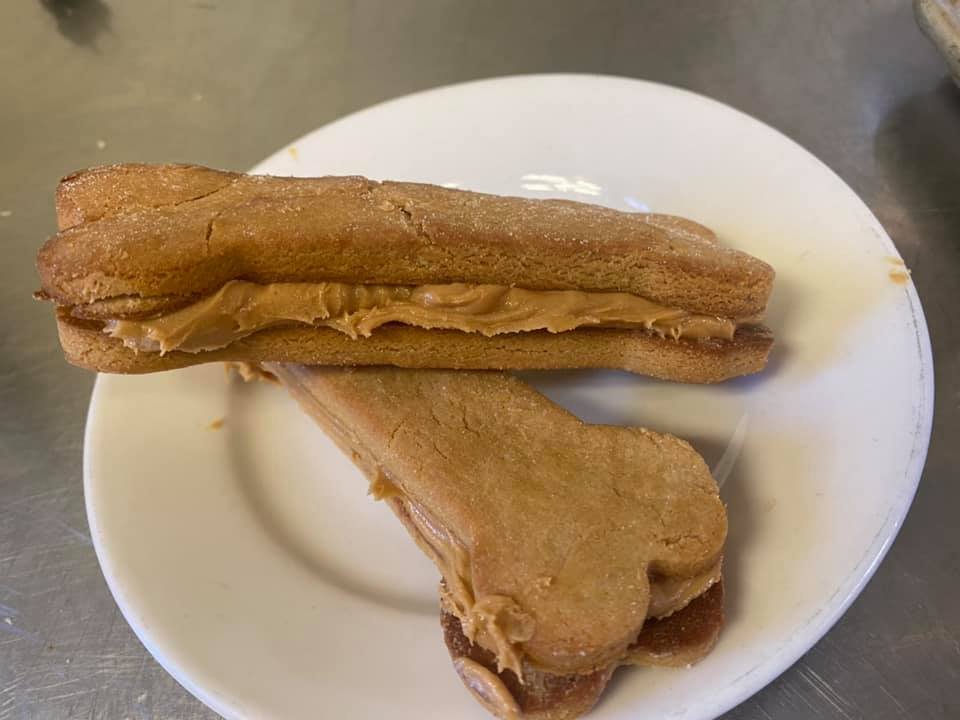
2. Peanut Butter Bacon Biscuits
Peanut butter and bacon—two flavors dogs go absolutely nuts for. Combine them into a homemade treat, and you’ve got a winning biscuit your pup will beg for. These peanut butter bacon biscuits are crunchy, packed with protein, and super simple to whip up. The best part? They’re made with wholesome, dog-safe ingredients you probably already have in your kitchen.
If you’ve been wanting to spoil your furry friend with something special, this step-by-step guide will walk you through the process of baking peanut butter bacon biscuits from scratch.
Ingredients You’ll Need:
Gather these dog-friendly ingredients before you begin:
- 1 cup all-natural peanut butter (no xylitol, low or no salt)
- ¾ cup cooked bacon, finely chopped
- 2 cups whole wheat flour (or oat flour for gluten-free option)
- ¼ cup rolled oats
- 1 egg
- ½ cup water (or low-sodium chicken broth for extra flavor)
- Optional: 1 tablespoon honey (for mild sweetness – skip if avoiding sugar)
Be sure to double-check that your peanut butter doesn’t contain xylitol, an artificial sweetener that is toxic to dogs.
Step 1: Preheat the Oven
Start by preheating your oven to 350°F (175°C). Line a baking sheet with parchment paper or a silicone baking mat to prevent sticking and make cleanup a breeze.
Step 2: Mix the Dry Ingredients
In a large mixing bowl, combine the whole wheat flour and rolled oats. Stir to blend them evenly. These ingredients will give the biscuits their structure and a satisfying crunch.
If your pup prefers softer treats, you can reduce the oats slightly or soak them briefly in warm water before adding.
Step 3: Blend the Wet Ingredients
In a separate bowl, mix together the peanut butter, egg, water (or broth), and honey (if using). Stir until you get a smooth, thick mixture. The peanut butter acts as the main binder and flavor base, while the egg helps the biscuits hold their shape.
Step 4: Combine and Create Dough
Gradually pour the wet mixture into the bowl of dry ingredients, mixing as you go. Stir with a spoon or use your hands until a stiff dough forms. If the dough is too dry or crumbly, add water one tablespoon at a time. If it’s too sticky, sprinkle in a bit more flour.
Step 5: Add the Bacon
Fold in the chopped bacon pieces last to avoid overmixing. Try to evenly distribute the bacon throughout the dough so your pup gets a bit in every bite. You might notice some tail wagging already!
Step 6: Roll Out the Dough
Lightly flour a clean surface and roll out the dough to about ¼ inch thickness. Use cookie cutters in fun shapes like bones, hearts, or circles to cut out your biscuits. If you don’t have cookie cutters, slicing the dough into squares with a knife works just as well.
The goal is to keep them all relatively uniform in size so they bake evenly.
Step 7: Bake the Biscuits
Place the cut-out biscuits on your prepared baking sheet, spacing them slightly apart. Bake in the preheated oven for 18 to 22 minutes, or until the biscuits are golden brown on the edges and firm to the touch.
For an extra crunchy treat, let the biscuits cool in the oven after turning it off. Just crack the door open and leave them inside for 1 to 2 hours as the oven cools naturally.
Step 8: Cool and Store
Once baked, transfer the biscuits to a wire rack to cool completely. Letting them cool ensures they crisp up nicely and stay fresh longer in storage.
Store your finished biscuits in an airtight container at room temperature for up to one week, or in the refrigerator for up to two weeks. For longer storage, freeze them in batches and thaw as needed.
Step 9: Treat Your Pup!
Give one to your dog as soon as they’ve cooled, and watch their tail wag with pure joy. These peanut butter bacon biscuits are perfect for training rewards, special occasions, or just because your pup deserves something delicious and made with love.
Making dog treats at home isn’t just more cost-effective than store-bought—it gives you peace of mind knowing exactly what’s in your dog’s food. Plus, it’s a fun and rewarding activity that brings you closer to your furry best friend.
3. Sweet Potato Bacon Biscuits
Sweet potatoes are a nutritional powerhouse for dogs—packed with fiber, vitamins, and natural sweetness that pups love. Add in a bit of crispy bacon, and you’ve got a biscuit that hits all the right notes. These homemade sweet potato bacon biscuits are easy to make, dog-safe, and full of wholesome goodness. Perfect for training, treat time, or as a special reward for your four-legged friend.
Follow this detailed step-by-step guide to whip up a batch of delicious, healthy treats your dog will go crazy for.
Ingredients You’ll Need:
Here’s everything you’ll need to make a batch of sweet potato bacon biscuits:
- 1 cup mashed cooked sweet potato (plain, no butter or seasoning)
- ¾ cup cooked bacon, finely chopped
- 2 ½ cups whole wheat flour (or oat flour for a gluten-free version)
- 1 egg
- ¼ cup water or low-sodium chicken broth
- Optional: 1 tablespoon ground flaxseed or dried parsley for added nutrition
Make sure the sweet potatoes are fully cooked and mashed until smooth before adding them to the dough.
Step 1: Preheat the Oven
Set your oven to 350°F (175°C) and line a baking sheet with parchment paper or a silicone baking mat. This will prevent the biscuits from sticking and make cleanup super easy.
Step 2: Prepare the Sweet Potato
If you haven’t already cooked the sweet potatoes, you can either roast or boil them. Roasting brings out more flavor, while boiling is quicker. Once cooked, mash the sweet potato well with a fork or potato masher and let it cool to room temperature.
Avoid adding any salt, butter, or seasoning—your dog will love them plain.
Step 3: Mix the Dry Ingredients
In a large bowl, combine the whole wheat flour and ground flaxseed or parsley (if using). Stir together evenly. The flour forms the base of your dough, while flaxseed adds a healthy omega-3 boost.
Step 4: Add the Wet Ingredients
In another bowl, mix the mashed sweet potato, egg, and water or broth. Stir until the mixture is smooth and well blended. This will act as the main binder and provide moisture and flavor.
Step 5: Combine Wet and Dry Mixtures
Slowly pour the wet mixture into the dry ingredients. Stir everything together until a dough begins to form. It should be firm but pliable—easy to roll without crumbling or sticking to your hands.
If the dough feels too dry, add a splash of water or broth. If it’s too sticky, sprinkle in more flour a little at a time.
Step 6: Add the Bacon
Fold in the chopped bacon pieces gently, making sure they’re evenly distributed throughout the dough. Bacon adds irresistible flavor and a chewy texture your dog will love.
Be sure to use plain, cooked bacon—no seasoning, sugar, or added ingredients.
Step 7: Roll Out and Shape the Dough
On a lightly floured surface, roll the dough out to about ¼ inch thickness. Use cookie cutters in fun shapes (like bones or hearts), or simply slice into squares or rectangles.
Uniform shapes help them bake evenly and make portioning easier based on your dog’s size.
Step 8: Bake to Perfection
Place your shaped biscuits onto the prepared baking sheet. Bake for 20 to 25 minutes, or until the edges are golden and the centers feel firm.
For extra crunch, leave the biscuits in the oven after it’s turned off, with the door slightly ajar. Let them sit for an hour or so to dry out and harden.
Step 9: Cool and Store the Biscuits
Remove the biscuits from the oven and let them cool completely on a wire rack. Once cooled, store them in an airtight container at room temperature for up to one week, or refrigerate for up to two weeks.
If you’ve made a big batch, you can also freeze them for up to three months—just thaw before serving.
Step 10: Serve and Watch the Tail Wag
Now comes the best part—sharing your homemade treats with your pup. These sweet potato bacon biscuits are flavorful, healthy, and made with love. Your dog will not only taste the goodness, but feel the love behind each crunchy bite.
Homemade dog biscuits are a great way to avoid fillers, artificial preservatives, and questionable ingredients. Plus, they make your kitchen smell amazing. Once you see how easy it is to make these sweet potato bacon treats, you’ll want to bake them on repeat.

4. Pumpkin Bacon Biscuits
Pumpkin is more than just a fall favorite—it’s a nutritious, dog-safe ingredient that helps with digestion and adds a naturally sweet, earthy flavor to homemade treats. When you mix it with the savory crunch of bacon, you get a biscuit that’s both healthy and drool-worthy. These pumpkin bacon biscuits are easy to make, filled with simple ingredients, and perfect for spoiling your pup year-round.
Ready to get started? Here’s a detailed, step-by-step guide to making these irresistible pumpkin bacon biscuits at home.
Start by gathering these dog-friendly ingredients:
- 1 cup pure pumpkin puree (unsweetened, no spices)
- ¾ cup cooked bacon, chopped into small bits
- 2 ½ cups whole wheat flour (or oat flour for a gluten-free version)
- 1 egg
- ¼ cup water or low-sodium chicken broth
- Optional: 1 tablespoon ground flaxseed or turmeric for added nutrition
Be sure to use plain pumpkin puree—not pumpkin pie filling, which contains sugar and spices unsafe for dogs.
Step 1: Preheat Your Oven
Begin by preheating your oven to 350°F (175°C). Line a baking sheet with parchment paper or use a silicone baking mat to make sure your biscuits don’t stick.
Step 2: Cook and Chop the Bacon
If you haven’t already, cook the bacon until it’s crisp. Once cooled, chop it into small, bite-sized pieces. Using crispy bacon helps distribute the flavor throughout the dough and adds a crunchy texture dogs love.
Make sure to use plain bacon with no extra seasonings, sugars, or glazes.
Step 3: Mix the Dry Ingredients
In a large mixing bowl, combine the whole wheat flour and any optional dry add-ins like flaxseed or turmeric. Mix thoroughly to ensure everything is evenly distributed.
Turmeric adds anti-inflammatory benefits, while flaxseed gives an omega-3 and fiber boost—great for your pup’s coat and digestion.
Step 4: Blend the Wet Ingredients
In a separate bowl, whisk together the pumpkin puree, egg, and water or broth. Stir until the mixture is smooth. Pumpkin not only adds flavor but also provides fiber and important nutrients like beta-carotene and vitamin A.
If your dog has a sensitive tummy, pumpkin is known to support healthy digestion.
Step 5: Combine Wet and Dry Ingredients
Slowly add the wet pumpkin mixture to the bowl of dry ingredients, stirring as you go. Mix until a thick, pliable dough forms. If the dough feels too dry or crumbly, add a little extra water. If it’s too sticky, sprinkle in a bit more flour.
It should be soft enough to roll but firm enough to hold its shape.
Step 6: Add the Bacon
Fold in the chopped bacon pieces until they’re well distributed throughout the dough. Bacon is the star of this treat—it adds rich flavor and a chewy surprise in every bite.
If your dog is a bacon fanatic, you can sprinkle a few extra bits on top of each biscuit before baking.
Step 7: Roll and Cut the Dough
Lightly flour your work surface and roll out the dough to about ¼ inch thickness. Use your favorite cookie cutters—bone shapes, pumpkins, or classic circles are all great. If you don’t have cutters, a knife or pizza cutter works just fine.
Aim for evenly sized biscuits to ensure they bake consistently.
Step 8: Bake the Biscuits
Place the cut-out biscuits on your prepared baking sheet, spacing them slightly apart. Bake in the preheated oven for 20 to 25 minutes, or until the edges are golden and the biscuits feel firm to the touch.
For extra crunch, turn off the oven and let the biscuits cool inside with the door slightly ajar. This helps them dry out fully and last longer.
Step 9: Cool and Store
Once baked, transfer the biscuits to a wire rack and allow them to cool completely. This helps them firm up and ensures safe storage.
Store cooled biscuits in an airtight container for up to 1 week at room temperature, 2 weeks in the fridge, or 3 months in the freezer. Just thaw before serving.
Step 10: Treat Your Pup!
Once the biscuits are cool, it’s time for a taste test. Offer one to your pup and watch their tail wag in approval. These pumpkin bacon biscuits are crunchy, flavorful, and made with love—everything a dog treat should be.
Homemade treats like these are a great way to avoid unnecessary additives and preservatives found in store-bought biscuits. Plus, baking for your dog is a fun way to bond and show them just how much you care.
With this easy recipe, you’ve got a go-to treat that’s both healthy and delicious. And let’s be honest—your dog will probably start recognizing the smell of pumpkin and bacon from the oven every time you bake a batch.

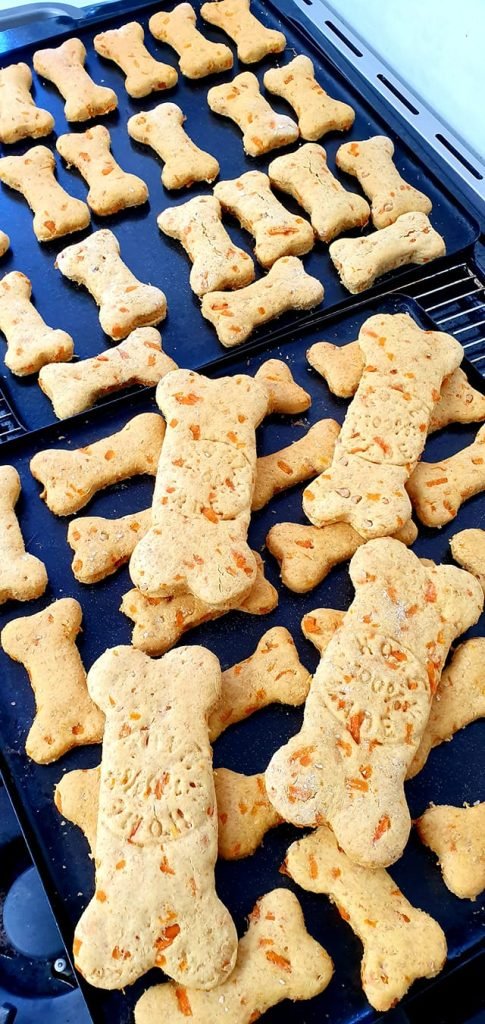
5. Carrot Bacon Biscuits
If you’re looking for a fun, healthy twist on homemade dog treats, these carrot bacon biscuits are the way to go. Carrots are rich in fiber and vitamins, especially beta-carotene, which is great for your dog’s eyes and immune system. Add crispy bacon into the mix, and you’ve got a treat that combines nutrition with tail-wagging flavor. These biscuits are simple to make, cost-effective, and sure to be a hit with your furry best friend.
Let’s walk through each step to whip up these tasty treats right in your kitchen.
Before getting started, gather the following:
- 1 cup finely grated carrots (peeled and raw or lightly steamed)
- ¾ cup cooked bacon, chopped into small pieces
- 2 ½ cups whole wheat flour (or oat flour for a gluten-free version)
- 1 egg
- ¼ cup water or low-sodium chicken broth
- Optional: 1 tablespoon parsley or ground flaxseed for added nutrition
Make sure to use plain, unsalted bacon and fresh carrots for the best flavor and nutrition.
Step 1: Preheat the Oven
Start by preheating your oven to 350°F (175°C). Line a baking sheet with parchment paper or use a silicone baking mat to prevent sticking and make cleanup easier.
Step 2: Cook and Prep the Bacon
If you haven’t already, cook the bacon until crispy. Drain it on a paper towel to remove excess grease, then chop it into small, dog-friendly bits.
Avoid using flavored or seasoned bacon—plain, cooked bacon is best for pups.
Step 3: Prepare the Carrots
Grate your carrots using a fine or medium grater. If your dog has trouble digesting raw veggies, you can lightly steam the carrots before grating. Just let them cool before mixing into the dough.
Carrots add natural sweetness, fiber, and vitamins to the biscuits—plus, they give the treats a pretty orange hue.
Step 4: Mix the Dry Ingredients
In a large mixing bowl, combine the whole wheat flour and optional flaxseed or parsley. Stir until everything is evenly distributed.
These dry ingredients create the base of your dough and add nutritional value without any fillers or preservatives.
Step 5: Combine the Wet Ingredients
In another bowl, whisk together the egg, grated carrots, and water or chicken broth until well blended. The carrots will act as a binder and natural flavor enhancer.
Use chicken broth for a savory boost if your dog prefers meatier flavors.
Step 6: Mix It All Together
Gradually pour the wet mixture into the bowl of dry ingredients, stirring as you go. Mix until a soft, slightly sticky dough forms. If the dough feels too dry, add a little more water or broth. If it’s too wet, sprinkle in a bit more flour.
The dough should hold together and be easy to roll out without falling apart.
Step 7: Add the Bacon
Fold in the chopped bacon pieces, making sure they’re evenly spread throughout the dough. This step is what takes the biscuits from healthy to downright irresistible.
Feel free to add a little extra bacon if you’re making these as high-value training treats.
Step 8: Roll and Cut the Dough
Lightly flour your surface and roll the dough out to about ¼ inch thickness. Use your favorite cookie cutters—bone shapes, stars, or even carrots—for a bit of fun. If you don’t have cutters, simply cut into small squares with a knife or pizza cutter.
Consistent sizing helps ensure even baking.
Step 9: Bake Until Golden
Place the cut biscuits on your prepared baking sheet, leaving a little space between each one. Bake for 20 to 25 minutes, or until the edges are golden and the centers are firm.
For extra-crispy treats, you can turn off the oven and let the biscuits sit inside as it cools with the door slightly open. This helps dry them out for a crunchy texture that stores longer.
Step 10: Cool and Store the Biscuits
Once the biscuits are done, transfer them to a wire rack and let them cool completely before serving. Proper cooling ensures they stay fresh and firm.
Store the cooled treats in an airtight container at room temperature for up to a week, or refrigerate for two weeks. You can also freeze them for up to three months—just thaw before giving them to your pup.

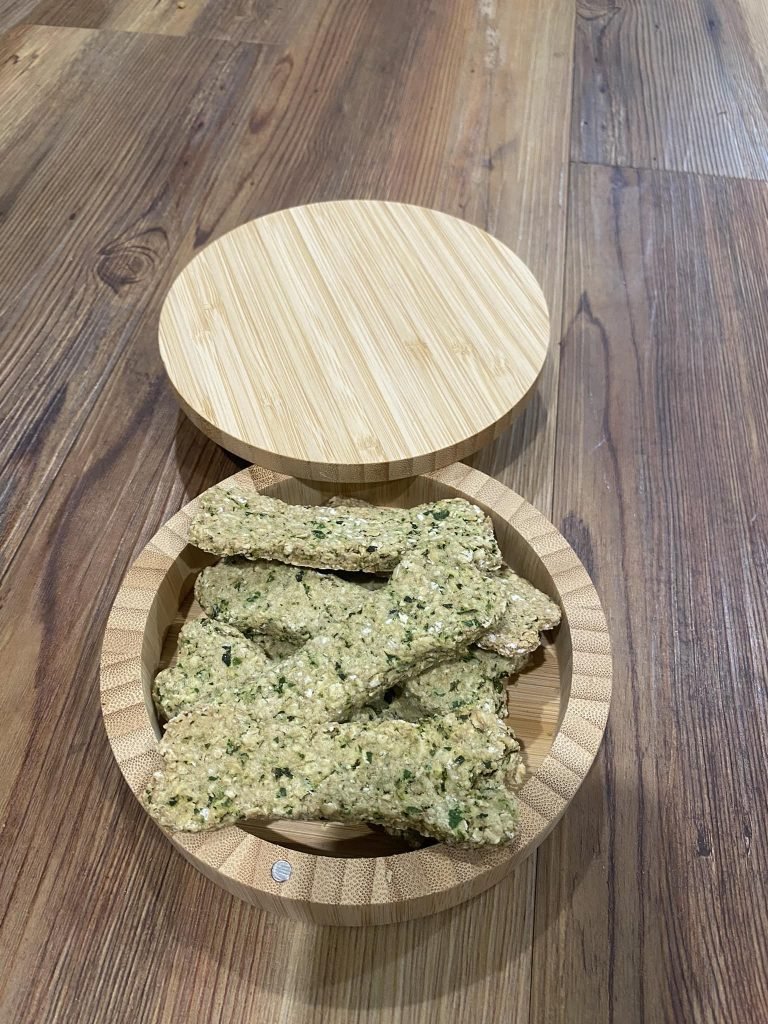
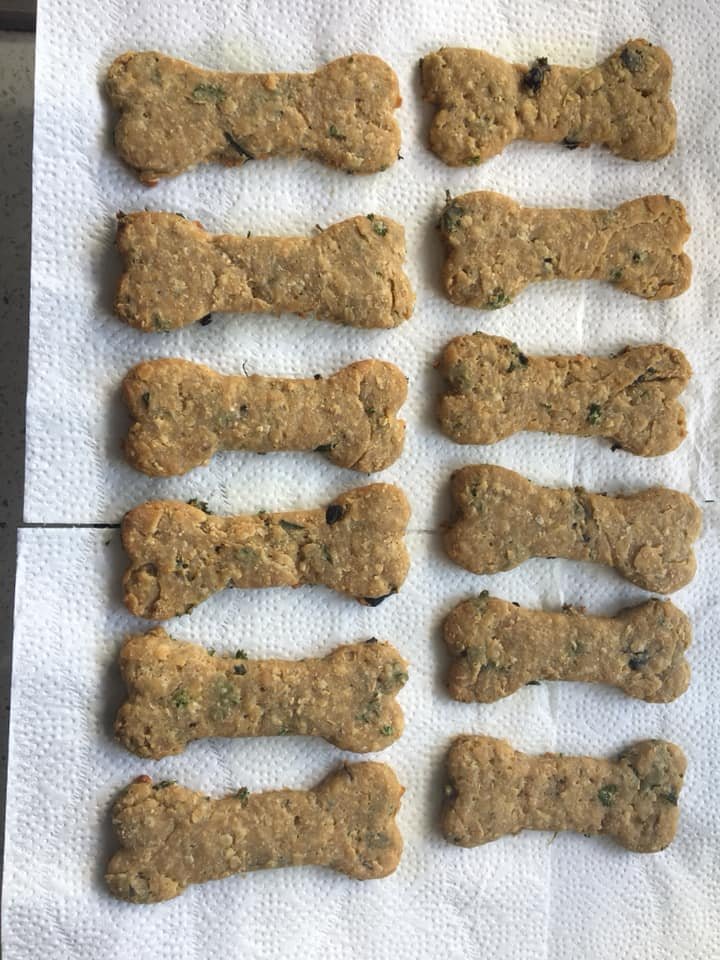
6. Spinach Bacon Biscuits
Looking for a way to sneak some greens into your dog’s diet without sacrificing flavor? Spinach bacon biscuits are the answer! These homemade treats combine the nutritional power of spinach with the irresistible crunch of crispy bacon. They’re easy to make, full of healthy goodness, and perfect for dogs who deserve a snack that’s as tasty as it is nourishing.
Follow this step-by-step guide to make spinach bacon biscuits your dog will drool over.
Ingredients You’ll Need:
Gather the following ingredients before you begin:
- 1 cup fresh spinach, finely chopped
- ¾ cup cooked bacon, chopped into small bits
- 2 ½ cups whole wheat flour (or oat flour for a grain-free version)
- 1 egg
- ¼ cup water or low-sodium chicken broth
- Optional: 1 tablespoon nutritional yeast or parsley for added flavor
Use fresh, organic spinach if possible, and always go with plain, unsalted bacon for your pup’s safety.
Step 1: Preheat the Oven
Set your oven to 350°F (175°C) and line a baking sheet with parchment paper or a silicone mat. This will prevent the biscuits from sticking and make cleanup a breeze.
Step 2: Cook and Crumble the Bacon
Fry or bake the bacon until it’s nice and crispy. Let it cool on a paper towel to remove excess grease, then chop or crumble it into small, dog-friendly pieces.
Avoid using flavored or maple bacon—stick to plain, unseasoned bacon to keep it safe and healthy.
Step 3: Prepare the Spinach
Wash the spinach thoroughly and dry it well. Then chop it finely. If your dog has a sensitive tummy, you can lightly steam the spinach and let it cool before adding it to the mixture. This softens the leaves and can aid digestion.
Spinach is rich in iron, fiber, and antioxidants—great for heart health and energy levels.
Step 4: Mix the Dry Ingredients
In a large mixing bowl, stir together the whole wheat flour and any optional add-ins like nutritional yeast or parsley. This will create a solid, flavorful base for your biscuit dough.
Whole wheat flour offers fiber and a bit of protein, giving the treats some staying power.
Step 5: Whisk the Wet Ingredients
In a separate bowl, whisk the egg, chopped spinach, and water or broth until the mixture is smooth and well combined.
Using low-sodium chicken broth adds a savory depth your dog will love, while the egg helps bind the dough together.
Step 6: Combine Wet and Dry Mixtures
Slowly pour the wet ingredients into the bowl of dry ingredients. Stir everything together with a spoon or your hands until it forms a slightly sticky dough. If it feels too dry, add a tablespoon of water or broth at a time. If it’s too wet, sprinkle in a little more flour.
You want a firm but rollable dough that doesn’t crumble or stick too much.
Step 7: Add the Bacon
Fold in the chopped bacon pieces and make sure they’re distributed evenly throughout the dough. Every bite should have a bit of that savory goodness!
Adding bacon last helps preserve its crispiness in the final biscuits.
Step 8: Roll Out and Cut the Dough
Lightly flour your surface and roll the dough out to about ¼ inch thick. Use dog bone-shaped cutters for a fun look, or simply slice into squares or strips using a knife or pizza cutter.
Uniform shapes help ensure even baking and make storage easier.
Step 9: Bake to Perfection
Place the shaped biscuits onto your prepared baking sheet with just a little space in between. Bake in the preheated oven for 20 to 25 minutes, or until the edges are golden brown and the centers are firm.
For an extra crunchy texture, you can turn the oven off and leave the biscuits inside with the door slightly open for another 10 to 15 minutes.
Step 10: Cool and Store the Biscuits
Transfer the baked biscuits to a wire rack and allow them to cool completely. Letting them cool ensures they firm up properly and won’t get soggy in storage.
Store in an airtight container at room temperature for up to one week, or refrigerate for two weeks. For longer storage, freeze and thaw as needed.
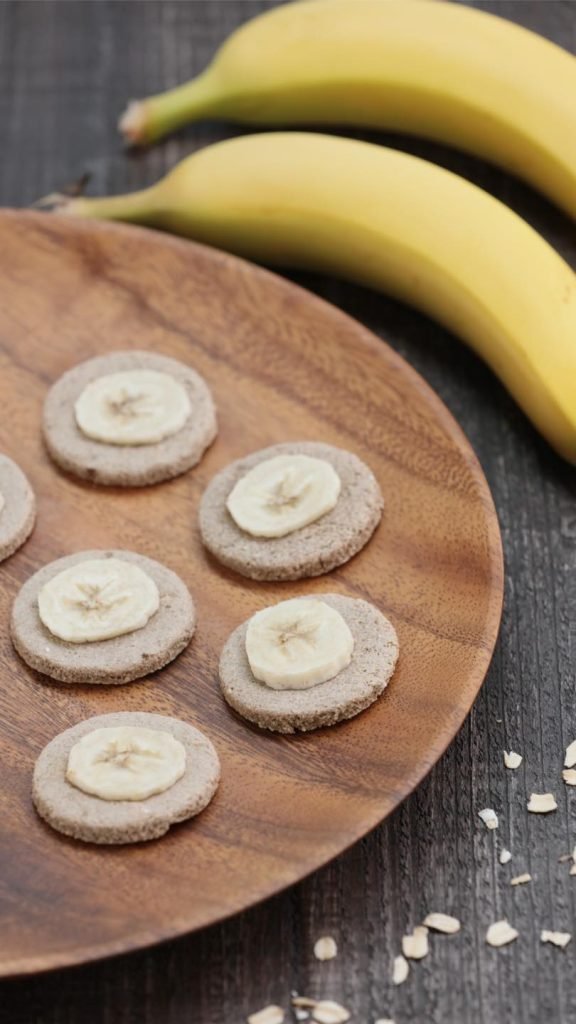
7. Banana Bacon Biscuits
If you want to surprise your furry friend with a unique treat, banana bacon biscuits are an excellent choice. These biscuits combine the natural sweetness and creamy texture of ripe bananas with the irresistible flavor of crispy bacon. Packed with nutrients and flavor, they’re sure to become your dog’s new favorite snack. Plus, making them at home allows you to control exactly what goes into each bite — no preservatives or fillers, just wholesome ingredients.
Here’s a detailed, easy-to-follow guide to making these tasty banana bacon biscuits from scratch.
Ingredients You’ll Need
Before you start baking, gather the following:
- 1 ripe banana, mashed (about ½ cup)
- ¾ cup cooked bacon, chopped into small pieces
- 2 ½ cups whole wheat flour (or oat flour for a gluten-free option)
- 1 egg
- ¼ cup water or unsweetened applesauce
- Optional: 1 tablespoon ground flaxseed or cinnamon for extra nutrition and flavor
Make sure the banana is ripe to provide natural sweetness, and use plain, unsalted bacon for your dog’s safety.
Step 1: Preheat Your Oven
Set your oven to 350°F (175°C) and line a baking sheet with parchment paper or a silicone baking mat. This ensures your biscuits bake evenly and don’t stick.
Step 2: Cook and Prepare the Bacon
Cook the bacon until crisp. Drain it on paper towels to remove excess grease, then chop it finely. Crispy bacon adds a savory punch and texture that dogs love.
Avoid flavored or heavily seasoned bacon to keep the treats healthy and safe.
Step 3: Mash the Banana
Peel the ripe banana and mash it in a bowl using a fork until it’s smooth. The banana will add moisture, natural sweetness, and essential nutrients like potassium and vitamins to the biscuits.
If you want a bit of extra flavor, you can mix in cinnamon or ground flaxseed at this stage.
Step 4: Mix the Dry Ingredients
In a large bowl, combine the whole wheat flour with any optional dry ingredients like flaxseed or cinnamon. Stir these together to evenly distribute flavors and nutrients.
Whole wheat flour offers fiber and protein, making these biscuits hearty and satisfying.
Step 5: Combine Wet Ingredients
In a separate bowl, whisk together the egg, mashed banana, and water or applesauce. Applesauce is a great alternative to water if you want extra natural sweetness and moisture.
Mix until smooth and well combined.
Step 6: Make the Dough
Pour the wet ingredients into the dry ingredients bowl. Stir with a spoon or your hands until a dough forms. It should be slightly sticky but firm enough to roll out.
If the dough feels too wet, add a little more flour. If too dry, add a splash more water or applesauce.
Step 7: Fold in the Bacon
Gently fold in the chopped bacon pieces, distributing them evenly throughout the dough. Bacon brings savory flavor that balances the sweetness of the banana perfectly.
Try not to overmix, as you want to keep the bacon bits intact for texture.
Step 8: Roll Out the Dough
Lightly flour your workspace and roll the dough to about ¼ inch thickness. Use cookie cutters shaped like bones, circles, or squares to cut out the biscuits.
Uniform thickness ensures even baking, and fun shapes make snack time more enjoyable.
Step 9: Bake the Biscuits
Arrange the cut biscuits on your prepared baking sheet with a bit of space between them. Bake in the oven for 20 to 25 minutes, or until the edges turn golden brown and the biscuits feel firm to the touch.
For crunchier treats, turn off the oven and leave the biscuits inside with the door slightly ajar for an additional 10 minutes to dry them out.
Step 10: Cool and Store Properly
Once baked, transfer the biscuits to a wire rack to cool completely. Cooling them prevents sogginess and helps the biscuits maintain their crisp texture.
Store the cooled banana bacon biscuits in an airtight container. They will keep at room temperature for up to a week, in the fridge for up to two weeks, or freeze them for longer storage.
8. Zucchini Bacon Biscuits
If you’re looking for a nutritious and tasty homemade treat for your dog, zucchini bacon biscuits are an excellent choice. These biscuits combine the moisture and vitamins from fresh zucchini with the savory flavor of crispy bacon. They’re perfect for pups who love a crunchy snack packed with natural goodness. Plus, making them at home ensures your dog gets wholesome ingredients without any preservatives or unnecessary additives.
Follow this easy step-by-step guide to whip up these delicious zucchini bacon biscuits your dog will adore.
Ingredients You’ll Need
Before starting, gather the following:
- 1 cup grated zucchini (about 1 small zucchini)
- ¾ cup cooked bacon, chopped into small pieces
- 2 ½ cups whole wheat flour or oat flour for a grain-free alternative
- 1 egg
- ¼ cup water or low-sodium chicken broth
- Optional: 1 tablespoon ground flaxseed or parsley for added nutrition and flavor
Make sure to squeeze out excess moisture from the grated zucchini to avoid soggy dough.
Step 1: Preheat Your Oven
Preheat your oven to 350°F (175°C). Line a baking sheet with parchment paper or a silicone baking mat to prevent sticking and make cleanup easier.
Step 2: Prepare the Bacon
Cook the bacon until it’s crispy, then drain on paper towels to remove excess fat. Chop it finely into small pieces. Using plain, unsalted bacon is best for your dog’s health.
Step 3: Grate and Drain the Zucchini
Wash and dry a small zucchini thoroughly. Grate it using a fine grater. Place the grated zucchini in a clean kitchen towel or paper towel and squeeze firmly to remove as much moisture as possible. This step is crucial to prevent the dough from becoming too wet.
Zucchini is rich in vitamins A and C, plus antioxidants, making it a healthy addition to your dog’s treats.
Step 4: Mix Dry Ingredients
In a large bowl, combine the whole wheat flour with any optional ingredients like flaxseed or parsley. Stir well to mix evenly.
Whole wheat flour adds fiber and structure to the biscuits, helping them hold their shape.
Step 5: Mix Wet Ingredients
In a separate bowl, whisk together the egg, grated zucchini, and water or chicken broth until well combined.
Using broth instead of water adds a little extra flavor that dogs find appealing.
Step 6: Combine Wet and Dry Ingredients
Slowly add the wet mixture into the bowl of dry ingredients. Stir gently until the dough comes together. The dough should be firm but slightly sticky.
If it’s too wet, sprinkle in more flour; if too dry, add a little more broth or water.
Step 7: Fold in the Bacon
Gently fold the chopped bacon into the dough, distributing it evenly without overmixing. Bacon brings that irresistible savory taste dogs love and adds a crunchy texture to the biscuits.
Step 8: Roll Out and Cut the Dough
Lightly flour your working surface and roll the dough out to about ¼ inch thick. Use cookie cutters shaped like bones or simply cut into small squares with a knife.
Keeping the dough evenly thick helps the biscuits bake evenly and become crunchy all around.
Step 9: Bake Your Biscuits
Place the cut biscuits on the prepared baking sheet, leaving some space between each one. Bake for 20 to 25 minutes or until the edges start to turn golden and the biscuits feel firm.
For a crunchier finish, turn off the oven and leave the biscuits inside with the door slightly open for 10 to 15 minutes to dry them out.
Step 10: Cool and Store
Transfer the baked biscuits to a wire rack to cool completely. Cooling helps maintain their crisp texture and prevents sogginess.
Store your zucchini bacon biscuits in an airtight container. They will last for about a week at room temperature, up to two weeks in the fridge, or you can freeze them for longer storage.
9. Apple Bacon Biscuits
Apple bacon biscuits are a wonderful homemade treat that combines the natural sweetness and crunch of apples with the savory, irresistible flavor of bacon. This delightful mix creates a healthy snack packed with vitamins and protein, perfect for rewarding your dog or simply showing some extra love. Making these biscuits at home ensures you control the ingredients, avoiding preservatives or artificial additives commonly found in store-bought treats.
If you’re ready to bake up some tasty apple bacon biscuits your dog will adore, follow this straightforward step-by-step guide.
Ingredients You’ll Need
Gather the following ingredients before you begin:
- 1 cup finely chopped or grated apple (preferably a sweet variety like Fuji or Gala)
- ¾ cup cooked bacon, chopped into small pieces
- 2 ½ cups whole wheat flour or oat flour for a gluten-free option
- 1 egg
- ¼ cup water or unsweetened applesauce
- Optional: 1 tablespoon ground cinnamon for extra flavor and antioxidants
Make sure to remove apple seeds before chopping, as they can be harmful to dogs.
Step 1: Preheat Your Oven
Preheat your oven to 350°F (175°C). Line a baking sheet with parchment paper or a silicone baking mat to prevent sticking and make cleanup easier.
Step 2: Prepare the Bacon
Cook the bacon until it’s crispy. Place it on paper towels to drain excess grease, then chop it into small, bite-sized pieces. Use plain, unsalted bacon for the healthiest option for your dog.
Step 3: Prepare the Apples
Wash and core the apple thoroughly. Chop it finely or grate it, depending on your preference. Finely chopped apple pieces give a nice texture, while grated apple adds moisture throughout the dough.
Remember to discard the core and seeds to keep the treats safe.
Step 4: Mix Dry Ingredients
In a large bowl, combine the whole wheat flour and, if using, ground cinnamon. Stir well to evenly distribute the cinnamon.
Whole wheat flour adds structure and fiber, making these biscuits hearty and satisfying.
Step 5: Combine Wet Ingredients
In a separate bowl, whisk together the egg, water or applesauce, and prepared apples until well mixed. Applesauce can add a touch more sweetness and moisture, which helps bind the dough.
Step 6: Mix Wet and Dry Ingredients
Gradually add the wet mixture to the dry ingredients. Stir or knead until a dough forms. The dough should be firm but slightly sticky — perfect for rolling and cutting.
If the dough feels too wet, add a little more flour; if too dry, add a splash more water or applesauce.
Step 7: Fold in the Bacon
Gently fold the chopped bacon pieces into the dough, distributing them evenly. The bacon provides savory bursts of flavor throughout each biscuit.
Avoid overmixing to keep the bacon pieces intact.
Step 8: Roll Out and Cut the Dough
Lightly flour your work surface and roll out the dough to about ¼ inch thickness. Use cookie cutters shaped like bones or any fun shapes you like, or simply cut the dough into small squares.
Even thickness ensures the biscuits bake evenly and become perfectly crunchy.
Step 9: Bake the Biscuits
Place the cut biscuits on the prepared baking sheet, leaving space between each. Bake in the preheated oven for 20 to 25 minutes, or until the edges turn golden brown and the biscuits feel firm.
For extra crunchiness, turn off the oven after baking and leave the biscuits inside with the door slightly open for 10 to 15 minutes.
Step 10: Cool and Store
Transfer the biscuits to a wire rack to cool completely. Cooling helps maintain their crisp texture.
Store the apple bacon biscuits in an airtight container. They will keep for about a week at room temperature, two weeks in the refrigerator, or can be frozen for longer storage.

10. Parsley Bacon Biscuits
Parsley bacon biscuits are a fantastic homemade treat that combines the savory flavor of bacon with the fresh, herbaceous notes of parsley. Not only do these biscuits taste great, but parsley also offers health benefits for your dog, including freshening breath and supporting digestion. Making these treats yourself means you can avoid artificial ingredients and tailor the recipe to your dog’s preferences and dietary needs.
Ready to create a batch of delicious parsley bacon biscuits your furry friend will love? Follow this detailed step-by-step guide to baking these tasty treats.
Ingredients You’ll Need
Before you start, gather these ingredients:
- ¾ cup cooked bacon, finely chopped
- 2 ½ cups whole wheat flour or oat flour for a grain-free option
- 1 large egg
- ¼ cup fresh parsley, finely chopped
- ¼ cup water or low-sodium chicken broth
- Optional: 1 tablespoon ground flaxseed or chia seeds for extra nutrition
Fresh parsley is best, but you can also use dried parsley if needed—just reduce the amount by half.
Step 1: Preheat Your Oven
Set your oven to 350°F (175°C). Line a baking sheet with parchment paper or use a silicone baking mat to prevent the biscuits from sticking and for easy cleanup.
Step 2: Cook and Prepare the Bacon
Cook the bacon until it’s crispy. Drain on paper towels to remove excess fat, then chop into small pieces. Choose plain, unsalted bacon to keep the treats healthier for your dog.
Step 3: Prepare the Parsley
Wash fresh parsley thoroughly, then finely chop it. Parsley adds a mild, refreshing flavor and can help reduce bad breath in dogs. Avoid adding too much parsley, as too much can upset digestion.
Step 4: Combine Dry Ingredients
In a large mixing bowl, combine the flour and optional flaxseed or chia seeds if using. These seeds add fiber and omega-3 fatty acids, which are great for your dog’s skin and coat.
Mix well to evenly distribute all the dry ingredients.
Step 5: Mix Wet Ingredients
In a separate bowl, whisk together the egg and water or chicken broth until well combined. Then stir in the chopped parsley.
Using broth instead of water can enhance the flavor, making the biscuits even more appealing.
Step 6: Combine Wet and Dry Mixtures
Gradually add the wet mixture into the dry ingredients. Stir or knead gently until the dough comes together. The dough should be firm but slightly sticky, easy to roll out without crumbling.
If the dough is too dry, add a little more water or broth, one tablespoon at a time. If too wet, add more flour until the right consistency is reached.
Step 7: Fold in the Bacon
Carefully fold the chopped bacon into the dough. Make sure it’s evenly distributed, so every biscuit has a delicious bacon flavor.
Avoid overmixing to keep the bacon pieces intact.
Step 8: Roll Out and Cut the Dough
Lightly flour your work surface and roll out the dough to about ¼ inch thickness. Use cookie cutters to cut the dough into fun shapes like bones or paws, or simply cut into squares or rectangles.
Even thickness helps the biscuits bake evenly and crisp up nicely.
Step 9: Bake the Biscuits
Place the cut biscuits on your prepared baking sheet with space between each one. Bake for 20 to 25 minutes or until the edges turn golden brown and the biscuits feel firm to the touch.
For extra crunch, turn off the oven and leave the biscuits inside with the door slightly ajar for 10 to 15 minutes to dry out further.
Step 10: Cool and Store
Remove the biscuits from the oven and transfer them to a wire rack to cool completely. Cooling is important to keep the biscuits crisp.
Store your parsley bacon biscuits in an airtight container. They will last about a week at room temperature, up to two weeks if refrigerated, or you can freeze them for longer storage.
11. Bacon & Egg Biscuits
Bacon and eggs are a classic combination beloved by many, and when turned into homemade dog biscuits, they become a nutritious and tasty treat for your furry friend. These biscuits are packed with protein and flavor, making them a perfect reward or snack. Plus, making them at home means you control every ingredient, ensuring your dog gets a wholesome treat without any additives or preservatives.
Ready to whip up some delicious bacon & egg biscuits for your pup? Here’s a detailed step-by-step guide to help you make these savory treats from scratch.
Ingredients You’ll Need
Before getting started, make sure you have:
- ¾ cup cooked bacon, finely chopped
- 2 large eggs
- 2 ½ cups whole wheat flour or oat flour (for a gluten-free alternative)
- ¼ cup water or unsalted chicken broth
- Optional: 1 tablespoon nutritional yeast for added vitamins and flavor
Make sure to use plain, unsalted bacon to keep it healthy for your dog.
Step 1: Preheat Your Oven
Preheat your oven to 350°F (175°C). Line a baking sheet with parchment paper or a silicone baking mat to keep the biscuits from sticking and make cleanup easier.
Step 2: Cook and Prepare the Bacon
Cook the bacon until it’s crispy, then drain on paper towels to remove excess fat. Chop the bacon into small, bite-sized pieces. This will ensure the bacon flavor is evenly spread throughout the biscuits.
Step 3: Beat the Eggs
In a medium bowl, crack the eggs and beat them until the yolks and whites are fully combined. Eggs add moisture and protein to the dough and help bind the ingredients together.
Step 4: Mix Dry Ingredients
In a large mixing bowl, combine the whole wheat or oat flour and nutritional yeast if you are using it. Stir well to distribute the yeast evenly throughout the flour.
Step 5: Combine Wet and Dry Ingredients
Gradually add the beaten eggs and water or chicken broth to the dry ingredients. Stir continuously until a dough starts to form. You’re aiming for a dough that’s firm yet pliable.
If the dough feels too sticky, add a little more flour; if too dry, add a splash more water or broth.
Step 6: Fold in the Bacon
Gently fold the chopped bacon into the dough, making sure it’s evenly incorporated but without overmixing. This keeps the bacon pieces intact and ensures each biscuit has that savory taste.
Step 7: Roll Out and Cut the Dough
Lightly flour your work surface and roll the dough out to about ¼ inch thickness. Use cookie cutters to cut out shapes like bones or circles, or simply cut the dough into small squares.
Keeping the thickness even ensures your biscuits bake thoroughly and have the perfect crunch.
Step 8: Bake the Biscuits
Place the cut biscuits on the prepared baking sheet, spacing them apart. Bake for 20 to 25 minutes, or until the edges turn golden brown and the biscuits feel firm when touched.
For an extra crunchy texture, turn off the oven after baking and leave the biscuits inside with the door slightly ajar for 10 to 15 minutes to dry out completely.
Step 9: Cool and Store
Transfer the biscuits to a wire rack to cool fully. Cooling is essential to firm up the biscuits and maintain their crispness.
Store your bacon & egg biscuits in an airtight container. They will keep fresh at room temperature for up to a week, longer if refrigerated, or you can freeze them for up to three months.

12. Turkey Bacon Biscuits
Turkey bacon biscuits are a fantastic alternative to traditional bacon treats for dogs, offering a leaner option that’s just as flavorful. These homemade biscuits combine the savory taste of turkey bacon with wholesome ingredients to create a nutritious snack your dog will love. Plus, making your own treats lets you control exactly what goes in, ensuring no harmful additives or preservatives.
If you’re ready to spoil your furry friend with tasty turkey bacon biscuits, follow this step-by-step guide to bake a batch of delicious, healthy snacks.
Ingredients You’ll Need
Before you begin, gather the following:
- ¾ cup cooked turkey bacon, finely chopped
- 2 cups whole wheat flour or oat flour (for a gluten-free option)
- 1 large egg
- ¼ cup unsweetened applesauce or pumpkin puree (for moisture and flavor)
- 2 tablespoons dried parsley (optional, for freshness and health benefits)
- 2 to 3 tablespoons water or low-sodium chicken broth
Using turkey bacon keeps these biscuits leaner than regular bacon, making them a great treat for dogs with sensitive diets.
Step 1: Preheat Your Oven
Preheat your oven to 350°F (175°C). Prepare a baking sheet by lining it with parchment paper or a silicone baking mat to prevent sticking and make cleanup easier.
Step 2: Cook and Chop the Turkey Bacon
Cook the turkey bacon in a skillet until it’s nicely browned and slightly crispy. Let it cool on paper towels to remove any excess grease, then chop it finely. This ensures the turkey bacon flavor spreads evenly in the biscuits.
Step 3: Prepare the Dry Ingredients
In a large mixing bowl, combine the whole wheat or oat flour with the dried parsley if you’re using it. Parsley adds a fresh flavor and can help with your dog’s digestion and breath.
Mix well to evenly distribute the parsley throughout the flour.
Step 4: Mix the Wet Ingredients
In a separate bowl, whisk together the egg and applesauce or pumpkin puree. These ingredients add moisture and a slight sweetness that complements the turkey bacon.
Step 5: Combine Wet and Dry Ingredients
Slowly add the wet mixture into the dry ingredients, stirring until a dough starts to form. If the dough is too dry or crumbly, add water or chicken broth one tablespoon at a time until it comes together into a firm, slightly sticky dough.
Step 6: Fold in the Turkey Bacon
Gently fold the chopped turkey bacon into the dough, making sure it’s well incorporated but without overmixing. You want to keep those tasty turkey bacon pieces intact in every biscuit.
Step 7: Roll Out and Cut the Dough
Lightly flour your work surface and roll the dough out to about ¼ inch thickness. Use cookie cutters to cut fun shapes like bones, paws, or simple circles. Alternatively, slice the dough into small squares.
Even thickness helps the biscuits bake evenly and crisp up nicely.
Step 8: Bake the Biscuits
Place the cut biscuits on your prepared baking sheet with enough space between them. Bake for 20 to 25 minutes, or until the edges turn golden and the biscuits feel firm when pressed gently.
For extra crunchiness, turn off the oven after baking and leave the biscuits inside with the door slightly ajar for 10 to 15 minutes to dry out.
Step 9: Cool and Store Your Treats
Transfer the biscuits to a wire rack to cool completely. Cooling them fully ensures they firm up and stay crisp.
Store your turkey bacon biscuits in an airtight container. They can stay fresh at room temperature for up to a week, or longer if refrigerated. You can also freeze them for up to three months for future snacking.
13. Coconut Bacon Biscuits
Coconut bacon biscuits bring a delightful twist to traditional dog treats by combining the smoky, savory flavor of bacon with the natural sweetness and crunch of coconut. This recipe is perfect for pups who love a bit of texture and flavor variety in their snacks. Plus, coconut offers beneficial nutrients like healthy fats and antioxidants, making these biscuits not just tasty but nourishing too.
If you’re excited to treat your furry friend to something unique and homemade, follow this easy, detailed guide to baking coconut bacon biscuits that your dog will adore.
Ingredients You’ll Need
Before you start, gather these simple and wholesome ingredients:
- ½ cup cooked bacon, finely chopped
- 1 cup unsweetened shredded coconut (unsweetened is key to avoid added sugars)
- 2 cups whole wheat flour or oat flour (for gluten-free option)
- 1 large egg
- ¼ cup coconut oil, melted
- ¼ cup unsweetened applesauce or pumpkin puree
- 2 to 3 tablespoons water or low-sodium chicken broth
Coconut oil adds healthy fats, while shredded coconut gives a nice crunch and subtle sweetness, perfectly balanced by the bacon’s smoky flavor.
Step 1: Preheat Your Oven
Set your oven to 350°F (175°C) and line a baking sheet with parchment paper or a silicone baking mat. This setup prevents sticking and makes cleaning up much easier after baking.
Step 2: Cook and Chop the Bacon
Cook your bacon until it’s crisp but not burnt, then drain on paper towels to remove excess grease. Chop the bacon into small, bite-sized pieces. The small bits will disperse evenly through the dough, giving each biscuit that irresistible smoky bacon flavor.
Step 3: Mix Dry Ingredients
In a large mixing bowl, combine the whole wheat or oat flour with the shredded coconut. Stir well to distribute the coconut evenly throughout the flour.
Step 4: Prepare Wet Ingredients
In a separate bowl, beat the egg lightly, then add the melted coconut oil and unsweetened applesauce or pumpkin puree. Whisk everything together until smooth and well combined.
Step 5: Combine Wet and Dry Ingredients
Gradually pour the wet ingredients into the dry mixture. Stir continuously until a dough begins to form. The dough should be firm yet pliable.
If the dough feels too dry or crumbly, add water or chicken broth one tablespoon at a time to reach the right consistency.
Step 6: Fold in Bacon
Carefully fold the chopped bacon into the dough. Avoid overmixing to keep the bacon pieces intact and ensure every biscuit has that delicious smoky flavor.
Step 7: Roll Out and Cut the Dough
Lightly flour your workspace and roll the dough to about ¼ inch thickness. Use cookie cutters or a knife to cut the dough into fun shapes or simple squares, depending on your preference.
An even thickness is important for baking the biscuits uniformly and achieving the perfect crunch.
Step 8: Bake the Biscuits
Place the cut biscuits on your lined baking sheet, spacing them evenly. Bake for 20 to 25 minutes, or until the edges turn golden brown and the biscuits feel firm to the touch.
For extra crunch, turn off the oven after baking and leave the biscuits inside with the door slightly ajar for 10-15 minutes to dry out completely.
Step 9: Cool and Store
Transfer the biscuits to a wire rack to cool fully. Cooling ensures they firm up nicely and maintain their crisp texture.
Store your coconut bacon biscuits in an airtight container. They will stay fresh at room temperature for up to a week, can be refrigerated to last longer, or frozen for up to three months.
14. Sweet Potato & Bacon Biscuits
Sweet potato and bacon biscuits are a delicious and nutritious treat that combines the natural sweetness of sweet potatoes with the smoky, savory flavor of bacon. These biscuits are perfect for dogs who love a bit of variety in their snacks and benefit from the added vitamins and fiber that sweet potatoes provide. Plus, homemade treats like these let you control exactly what your dog is eating — no preservatives, fillers, or artificial ingredients.
If you’re ready to bake a batch of healthy, tasty sweet potato and bacon biscuits for your furry friend, follow this easy step-by-step guide to create the perfect homemade snack.
Ingredients You’ll Need
Before you get started, gather these simple, wholesome ingredients:
- 1 cup cooked and mashed sweet potato (without any added seasoning)
- ½ cup cooked bacon, finely chopped
- 2 cups whole wheat flour or oat flour (use oat flour for a gluten-free option)
- 1 large egg
- 2 tablespoons coconut oil or olive oil, melted
- 2 to 3 tablespoons water or low-sodium chicken broth
Sweet potatoes provide fiber, vitamins A and C, and natural sweetness that pairs perfectly with the rich bacon flavor.
Step 1: Preheat the Oven
Preheat your oven to 350°F (175°C). Line a baking sheet with parchment paper or a silicone baking mat. This will keep the biscuits from sticking and make cleanup easier.
Step 2: Cook and Prepare the Bacon
Cook the bacon until it is crispy but not burnt. Place it on paper towels to drain any excess grease, then finely chop it into small pieces. This ensures the bacon flavor is evenly distributed in each biscuit.
Step 3: Prepare the Sweet Potato
If you’re using fresh sweet potato, peel and boil or bake it until soft, then mash thoroughly. If you prefer convenience, canned sweet potato puree (without additives) works well too. The mashed sweet potato adds moisture and natural sweetness to the dough.
Step 4: Mix Dry Ingredients
In a large bowl, combine the whole wheat or oat flour with the chopped bacon. Stir to distribute the bacon evenly throughout the flour.
Step 5: Combine Wet Ingredients
In a separate bowl, whisk together the mashed sweet potato, egg, and melted coconut or olive oil until smooth and well blended.
Step 6: Form the Dough
Slowly add the wet mixture to the dry ingredients, stirring continuously. The dough should start to come together. If it feels too dry or crumbly, add water or chicken broth one tablespoon at a time until you get a firm, pliable dough that isn’t sticky.
Step 7: Roll Out and Cut the Biscuits
Lightly flour a clean surface and roll the dough out to about ¼ inch thickness. Use cookie cutters to cut out fun shapes like bones or paws, or simply slice the dough into small squares.
Rolling the dough evenly is important so all biscuits bake uniformly.
Step 8: Bake the Biscuits
Arrange the cut biscuits on your prepared baking sheet, leaving space between each one. Bake for 20 to 25 minutes or until the edges are golden and the biscuits feel firm when pressed gently.
For an extra crunchy texture, after baking, turn off the oven and leave the biscuits inside with the door slightly ajar for 10 to 15 minutes to dry out.
Step 9: Cool and Store
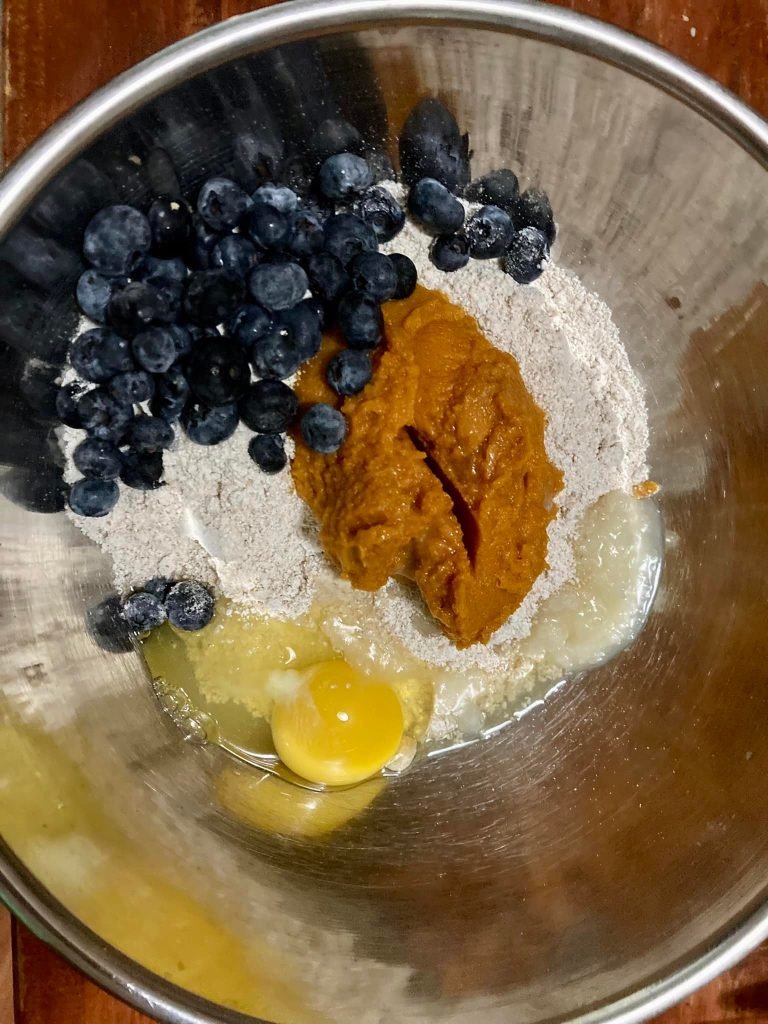
Blueberry bacon biscuits are a unique and tasty treat that combines the natural sweetness and antioxidants of blueberries with the savory, smoky flavor of bacon. These homemade biscuits are a nutritious option to spoil your dog with a flavorful snack, packed with vitamins, fiber, and protein. Plus, making treats at home means you control every ingredient, avoiding unnecessary additives and preservatives.
If you’re ready to try a fresh twist on dog biscuits, this step-by-step guide will help you create delicious blueberry bacon biscuits your pup will love.
Ingredients You’ll Need
Before baking, gather the following ingredients:
- ½ cup cooked bacon, finely chopped
- ½ cup fresh or frozen blueberries (if frozen, thaw and drain excess moisture)
- 2 cups whole wheat flour or oat flour (for a gluten-free option)
- 1 large egg
- ¼ cup plain Greek yogurt or unsweetened applesauce
- 2 tablespoons coconut oil or olive oil, melted
- 2 to 3 tablespoons water or low-sodium chicken broth
Blueberries add antioxidants and a burst of natural sweetness, while bacon brings that irresistible flavor dogs adore.
Step 1: Preheat Your Oven
Preheat your oven to 350°F (175°C) and line a baking sheet with parchment paper or a silicone baking mat. This prevents sticking and helps your biscuits bake evenly.
Step 2: Cook and Chop the Bacon
Cook the bacon until crisp but not burnt. Drain on paper towels to remove excess grease, then chop into small pieces. The bacon will provide savory flavor throughout each biscuit.
Step 3: Prepare the Blueberries
If using fresh blueberries, rinse them gently and pat dry. If using frozen, thaw completely and drain any extra liquid to avoid soggy dough.
Step 4: Mix Dry Ingredients
In a large bowl, combine the flour with the chopped bacon. Stir well to distribute the bacon evenly.
Step 5: Combine Wet Ingredients
In a separate bowl, beat the egg, then mix in the Greek yogurt (or applesauce) and melted coconut or olive oil. Stir until smooth.
Step 6: Combine Wet and Dry Ingredients
Slowly add the wet mixture to the dry ingredients, stirring as you go. When the dough starts to come together, gently fold in the blueberries. Be careful not to crush them too much to keep the dough from turning purple.
If the dough feels too dry or crumbly, add water or chicken broth a tablespoon at a time until it forms a firm, workable dough.
Step 7: Roll Out and Cut the Biscuits
Lightly flour your work surface and roll the dough out to about ¼ inch thickness. Use cookie cutters to cut fun shapes or simply slice the dough into bite-sized squares.
Step 8: Bake the Biscuits
Arrange the biscuits on the prepared baking sheet with space between them. Bake for 20 to 25 minutes or until the edges are golden brown and the biscuits feel firm.
For extra crunch, after baking, turn off the oven and leave the biscuits inside with the door slightly ajar for 10 to 15 minutes to dry out completely.
Step 9: Cool and Store
Transfer the biscuits to a wire rack to cool fully. Cooling helps them crisp up and prevents sogginess.
Store the blueberry bacon biscuits in an airtight container at room temperature for up to a week. For longer storage, refrigerate or freeze them.

15. Blueberry Bacon Biscuits
Bacon and cheddar biscuits are a classic combination that dogs can’t resist. The smoky, savory flavor of bacon paired with the rich, creamy taste of cheddar cheese creates a mouthwatering treat perfect for rewarding your furry friend. Plus, these homemade biscuits are simple to make with wholesome ingredients, giving you full control over what goes into your dog’s snacks.
If you want to treat your pup to some irresistible bacon and cheddar biscuits, follow this easy step-by-step guide for baking delicious, crunchy, and flavorful dog biscuits right at home.
Ingredients You’ll Need
Before you start baking, gather these ingredients:
- ½ cup cooked bacon, finely chopped
- 1 cup shredded cheddar cheese (mild or sharp, depending on your dog’s preference)
- 2 cups whole wheat flour or oat flour (use oat flour for a gluten-free option)
- 1 large egg
- 2 tablespoons coconut oil or olive oil, melted
- ½ cup water or low-sodium chicken broth
Cheddar cheese adds a creamy, tangy flavor while also providing protein and calcium, making these biscuits both tasty and nutritious.
Step 1: Preheat Your Oven
Set your oven to 350°F (175°C). Prepare a baking sheet by lining it with parchment paper or a silicone baking mat to prevent sticking and ensure even baking.
Step 2: Cook and Chop the Bacon
Cook the bacon until it is crisp but not burnt. Drain the bacon on paper towels to remove excess grease, then chop it finely. Even distribution of bacon pieces throughout the dough is key for that delicious smoky flavor in every bite.
Step 3: Shred the Cheddar Cheese
Grate your cheddar cheese finely so it mixes evenly into the dough. Using pre-shredded cheese is fine but freshly shredded tends to blend better.
Step 4: Mix Dry Ingredients
In a large bowl, combine the whole wheat or oat flour, chopped bacon, and shredded cheddar cheese. Stir the mixture well so the cheese and bacon pieces are evenly dispersed in the flour.
Step 5: Combine Wet Ingredients
In a separate bowl, whisk together the egg and melted coconut or olive oil. Slowly add water or chicken broth, starting with half a cup, to form a wet mixture.
Step 6: Form the Dough
Gradually add the wet mixture to the dry ingredients, stirring continuously. The dough should come together into a firm but pliable ball. If the dough feels too dry or crumbly, add water or broth a tablespoon at a time until the consistency is just right—not sticky, but easy to work with.
Step 7: Roll Out and Cut the Biscuits
Lightly flour a clean surface and roll the dough out to about ¼ inch thickness. Use cookie cutters to cut fun shapes like bones or paws, or simply cut into small squares.
Even thickness ensures that the biscuits bake evenly and become perfectly crunchy.
Step 8: Bake the Biscuits
Place the cut biscuits on your lined baking sheet, spacing them apart. Bake in the preheated oven for 20 to 25 minutes, or until the edges are golden brown and the biscuits feel firm to the touch.
For extra crunchiness, after baking, leave the biscuits in the turned-off oven with the door slightly open for 10 to 15 minutes to dry out completely.
Step 9: Cool and Store
Remove the biscuits from the oven and transfer them to a wire rack to cool completely. Cooling is important to help the biscuits harden and maintain their crunch.
Store your bacon and cheddar biscuits in an airtight container at room temperature for up to a week. To keep them fresh longer, refrigerate or freeze the biscuits.
16. Bacon & Cheddar Biscuits
Bacon and cheddar are a classic flavor combo that’s just as irresistible for dogs as it is for humans. Making homemade bacon and cheddar dog biscuits is a fun and rewarding way to spoil your furry friend with a tasty treat packed with protein and flavor. These biscuits have a perfect balance of savory bacon and sharp cheddar cheese, making them an ideal snack or training reward for your pup. Plus, baking them at home means you know exactly what goes into your dog’s treats, avoiding unnecessary additives and preservatives found in store-bought options.
If you’re ready to bake some delicious bacon and cheddar biscuits, follow this step-by-step guide to create crunchy, flavorful dog biscuits your pet will love.
Gather Your Ingredients
To get started, you’ll need:
- ½ cup cooked bacon, chopped finely
- 1 cup shredded cheddar cheese (mild or sharp)
- 2 cups whole wheat flour (or oat flour for gluten-free)
- 1 large egg
- 2 tablespoons coconut oil or olive oil, melted
- ½ cup water or low-sodium chicken broth
Cheddar cheese adds richness and protein, while bacon gives that smoky, irresistible flavor dogs adore.
Preheat the Oven
Preheat your oven to 350°F (175°C). Line a baking sheet with parchment paper or a silicone baking mat to prevent sticking and make cleanup easier.
Prepare the Bacon and Cheese
Cook the bacon until crisp but not burnt. Drain it on paper towels to remove excess grease, then chop finely. Finely shredding the cheddar cheese helps it distribute evenly throughout the dough.
Mix Dry Ingredients
In a large bowl, combine the flour, chopped bacon, and shredded cheddar cheese. Stir well to ensure even distribution of the bacon and cheese pieces.
Mix Wet Ingredients
In a separate bowl, whisk together the egg, melted coconut or olive oil, and water (or broth). Mix until fully combined.
Combine and Form Dough
Slowly add the wet ingredients to the dry ingredients, stirring as you go. The dough should form a firm ball that’s easy to handle. If the dough is too dry and crumbly, add a little more water or broth, one tablespoon at a time, until you get the right consistency.
Roll Out and Cut
Lightly flour your workspace and roll the dough out to about ¼ inch thick. Use cookie cutters to cut the dough into shapes, or simply slice into small squares.
Bake the Biscuits
Place the cut biscuits on the prepared baking sheet, leaving some space between them. Bake for 20-25 minutes or until golden brown and firm. For extra crunch, leave the biscuits in the turned-off oven with the door ajar for 10-15 minutes after baking.
Cool and Store
Transfer the biscuits to a wire rack to cool completely. Store them in an airtight container at room temperature for up to one week. For longer storage, refrigerate or freeze.
Why Homemade Bacon & Cheddar Biscuits Are Great
Making your own dog treats ensures you use fresh, wholesome ingredients without fillers or preservatives. The combination of bacon and cheddar offers a tasty treat packed with protein and flavor dogs love. Plus, the crunchy texture is great for dental health, helping to clean your dog’s teeth as they chew.
17. Carrot & Bacon Biscuits
Carrot and bacon make a fantastic flavor pairing in homemade dog biscuits that combine sweetness, crunch, and savory richness. Carrots add a natural sweetness and valuable nutrients like beta-carotene and fiber, while bacon delivers that smoky, irresistible taste dogs adore. Together, these ingredients create a tasty, wholesome treat your furry friend will look forward to every time. Making your own carrot and bacon biscuits at home also means you can control what goes in them—avoiding unnecessary preservatives or artificial additives commonly found in store-bought treats.
Ready to spoil your pup with these delicious carrot and bacon biscuits? Follow this detailed step-by-step guide for easy baking success.
Gather Your Ingredients
Before you begin, make sure you have everything you need:
- ½ cup cooked bacon, finely chopped
- 1 cup grated fresh carrot
- 2 cups whole wheat flour (or oat flour for a gluten-free option)
- 1 large egg
- 2 tablespoons olive oil or coconut oil, melted
- ½ cup water or low-sodium chicken broth
Carrots add moisture and sweetness, while bacon gives a savory punch, making these biscuits an irresistible treat.
Preheat the Oven
Start by preheating your oven to 350°F (175°C). Line a baking sheet with parchment paper or a silicone baking mat to prevent the biscuits from sticking and make cleanup a breeze.
Prepare the Bacon and Carrots
Cook your bacon until crisp but not burnt, then place it on paper towels to drain any excess grease. Chop the bacon into small pieces so it spreads evenly throughout the dough. Meanwhile, grate the carrot finely to mix well with the other ingredients and distribute flavor evenly.
Mix the Dry Ingredients
In a large mixing bowl, combine the whole wheat flour, chopped bacon, and grated carrot. Stir everything together until the ingredients are evenly distributed.
Mix the Wet Ingredients
In a separate bowl, whisk together the egg, melted oil, and water or broth. Mixing these ingredients well will help ensure the dough comes together smoothly.
Combine Wet and Dry Ingredients to Form Dough
Slowly pour the wet mixture into the dry ingredients while stirring continuously. The dough should start to come together as a firm, pliable ball. If the dough feels too dry or crumbly, add a tablespoon of water or broth at a time until the right consistency is reached—it should be firm but not sticky.
Roll Out and Cut the Dough
Lightly flour your working surface and roll the dough out to approximately ¼ inch thickness. Use cookie cutters to cut out fun shapes, or simply slice the dough into small squares or rectangles if you prefer a rustic look.
Bake the Biscuits
Place the cut biscuits on your prepared baking sheet, leaving a little space between each one so they bake evenly. Bake for 20-25 minutes, or until the biscuits turn golden brown and feel firm to the touch. If you want a crunchier texture, after turning off the oven, leave the biscuits inside with the door slightly open for 10-15 minutes to dry out completely.
Cool and Store Properly
Once baked, transfer the biscuits to a wire rack to cool thoroughly. Proper cooling helps maintain their crunchy texture. Store the biscuits in an airtight container at room temperature for up to one week. For longer preservation, keep them refrigerated or freeze them, thawing before serving.
Why Carrot & Bacon Biscuits Are a Great Choice
Carrots not only add a subtle sweetness but also provide important nutrients like vitamin A and fiber, which support your dog’s vision and digestion. Bacon offers a savory flavor and protein that makes these biscuits especially tempting. Plus, the crunchy texture can help keep your dog’s teeth cleaner by reducing plaque buildup as they chew.

18. Bacon & Parsnip Biscuits
Bacon and parsnip combine to create a deliciously unique treat your dog will love. Parsnips add a subtle sweetness and earthy flavor packed with vitamins and fiber, while bacon brings that irresistible savory punch. Together, they make homemade biscuits that are both tasty and nutritious. If you’re looking to spoil your pup with a special snack made from wholesome ingredients, these bacon and parsnip biscuits are a perfect choice.
Not only are they easy to make, but baking treats at home also gives you full control over what your dog consumes — no preservatives, artificial flavors, or fillers, just simple, natural goodness. Follow this step-by-step guide to create crunchy, flavorful bacon and parsnip biscuits that will have your dog begging for more.
Gather Your Ingredients
Before starting, make sure you have everything you need:
- ½ cup cooked bacon, finely chopped
- 1 cup cooked and mashed parsnip
- 2 cups whole wheat flour (or oat flour for a gluten-free option)
- 1 large egg
- 2 tablespoons olive oil or coconut oil, melted
- ½ cup water or low-sodium chicken broth
Parsnips are nutrient-rich and add moisture to the dough, while bacon contributes a smoky flavor that dogs find irresistible.
Preheat the Oven
Preheat your oven to 350°F (175°C). Line a baking sheet with parchment paper or a silicone baking mat to prevent sticking and ensure easy cleanup.
Prepare the Bacon and Parsnip
Cook the bacon until crisp, then place it on paper towels to drain excess grease. Chop into small pieces. For the parsnip, peel and boil or steam until soft. Once tender, mash the parsnip thoroughly to create a smooth consistency that will blend well into the dough.
Mix the Dry Ingredients
In a large bowl, combine the whole wheat flour and chopped bacon. Stir these ingredients together to distribute the bacon evenly throughout the flour.
Mix the Wet Ingredients
In a separate bowl, whisk together the egg, melted oil, water or chicken broth, and mashed parsnip. Make sure the mashed parsnip is well incorporated with the other wet ingredients to create a smooth mixture.
Combine Wet and Dry Ingredients
Gradually add the wet ingredients to the dry mixture, stirring constantly. The dough should come together into a firm, pliable ball that is easy to handle. If the dough feels too dry, add a little more water or broth, one tablespoon at a time, until you achieve the right texture. The dough should not be sticky but should hold together well.
Roll Out and Cut the Dough
Lightly flour your working surface and roll out the dough to about ¼ inch thickness. Use cookie cutters to create fun shapes or simply cut the dough into small squares or rectangles, depending on your preference.
Bake the Biscuits
Place the cut biscuits on the prepared baking sheet with some space between each one to allow even baking. Bake for 20-25 minutes or until the biscuits are golden brown and firm. To achieve a crunchier biscuit, after baking, turn off the oven and leave the biscuits inside with the door slightly ajar for 10-15 minutes.
Cool and Store
Transfer the baked biscuits to a wire rack to cool completely. This cooling step helps them harden and achieve the perfect crunch. Store the biscuits in an airtight container at room temperature for up to one week. For longer storage, keep them refrigerated or freeze and thaw as needed.
Why Bacon & Parsnip Biscuits Are a Great Choice
Parsnips are a fantastic source of dietary fiber, vitamins C and K, and folate, which support your dog’s immune system and digestion. Combined with the savory protein from bacon, these biscuits offer a balanced treat that’s both healthy and delicious. The crunchy texture helps promote dental health by gently scraping away plaque and tartar as your dog chews.
19. Bacon & Mint Biscuits
Bacon and mint might sound like an unusual combination for dog biscuits, but this unique pairing creates a fresh and savory treat your pup will love. The smoky richness of bacon perfectly balances with the cool, refreshing flavor of mint, making these homemade biscuits both tasty and wholesome. Mint also offers some surprising health benefits for dogs, like freshening their breath and aiding digestion, making these biscuits a win-win.
If you want to treat your furry friend to something special and nutritious, baking bacon and mint biscuits at home is a great choice. Plus, you’ll know exactly what ingredients are going into their snacks—no fillers or artificial additives here! Follow this detailed step-by-step guide to make delicious bacon and mint biscuits that your dog won’t be able to resist.
Gather Your Ingredients
Before you start baking, assemble the following ingredients:
- ½ cup cooked bacon, finely chopped
- 2 tablespoons fresh mint leaves, finely chopped (or 1 tablespoon dried mint)
- 2 cups whole wheat flour (or oat flour for gluten-free)
- 1 large egg
- 2 tablespoons olive oil or coconut oil, melted
- ½ cup water or low-sodium chicken broth
Mint provides a fresh aroma and flavor, while bacon adds savory richness that dogs crave.
Preheat the Oven
Set your oven to 350°F (175°C) and line a baking sheet with parchment paper or a silicone mat. This prevents sticking and makes cleanup easier.
Prepare the Bacon and Mint
Cook the bacon until crisp but not burnt. Drain on paper towels to remove excess grease and chop finely. Wash the fresh mint leaves and chop them finely as well, or measure out dried mint if using that option. Both will add a subtle, fresh flavor that complements the bacon perfectly.
Mix the Dry Ingredients
In a large bowl, combine the whole wheat flour and chopped bacon. Stir well to evenly distribute the bacon throughout the flour. Add the chopped mint leaves and mix again.
Mix the Wet Ingredients
In a separate bowl, whisk together the egg, melted oil, and water or chicken broth. Make sure these ingredients are well combined for a smooth mixture.
Combine Wet and Dry Ingredients
Pour the wet mixture into the dry ingredients slowly, stirring continuously. The dough should come together into a firm ball. If it feels too dry or crumbly, add water or broth one tablespoon at a time until the dough holds together well. Avoid making it too sticky.
Roll Out and Cut the Dough
Lightly flour your work surface and roll the dough out to about ¼ inch thickness. Use cookie cutters to cut the dough into fun shapes, or simply slice into squares or rectangles if preferred.
Bake the Biscuits
Place the cut biscuits onto the lined baking sheet with some space between each to ensure even baking. Bake for 20-25 minutes, or until the biscuits turn a nice golden brown and feel firm. For extra crunch, after baking, turn off the oven and leave the biscuits inside with the door slightly open for 10-15 minutes to dry out.
Cool and Store
Transfer the biscuits to a wire rack to cool completely, which helps them firm up and maintain a crunchy texture. Store the cooled biscuits in an airtight container at room temperature for up to one week. For longer storage, refrigerate or freeze the biscuits and thaw before serving.
20. Bacon & Flaxseed Biscuits
If you’re looking to make a nutritious and delicious treat for your furry friend, bacon and flaxseed biscuits are a fantastic option. Bacon brings that irresistible savory flavor dogs love, while flaxseed adds a healthy boost of omega-3 fatty acids, fiber, and antioxidants that support your dog’s skin, coat, and digestion. These homemade biscuits combine taste and nutrition, making them perfect for rewarding your dog with something wholesome and tasty.
Baking treats at home also gives you complete control over the ingredients, ensuring your dog enjoys snacks free from preservatives and additives. Ready to spoil your pup? Follow this step-by-step guide to make crunchy, flavorful bacon and flaxseed biscuits that will have your dog coming back for more.
Gather Your Ingredients
Before you begin, make sure you have the following:
- ½ cup cooked bacon, finely chopped
- 3 tablespoons ground flaxseed (also known as flaxseed meal)
- 2 cups whole wheat flour (or oat flour for gluten-free option)
- 1 large egg
- 2 tablespoons olive oil or coconut oil, melted
- ½ cup water or low-sodium chicken broth
Ground flaxseed is preferred over whole flaxseed because it’s easier for your dog to digest and absorb the nutrients.
Preheat the Oven
Preheat your oven to 350°F (175°C). Prepare a baking sheet by lining it with parchment paper or a silicone baking mat to prevent sticking and make cleanup easier.
Prepare the Bacon
Cook the bacon until it’s crispy but not burnt. Drain on paper towels to remove excess grease, then chop it finely. Using crisp bacon ensures the biscuits have that savory crunch your dog will adore.
Mix the Dry Ingredients
In a large mixing bowl, combine the whole wheat flour, ground flaxseed, and chopped bacon. Stir to distribute the bacon and flaxseed evenly throughout the flour. The flaxseed adds a nutty flavor and a slight texture boost to the dough.
Mix the Wet Ingredients
In a separate bowl, whisk together the egg, melted oil, and water or chicken broth. Mix well until all the wet ingredients are thoroughly combined.
Combine Wet and Dry Ingredients
Slowly pour the wet mixture into the dry ingredients, stirring continuously. The dough should form a firm, slightly sticky ball. If it feels too dry or crumbly, add water or broth one tablespoon at a time until the dough holds together well but is not overly sticky.
Roll Out and Cut the Dough
Lightly flour your work surface to prevent sticking and roll the dough out to about ¼ inch thickness. Use cookie cutters to create fun shapes or simply cut the dough into small squares or rectangles based on your preference.
Bake the Biscuits
Place the cut biscuits onto the prepared baking sheet, leaving some space between each to allow for even baking. Bake for 20-25 minutes or until the biscuits are golden brown and firm to the touch. For an extra crunchy texture, after baking, turn off the oven and leave the biscuits inside with the door slightly ajar for 10-15 minutes to dry out.
Cool and Store
Transfer the biscuits to a wire rack to cool completely. Cooling helps the biscuits harden and achieve that perfect crunch. Store the cooled biscuits in an airtight container at room temperature for up to one week. For longer storage, refrigerate or freeze and thaw before serving.
Benefits of Bacon & Flaxseed Biscuits
Flaxseed is a powerhouse of nutrition, rich in omega-3 fatty acids which help keep your dog’s skin healthy and coat shiny. It also contains fiber to support good digestion and antioxidants that promote overall wellness. Paired with bacon’s protein and flavor, these biscuits offer a delicious and healthy treat that supports your dog’s well-being.
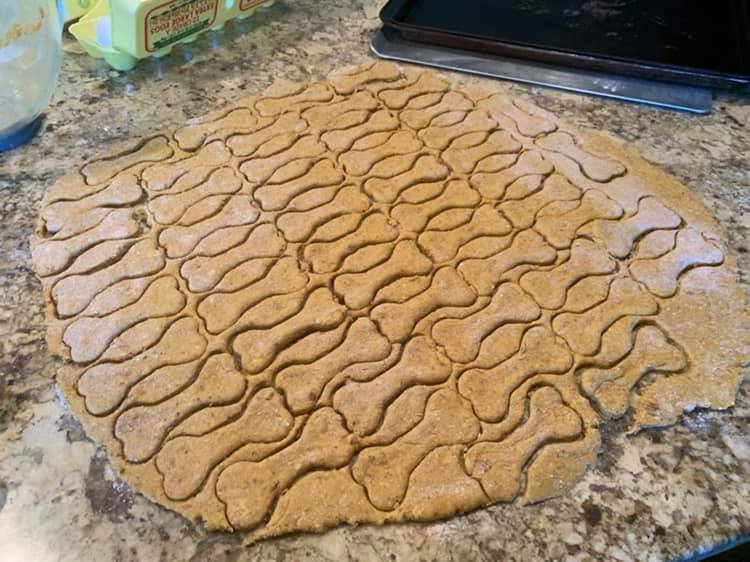
Frequently Asked Questions
What Are The Key Ingredients To Look For In The Best Bacon Dog Biscuits Recipes?
When choosing or making the best bacon dog biscuits, you want to focus on natural, wholesome ingredients that are safe and healthy for your dog. High-quality bacon is a must for that irresistible flavor, but it’s important to use it in moderation to avoid excess sodium and fat.
Whole wheat or oat flour makes a good base, providing fiber and nutrients. Adding extras like flaxseed, sweet potato, or pumpkin boosts the biscuits’ nutritional value. Avoid artificial preservatives, excessive salt, and ingredients toxic to dogs, such as onions or garlic. Keeping the recipe simple yet nutrient-rich ensures your dog gets a tasty treat without compromising health.
How Can I Make Bacon Dog Biscuits Healthier For My Dog?
You can easily make bacon dog biscuits healthier by balancing the savory bacon flavor with nutritious ingredients. Incorporate fiber-rich veggies like carrots or sweet potatoes to aid digestion. Use whole grain or gluten-free flours such as oat or brown rice flour for better nutrition and easier digestion.
Adding omega-3 rich flaxseed or chia seeds supports skin and coat health. Limit added salt or fats and choose lean bacon to reduce unhealthy fat intake. Baking the biscuits at home also means you can avoid preservatives and fillers found in many store-bought treats, giving you full control over the quality of what your dog eats.
How Should I Store Homemade Bacon Dog Biscuits To Keep Them Fresh?
Proper storage is key to maintaining the crunch and freshness of your homemade bacon dog biscuits. After baking, allow the biscuits to cool completely on a wire rack to avoid moisture buildup. Store them in an airtight container at room temperature if you plan to use them within a week. For longer shelf life, refrigerate the biscuits for up to two weeks or freeze them for several months. When freezing, place the biscuits in a freezer-safe bag or container and thaw at room temperature before serving. This keeps your dog’s treats tasty and safe to eat over time.
Can I Customize Bacon Dog Biscuits For Dogs With Food Sensitivities?
Absolutely! Many bacon dog biscuit recipes are easily adaptable to suit dogs with food sensitivities. Start by substituting common allergens like wheat with gluten-free flours such as oat, rice, or chickpea flour. Use low-sodium or turkey bacon as a leaner, less salty alternative.
If your dog is sensitive to eggs, you can replace them with flaxseed or chia seed “eggs” (mixed with water). Adding gentle, anti-inflammatory ingredients like pumpkin or sweet potato can also support sensitive digestion. Always introduce new ingredients slowly and monitor your dog’s reaction to ensure the treats remain safe and enjoyable.
How Often Can I Give My Dog Bacon Biscuits Without Affecting Their Health?
Bacon dog biscuits are best given as occasional treats rather than daily snacks. Due to the bacon’s natural fat and sodium content, too many treats can lead to weight gain, digestive upset, or more serious health issues over time. A good rule of thumb is to limit treats to about 10% of your dog’s daily calorie intake.
For most dogs, a few small biscuits a couple of times a week is safe and satisfying. Always consult with your veterinarian if you have concerns about your dog’s diet or specific health conditions before adding new treats regularly.
Conclusion
Creating the best bacon dog biscuits recipes at home is a wonderful way to treat your furry friend with tasty, wholesome snacks made from quality ingredients. Whether you prefer classic bacon biscuits or exciting variations like sweet potato, pumpkin, or flaxseed blends, these recipes combine flavor and nutrition that dogs love.
Homemade treats let you control what goes into your dog’s snacks, ensuring they stay healthy without unnecessary additives or preservatives. By following simple steps and choosing natural ingredients, you can spoil your dog safely and deliciously.
Give these bacon biscuit recipes a try and enjoy the joy of seeing your dog happily munch on treats made with love and care!