

Looking to treat your furry friend to something special? You’ve come to the right place! In this guide, we’re sharing the Best 5 Puppy Frosting Recipes that will make your pup’s tail wag with excitement. Whether you’re celebrating a birthday, a special achievement, or simply want to show your puppy some love, homemade frosting can be a fun and healthy way to spoil them.
These recipes are not only easy to make but also safe for your puppy’s tummy, using dog-friendly ingredients that are free from harmful additives. From creamy peanut butter frostings to delightful yogurt-based treats, we’ve got a variety of flavors and textures to suit every puppy’s preference.
So, grab your mixing bowls and get ready to whip up some tail-wagging goodness. Let’s dive into the Best 5 Puppy Frosting Recipes that will have your pup begging for more!
Why Choose Homemade Puppy Frosting?
When it comes to treating your pup, you might be tempted to grab a store-bought frosting or treat, but homemade puppy frosting offers so many benefits that it’s worth considering. Not only does it give you full control over the ingredients, but it’s also a fun and rewarding way to pamper your furry friend.
Control Over Ingredients
One of the biggest advantages of making your own puppy frosting is knowing exactly what’s going into it. Many commercial dog treats and frostings are packed with preservatives, artificial flavorings, and sweeteners that can upset your pup’s stomach or, worse, be harmful to their health. By making homemade frosting, you can use dog-safe ingredients like plain yogurt, peanut butter, and even pumpkin puree, which are nutritious and free from harmful additives.
Plus, you can customize the recipe based on your dog’s specific needs or preferences. Whether your dog is sensitive to certain ingredients or has allergies, homemade puppy frosting allows you to pick what’s best for them.
Healthier and Nutritious
Homemade puppy frosting can be far healthier than store-bought options. Many store-bought treats contain sugars, artificial colorants, or chemicals that are unhealthy for dogs. Ingredients like Greek yogurt and pumpkin puree provide beneficial nutrients like fiber, probiotics, and vitamins. For example, yogurt can aid in digestion, while pumpkin can help regulate digestion and promote a healthy coat. These wholesome ingredients contribute to your pup’s well-being while still giving them the sweet treat they crave.
Bonding Experience and Fun
Making homemade puppy frosting isn’t just about the treat—it’s also about the experience. Whipping up a batch of frosting for your dog gives you a chance to bond with your furry companion while making something special for them. Plus, it’s a great activity for involving kids or other family members in a fun, hands-on project.
Budget-Friendly Option
While specialty dog treats and frostings from pet stores can be expensive, making your own frosting is an affordable alternative. With simple ingredients that are often already in your pantry, homemade frosting allows you to create multiple batches for a fraction of the cost. You’ll be able to treat your puppy more frequently without breaking the bank.
Essential Ingredients for Puppy Frostings
Creating the perfect puppy frosting requires a few simple, dog-safe ingredients. These ingredients not only ensure that the frosting is safe for your furry friend but also provide essential nutrients that can help promote their overall health. Let’s dive into the key ingredients you’ll want to have on hand when making puppy frosting at home.
Greek Yogurt
Greek yogurt is a popular ingredient for many puppy frosting recipes, and for good reason. It’s packed with probiotics, which help maintain a healthy gut and support digestion. Greek yogurt is also rich in calcium and protein, making it a great choice to promote strong bones and muscles. Just make sure to use plain, unsweetened Greek yogurt, as flavored yogurts may contain added sugars and artificial sweeteners like xylitol, which is toxic to dogs.
Peanut Butter
Peanut butter is another staple in many puppy frosting recipes, and it’s a treat that most dogs go crazy for. Not only does it add flavor and richness, but peanut butter is also a source of healthy fats and protein. It’s also a great source of vitamins and minerals like vitamin E and niacin. However, when selecting peanut butter, make sure it’s free from xylitol, as this sweetener is highly toxic to dogs. Always choose natural, unsweetened peanut butter for the best and safest option for your pup.
Pumpkin Puree
Pumpkin puree is a highly nutritious ingredient that’s perfect for homemade puppy frosting. Pumpkin is a fantastic source of fiber, which can help regulate your dog’s digestion and keep their digestive system running smoothly. It’s also full of vitamins and minerals, including vitamin A, which supports healthy skin, vision, and immune function. Just be sure to use pure pumpkin puree, not pumpkin pie filling, as the latter often contains spices, sugar, and other additives that may not be safe for dogs.
Coconut Oil
Coconut oil is another ingredient that can benefit your dog’s health while adding a smooth texture to your puppy frosting. It’s loaded with healthy medium-chain fatty acids (MCFAs), which can support brain function, promote a healthy coat, and even boost your dog’s immune system. Coconut oil is also known for its anti-inflammatory properties and can help with joint health. Just use it in moderation, as it is calorie-dense and can lead to weight gain if given in excess.
Carob
If you’re looking to add a bit of sweetness and flavor to your frosting, carob is a great alternative to chocolate. Carob is naturally sweet and safe for dogs, unlike chocolate, which contains theobromine, a toxic substance for pets. Carob is high in fiber and contains antioxidants, making it a great addition to any puppy treat. It’s often used in dog-friendly recipes to create a “chocolate-like” experience without the danger.
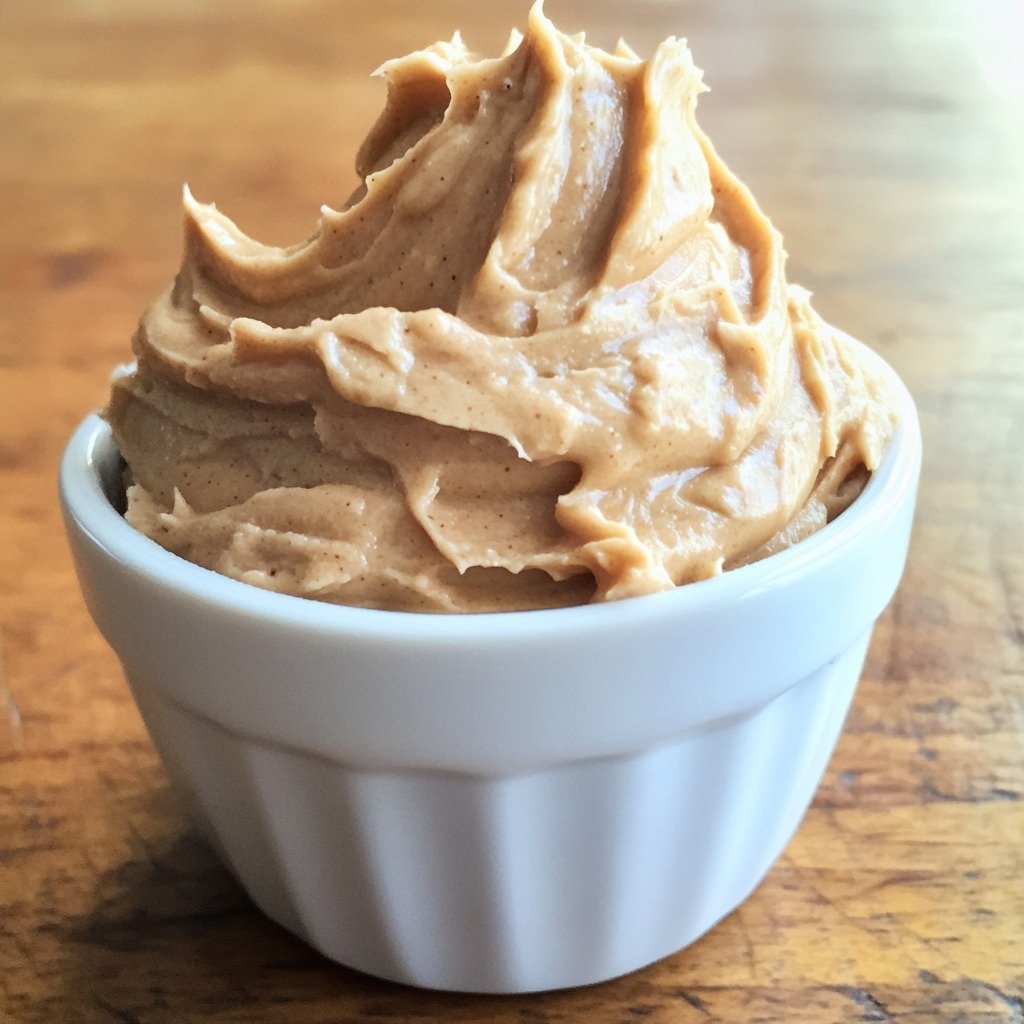
1. Peanut Butter Frosting
Peanut butter frosting is one of the most popular choices for homemade puppy treats. It’s creamy, flavorful, and packed with healthy fats and protein that your pup will love. Plus, it’s super easy to make with just a few ingredients. Follow this simple, step-by-step guide to create a delightful peanut butter frosting your furry friend won’t be able to resist!
Ingredients You’ll Need
Before you start, gather the following ingredients:
- 1/2 cup unsweetened peanut butter (Make sure it contains no xylitol or artificial sweeteners)
- 1/4 cup plain Greek yogurt (Unsweetened, plain yogurt is ideal)
- 1 tablespoon coconut oil (Melted)
- 1 tablespoon honey (Optional, for sweetness—use in moderation)
- 1/2 cup powdered coconut flour (Or a small amount of oat flour if needed for thickening)
Once you have all your ingredients ready, let’s begin!
Step 1: Prepare the Ingredients
Start by gathering your ingredients and measuring them out. Make sure to use unsweetened peanut butter, as other varieties may contain sugar or xylitol, which are not safe for dogs. Check the ingredient list carefully! Also, ensure your Greek yogurt is plain and free from any added sugar or artificial sweeteners. If you plan to add honey, use it sparingly, as too much sugar can upset your dog’s tummy.
Next, melt your coconut oil in a microwave-safe bowl or over low heat on the stove. Coconut oil will give the frosting a nice, smooth texture and provide healthy fats.
Step 2: Mix Peanut Butter and Yogurt
In a medium mixing bowl, combine the unsweetened peanut butter and the plain Greek yogurt. Stir well until the two ingredients are fully blended and smooth. The yogurt will help balance the richness of the peanut butter, giving the frosting a light, creamy texture.
Step 3: Add Coconut Oil and Honey
Once the peanut butter and yogurt are thoroughly mixed, add the melted coconut oil to the bowl. This will give the frosting a smooth consistency that’s easy to spread. If you’re using honey, add it now to give the frosting a slight sweetness. However, remember that honey is optional, as many dogs prefer the natural flavors of peanut butter without any added sugar.
Stir all of the ingredients together until the mixture becomes smooth and creamy.
Step 4: Adjust Consistency (Optional)
At this point, you may notice that the frosting is still too runny or too thick, depending on your desired consistency. If it’s too thin, add a little powdered coconut flour to help thicken it. Start with a tablespoon, and mix it in gradually until you reach the desired texture. You can also use oat flour as a substitute if coconut flour is unavailable. If the frosting is too thick, a small splash of water or a little more Greek yogurt will help loosen it up.
The goal is to have a consistency that’s thick enough to hold its shape but still soft enough to easily spread or pipe onto your puppy’s favorite treats.
Step 5: Chill (Optional)
For a firmer frosting that holds its shape better, you can place the bowl in the fridge for about 30 minutes. Chilling it will allow the frosting to set up, making it easier to apply on cakes, cupcakes, or cookies for your pup. If you’re planning to pipe the frosting onto treats, refrigerating the frosting can help it stiffen and give you a cleaner, more defined look.
Step 6: Apply the Frosting to Treats
Now that your peanut butter frosting is ready, it’s time to spread or pipe it onto your puppy’s treats! You can use a knife to spread it over dog-safe cakes or cookies, or if you want to get creative, use a piping bag to pipe fun designs. The frosting will give your treats a glossy, appetizing finish that will surely catch your dog’s eye.
Step 7: Serve and Enjoy
Once you’ve finished decorating your dog’s treats, it’s time for the best part—enjoying the delicious creations with your furry friend! Allow the frosting to sit for a few minutes to firm up, then serve it to your pup and watch them gobble up their treat.
Remember, while homemade peanut butter frosting is a delightful and healthy option for your dog, it should still be given in moderation. Treats are meant to be just that—occasional rewards for your pup!
2. Pumpkin Cream Frosting
Pumpkin is a fantastic ingredient for puppy treats, and when paired with creamy ingredients, it makes a delicious, nutritious frosting that your furry friend will love. Packed with vitamins, fiber, and antioxidants, pumpkin cream frosting is a perfect way to spoil your pup with something both tasty and healthy. Follow this simple step-by-step guide to create a creamy pumpkin frosting that will have your dog’s tail wagging!
Ingredients You’ll Need
Before you start, make sure you have the following ingredients on hand:
- 1/2 cup pure pumpkin puree (Make sure it’s plain pumpkin, not pumpkin pie filling)
- 1/4 cup plain Greek yogurt (Unsweetened, plain yogurt is the best option)
- 1/4 cup low-fat cream cheese (Room temperature, to make mixing easier)
- 1 tablespoon honey (Optional for a bit of sweetness—use sparingly)
- 1 tablespoon coconut oil (Melted, for a smooth texture)
- 1/4 cup coconut flour (Or oat flour if preferred for thickening)
- 1/4 teaspoon ground cinnamon (Optional, to enhance the flavor)
Once you have everything ready, let’s begin!
Step 1: Prepare the Ingredients
Start by gathering your ingredients and measuring them out. For the pure pumpkin puree, be sure to choose a variety with no added sugar or spices—this ensures the frosting remains safe for your pup. You can find canned pumpkin at most grocery stores, but avoid the “pumpkin pie filling,” as it often contains sugar, cinnamon, and other ingredients that aren’t dog-friendly.
Let your cream cheese come to room temperature to make mixing easier. Also, melt the coconut oil in the microwave or over low heat on the stove until it’s liquid.
Step 2: Mix the Pumpkin Puree and Greek Yogurt
In a medium-sized mixing bowl, combine the pure pumpkin puree and the plain Greek yogurt. Stir them together thoroughly until they form a smooth, creamy base. The yogurt adds a nice balance of texture and a little tang to complement the sweetness of the pumpkin, while also providing probiotics for your pup’s digestive health.
Step 3: Add the Cream Cheese and Coconut Oil
Now, add the room-temperature cream cheese and the melted coconut oil to the bowl. Using a whisk or hand mixer, blend the ingredients until they’re fully incorporated and smooth. The cream cheese will give the frosting a creamy, rich texture that’s easy to spread or pipe onto treats. The coconut oil helps to loosen up the mixture, making it easier to work with.
Step 4: Sweeten and Flavor the Frosting (Optional)
If you’d like a touch of sweetness, add 1 tablespoon of honey to the frosting. Honey is a natural sweetener that’s safe for dogs when used in moderation, but you can skip it if you prefer a more neutral flavor.
If you want to enhance the flavor further, you can add a pinch of ground cinnamon. Cinnamon is not only flavorful but also offers health benefits for your dog, such as anti-inflammatory properties. However, be sure to use cinnamon in small amounts, as too much can upset your dog’s stomach.
Mix everything together until fully combined, ensuring a smooth consistency throughout.
Step 5: Adjust the Consistency
At this point, check the consistency of the frosting. If it’s too runny, add 1/4 cup of coconut flour (or oat flour) to thicken it up. Stir it in gradually until the frosting reaches your desired thickness. The coconut flour helps absorb excess moisture and gives the frosting a more substantial texture, which is especially important if you plan to pipe it onto cupcakes or cookies. If the frosting is too thick, you can add a little more Greek yogurt or a splash of water to loosen it.
Step 6: Chill the Frosting
For a firmer, easier-to-work-with frosting, place it in the refrigerator for about 30 minutes. Chilling the frosting helps it set and makes it easier to spread or pipe onto your puppy’s treats. If you plan to use a piping bag, chilling the frosting is especially helpful to achieve clean, defined designs.
Step 7: Apply the Frosting to Treats
Now that your pumpkin cream frosting is ready, it’s time to apply it to your dog’s treats! Use a knife to spread the frosting onto dog-safe cakes, cupcakes, or cookies, or for a more polished look, pipe it onto your treats using a piping bag. The creamy, smooth texture makes it perfect for spreading or piping, giving your puppy’s treats a beautiful finish.
Step 8: Serve and Enjoy!
Once you’ve finished decorating the treats, let the frosting sit for a few minutes to firm up before serving it to your pup. Watch as your dog devours their pumpkin-filled treat, and be sure to have a camera handy to capture their excited reaction!
3. Banana Yogurt Frosting
Bananas are not only delicious but also packed with essential vitamins and minerals that can be a great addition to your pup’s diet. Combined with yogurt, which is full of probiotics and calcium, banana yogurt frosting makes a creamy and nutritious topping for dog-friendly treats. This simple recipe will make your dog’s treats irresistible, and it’s super easy to whip up! Follow these step-by-step instructions to create this tasty and healthy frosting that your furry friend will love.
Ingredients You’ll Need
Before you start, gather the following ingredients:
- 1 ripe banana (Make sure it’s fully ripe for the best flavor and sweetness)
- 1/2 cup plain Greek yogurt (Unsweetened, plain yogurt works best)
- 2 tablespoons natural peanut butter (Ensure it’s free from xylitol and other harmful additives)
- 1 tablespoon honey (Optional, for extra sweetness, but use sparingly)
- 1 tablespoon coconut oil (Melted, for smooth texture)
- 1/4 cup oat flour or coconut flour (For thickening, optional)
Once you’ve gathered your ingredients, let’s dive into making this frosting!
Step 1: Prepare the Ingredients
Start by peeling the ripe banana and placing it in a bowl. The banana should be ripe and soft to make it easy to mash. If your banana is not ripe enough, it will be harder to mix with the other ingredients, so choose one that has plenty of spots or is almost fully yellow.
Let the coconut oil melt in the microwave or on the stovetop. This ensures it blends easily with the other ingredients, giving the frosting a smooth texture. Additionally, ensure that your Greek yogurt is plain and unsweetened to avoid any harmful added sugars.
Step 2: Mash the Banana
Place the ripe banana into a small bowl and use a fork or potato masher to mash it until it’s smooth. The riper the banana, the easier it will mash, and the sweeter the frosting will be. If you want a chunkier texture for your frosting, feel free to leave a few small banana pieces, but for a smooth frosting, make sure the banana is fully mashed.
Step 3: Mix the Greek Yogurt and Peanut Butter
In a separate mixing bowl, add plain Greek yogurt and natural peanut butter. Stir the yogurt and peanut butter together until they form a creamy, smooth mixture. The peanut butter will add a rich, nutty flavor and provide healthy fats, while the Greek yogurt brings a creamy texture and probiotics that are beneficial for your dog’s digestive system.
Step 4: Add the Mashed Banana and Coconut Oil
Next, add the mashed banana to the yogurt and peanut butter mixture. Stir everything together until the banana is evenly incorporated into the frosting mixture. The banana will add natural sweetness, while the yogurt and peanut butter will make the frosting smooth and creamy.
Pour in the melted coconut oil and mix until fully combined. The coconut oil helps create a silky texture and allows the frosting to spread smoothly on your puppy’s treats.
Step 5: Sweeten with Honey (Optional)
If you’d like the frosting to be a little sweeter, you can add 1 tablespoon of honey to the mixture. Honey is safe for dogs in moderation and provides a touch of natural sweetness that enhances the flavor. Stir the honey in until everything is well combined. Keep in mind that honey is optional, especially if you want to keep the frosting on the less sugary side.
Step 6: Adjust the Consistency
At this point, check the consistency of your frosting. If it’s too runny, you can thicken it up by adding 1/4 cup of oat flour or coconut flour. Stir in small amounts at a time until you reach the desired thickness. If the frosting is too thick, add a small splash of water or more Greek yogurt to loosen it up. The goal is to achieve a creamy but spreadable consistency, perfect for covering your dog’s treats.
Step 7: Chill the Frosting (Optional)
For a firmer frosting, you can place the mixture in the refrigerator for about 30 minutes. This will allow it to set and become easier to spread or pipe. If you’re piping the frosting onto cupcakes or cookies, chilling it will give you cleaner lines and better structure.
Step 8: Apply the Frosting to Treats
Once the frosting has chilled and is the right consistency, it’s time to apply it to your dog’s treats! You can use a knife to spread the frosting onto cakes or cookies, or if you want a more decorative touch, pipe it using a piping bag. The banana yogurt frosting will add a beautiful, creamy finish to your homemade dog treats.
Step 9: Serve and Enjoy!
After decorating your pup’s treats, allow the frosting to set for a few minutes before serving them to your dog. Once everything is ready, let your furry friend enjoy the treat! Watch as they savor the sweet, creamy frosting with a wagging tail.
4. Carob Frosting
Carob is a dog-friendly alternative to chocolate that’s both safe and delicious for your pup. It’s rich in antioxidants and fiber, making it a fantastic choice for a healthy dog frosting. With its naturally sweet flavor, carob frosting is an excellent option to add a rich, chocolaty finish to your dog’s treats without any harmful ingredients like cocoa or theobromine. Follow these simple step-by-step instructions to make a smooth and creamy carob frosting your dog will love!
Ingredients You’ll Need
Before you get started, gather these ingredients for the frosting:
- 1/2 cup carob powder (Make sure it’s unsweetened and pure)
- 1/4 cup plain Greek yogurt (Unsweetened and unflavored)
- 2 tablespoons coconut oil (Melted)
- 1 tablespoon honey (Optional, for added sweetness)
- 1/4 teaspoon vanilla extract (Optional, to enhance the flavor)
- 1/4 cup coconut flour or oat flour (Optional, for thickening the frosting)
- Water or more coconut oil (To adjust consistency)
Now that you have everything ready, let’s begin the process!
Step 1: Prepare the Ingredients
Before you start making your carob frosting, ensure all the ingredients are ready. Coconut oil needs to be melted, so either microwave it for a few seconds or gently heat it on the stove. Also, make sure your Greek yogurt is unsweetened and unflavored, as additives and sugars aren’t suitable for dogs. Gather the carob powder and sift it if it’s clumpy, ensuring a smooth frosting mixture.
Step 2: Combine the Greek Yogurt and Carob Powder
In a medium-sized mixing bowl, combine the plain Greek yogurt and carob powder. Start by stirring them together gently until the carob powder is fully absorbed into the yogurt. The carob powder has a naturally sweet flavor, so it will blend seamlessly with the creamy yogurt base. This combination provides a rich and nutritious frosting that’s perfect for your dog.
Step 3: Add the Coconut Oil and Honey
Now, add the melted coconut oil to the mixture and stir well. The coconut oil helps the frosting become smooth and spreadable, while also adding a slight richness to the flavor. If you’d like to sweeten the frosting slightly, add 1 tablespoon of honey. Honey is safe for dogs in moderation and enhances the natural sweetness of the carob without making it overly sweet.
For a little extra flavor, you can include 1/4 teaspoon of vanilla extract, which pairs nicely with the carob’s flavor and adds depth to the frosting. Stir everything together until it’s completely smooth and well-combined.
Step 4: Adjust the Consistency
At this point, the frosting may need some adjustments in consistency. If the mixture is too thick, add a small amount of water or more melted coconut oil, stirring gradually until you reach your desired texture. The frosting should be creamy but still firm enough to hold up when spread or piped onto your dog’s treats. If it’s too runny, add a little more coconut flour or oat flour to thicken it.
Step 5: Refrigerate the Frosting (Optional)
For a firmer texture, it’s a good idea to refrigerate the frosting for about 30 minutes before using it. Chilling the frosting will allow it to set and become easier to spread or pipe. It will also help it hold its shape when applied to treats, especially if you plan to decorate them with a piping bag.
Step 6: Apply the Frosting to Treats
Once the frosting has chilled and is the right consistency, it’s time to apply it to your dog’s treats! You can use a spoon or knife to spread the frosting onto dog-friendly cakes, cookies, or cupcakes, or pipe it for a more decorative look using a piping bag. The carob frosting will add a glossy, rich finish to your treats, making them even more appetizing to your furry friend.
Step 7: Serve and Enjoy!
After applying the frosting, allow the treats to set for a few minutes so the frosting firms up. Once everything is ready, serve your dog their beautifully decorated treats! Be sure to snap a photo of their excited reaction—they’ll love the carob frosting just as much as the treat itself.
5. Sweet Potato Frosting
Sweet potatoes are a fantastic choice for making dog-friendly frostings, as they are packed with vitamins, fiber, and antioxidants. The natural sweetness of sweet potatoes, combined with their smooth texture, makes them an ideal base for creating a creamy and nutritious frosting for your pup’s treats. This sweet potato frosting recipe is simple to make and adds a delicious, healthy touch to homemade dog cakes, cookies, or cupcakes. Follow these step-by-step instructions to create a tasty treat your dog will adore!
Ingredients You’ll Need
Gather the following ingredients before you begin:
- 1 medium sweet potato (Fresh or canned, as long as it’s plain and unsweetened)
- 1/4 cup plain Greek yogurt (Unsweetened, unflavored)
- 1 tablespoon coconut oil (Melted)
- 1 tablespoon honey (Optional, for added sweetness)
- 1/2 teaspoon cinnamon (Optional, for extra flavor)
- 1/4 cup oat flour or coconut flour (Optional, for thickening)
- Water or more coconut oil (To adjust consistency)
These ingredients will come together to create a velvety, slightly sweet frosting that’s perfect for any doggy dessert!
Step 1: Prepare the Sweet Potato
Start by preparing the sweet potato. If you’re using a fresh sweet potato, wash it thoroughly and peel the skin. You can then either bake it or microwave it until it becomes soft and tender. To bake, preheat the oven to 400°F (200°C), place the sweet potato on a baking sheet, and bake for 45-60 minutes, or until soft. Alternatively, you can microwave it on high for about 5-8 minutes, depending on the size, until it’s easily pierced with a fork.
Once cooked, let the sweet potato cool slightly before mashing it with a fork or potato masher until it’s smooth. You can also blend it in a food processor to make it even smoother. If you’re using canned sweet potato puree, make sure it’s plain with no added sugar or spices.
Step 2: Combine the Sweet Potato and Greek Yogurt
Next, add the mashed sweet potato to a mixing bowl. Greek yogurt adds a creamy texture to the frosting and provides probiotics that are great for your dog’s digestion. Mix the Greek yogurt with the mashed sweet potato until they are fully combined. The yogurt helps balance the sweetness of the sweet potato and gives the frosting a smooth consistency.
Step 3: Add Coconut Oil and Honey
Once the sweet potato and yogurt are mixed together, add the melted coconut oil to the bowl. Coconut oil not only adds richness but also helps the frosting set and gives it a smooth, spreadable texture. Stir the mixture well to incorporate the coconut oil evenly.
If you want to sweeten the frosting, add 1 tablespoon of honey. This will give the frosting a little extra sweetness, but keep in mind that honey should only be used sparingly. While honey is safe for dogs in small amounts, it can add extra calories and sugar to the recipe, so it’s optional.
Step 4: Add Cinnamon (Optional)
For an extra flavor boost, you can sprinkle in 1/2 teaspoon of cinnamon. This spice is safe for dogs and can add a warm, aromatic taste to the frosting. Cinnamon also has anti-inflammatory properties, making it a healthy addition. However, cinnamon is optional—if you’re unsure whether your dog likes the flavor, you can skip it.
Step 5: Adjust the Consistency
At this point, the frosting might need to be adjusted for the right consistency. If it’s too thick, you can add a small amount of water to loosen it up, or add a little more melted coconut oil for a smoother finish. If the frosting is too runny, you can add oat flour or coconut flour to thicken it. Stir in the flour slowly until the frosting reaches the desired texture—it should be creamy and easy to spread.
Step 6: Chill the Frosting (Optional)
To achieve a firmer consistency, refrigerate the frosting for about 30 minutes. Chilling the frosting will allow it to thicken up, making it easier to spread or pipe onto your dog’s treats. It will also help the frosting hold its shape better when applied to cakes or cookies.
Step 7: Apply the Frosting to Treats
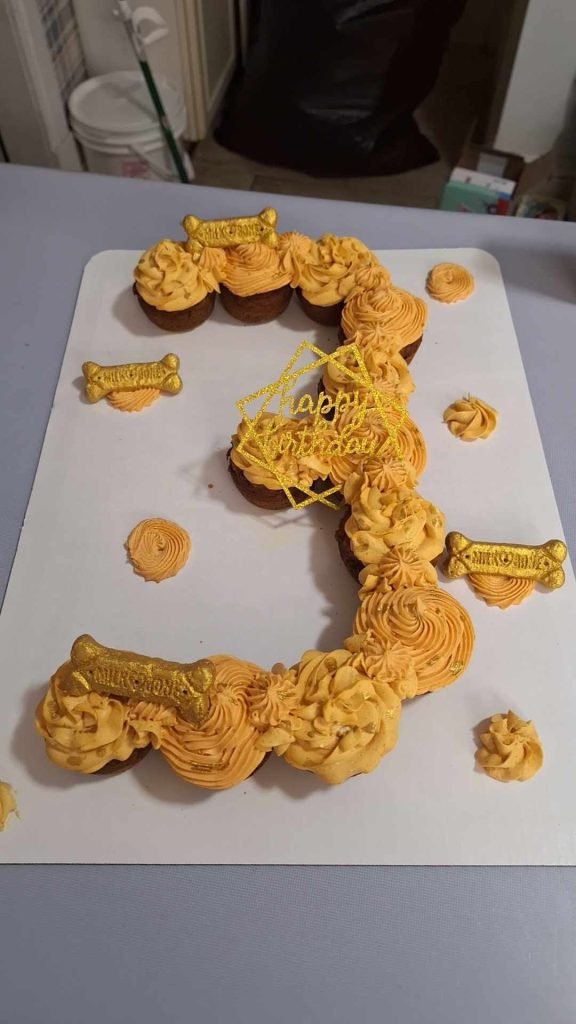
Once the frosting has chilled and is the right consistency, it’s time to apply it to your dog’s treats. Whether you’re making dog-friendly cupcakes, cakes, or cookies, this frosting will add a beautiful, creamy finish. You can use a spoon, knife, or piping bag to decorate the treats. The vibrant orange color of the sweet potato frosting will make the treats look as tasty as they are!
Step 8: Serve and Enjoy!
After frosting the treats, allow them to set for a few minutes so the frosting firms up slightly. Once it’s ready, serve your dog their special treat! Your pup will love the sweet, creamy frosting, and you’ll love knowing it’s made with wholesome, nutritious ingredients.
FAQs
What Are the Best 5 Puppy Frosting Recipes?
The best puppy frosting recipes include healthy, dog-friendly ingredients that are safe for your furry friend. Some of the top options are peanut butter frosting, pumpkin cream frosting, banana yogurt frosting, carob frosting, and sweet potato frosting.
These frostings are made using wholesome ingredients that provide flavor and nutrition. They are perfect for topping dog cakes, cookies, or cupcakes and can easily be made at home. Make sure to avoid ingredients like chocolate, xylitol, or artificial sweeteners when preparing frosting for your dog.
Can I Use Store-Bought Frosting for My Puppy?
While it’s tempting to use store-bought frosting for convenience, it’s not recommended for your puppy. Many store-bought frostings contain sugar, artificial sweeteners like xylitol, and other ingredients that are harmful to dogs.
Homemade puppy frostings made with natural, dog-friendly ingredients like Greek yogurt, peanut butter, and pumpkin are much safer and healthier for your pet. Making your own allows you to control the ingredients, ensuring they are both safe and nutritious for your puppy.
Are Homemade Frostings Safe for Puppies?
Yes, homemade frostings can be safe for your puppy, but it’s essential to use ingredients that are specifically safe for dogs. You should avoid harmful ingredients such as chocolate, xylitol, and excessive sugar.
Stick to natural ingredients like sweet potatoes, Greek yogurt, peanut butter (without xylitol), and carob powder, which are dog-friendly. Always ensure that the frosting is used in moderation, as too much of any treat can cause an upset stomach or contribute to weight gain.
How Do I Make Frosting for My Puppy?
Making frosting for your puppy is simple and involves a few key ingredients. Start with a base such as mashed sweet potatoes, Greek yogurt, or banana. Add healthy fats like coconut oil or peanut butter for richness, and sweeten naturally with honey (optional).
You can adjust the consistency by adding water, coconut oil, or flour to thicken it. Once the ingredients are mixed into a smooth, creamy frosting, you can spread or pipe it onto your puppy’s treats. Always remember to refrigerate the frosting if you want it to firm up.
What Ingredients Should I Avoid in Puppy Frosting?
When making frosting for your puppy, it’s important to avoid ingredients that can be harmful. Some ingredients to steer clear of include:
- Chocolate: Contains theobromine, which is toxic to dogs.
- Xylitol: A sugar substitute that is highly toxic to dogs and can cause liver failure.
- Sugar: Excessive sugar can lead to weight gain, obesity, and other health issues.
- Artificial Sweeteners: Many are unsafe for dogs and should be avoided.
Focus on using natural, safe ingredients like peanut butter, sweet potatoes, plain Greek yogurt, and carob powder for a healthy, dog-safe frosting.
Can I Use Frosting for Dog Cakes or Cupcakes?
Absolutely! Puppy frosting can be used to decorate homemade dog cakes, cupcakes, or cookies. It’s the perfect finishing touch for any doggy dessert, whether it’s for a birthday, holiday, or just a special treat. Just ensure that the frosting is made with dog-safe ingredients and is applied in moderation.
You can pipe or spread it on the top of the cake or cupcake and let your puppy enjoy a delicious, healthy dessert.
How Can I Store Leftover Puppy Frosting?
Leftover puppy frosting should be stored in an airtight container in the refrigerator. It will keep for about 5 to 7 days. Before using it again, allow it to come to room temperature and give it a good stir, as it may firm up in the fridge. If the frosting becomes too thick, you can add a little water or coconut oil to adjust the consistency.
Always check the frosting for any signs of spoilage before offering it to your puppy.
How Often Can I Give My Puppy Frosting?
While frosting can be a delightful treat for your puppy, it should be given in moderation. Too much frosting, even if made with safe ingredients, can lead to an upset stomach or contribute to weight gain. Treats like frosting should only be offered occasionally, such as for special occasions or as a reward for good behavior.
Always balance your puppy’s diet with a healthy, well-rounded meal plan, and consult with your vet if you’re unsure how much frosting is appropriate for your pet’s size and age.
Conclusion
Homemade puppy frosting recipes are a fun and healthy way to treat your furry friend. By using natural ingredients like peanut butter, pumpkin, banana, carob, and sweet potatoes, you can create safe, nutritious, and tasty toppings for dog cakes, cupcakes, and treats.
Always ensure that the ingredients you choose are dog-friendly, avoiding harmful substances like chocolate and xylitol. Whether you’re celebrating a special occasion or just spoiling your pup, these frostings are a great way to show them how much you care.
Remember to use frosting in moderation and store any leftovers properly. With these Best 5 Puppy Frosting Recipes, you’ll have plenty of creative ways to make your dog’s day a little sweeter!