

If you’ve ever glanced at the ingredients list on store-bought dog treats and felt a little uneasy, you’re not alone. That’s exactly why Homemade Liver Dog Treats are becoming a favorite among pet owners who want to give their dogs something healthier, tastier, and made with love. Liver is packed with nutrients like iron, B vitamins, and protein — all essential for keeping your dog energized and healthy. And the best part? Dogs absolutely go wild for the rich, meaty flavor.
Making your own treats at home also gives you total control over what goes into your pup’s snack — no preservatives, fillers, or mystery ingredients. Whether you’re training a new puppy or just want to spoil your loyal companion, these Homemade Liver Dog Treats are a simple and rewarding way to show your love. Trust me, once your dog gets a taste, these will be their new favorite treat!
Benefits of Liver for Dogs
Liver might not be the most glamorous ingredient on the menu, but when it comes to your dog’s health, it’s a true powerhouse. Whether you’re adding it to their meals or whipping up some homemade treats, liver offers a range of nutritional benefits that can help your pup thrive. Let’s explore why this organ meat deserves a spot in your dog’s diet.
Rich in Essential Nutrients
Liver is often referred to as “nature’s multivitamin” because of how densely packed it is with key nutrients. It’s an excellent source of vitamin A, which supports vision, immune function, and healthy skin. Iron helps produce red blood cells and maintain energy levels, while minerals like copper and zinc boost the immune system and promote a shiny coat. On top of that, liver is loaded with B vitamins — especially B12 — which play a big role in your dog’s metabolism and nerve function. Just a small amount goes a long way in giving your dog a nutrient-rich boost.
Supports Energy and Stamina
If your dog is the type that loves to play fetch endlessly or run circles around the yard, liver can help support their high energy needs. Thanks to its high B vitamin content, liver helps convert food into energy efficiently. This means your pup can stay active and alert throughout the day. Whether you have a working dog, a young puppy, or just a high-spirited pet, liver is a great addition to support their physical vitality.
Boosts Immune System Health
A strong immune system is essential for keeping your dog healthy and resilient, and liver can play an important part in that. Nutrients like vitamin A, zinc, and iron help fortify your dog’s natural defenses. These nutrients work together to help your pup fight off infections more easily and recover more quickly from illness or injury. If your dog has been under the weather or simply needs an immune boost, liver can be a natural, food-based way to support their recovery.
Promotes a Healthy Coat and Skin
Does your dog’s coat look a little dull or their skin seem dry or flaky? Liver may help. Because it’s high in nutrients that support skin and hair health — especially vitamin A and zinc — it can help bring back that shiny, smooth look you love to see. Many pet owners notice improvements in their dog’s coat after adding liver to their diet. It’s one of those changes that you can see in the mirror — or, in this case, in the fur.
Encourages Healthy Digestion
Dogs with sensitive stomachs often do better with simple, nutrient-rich foods — and liver fits that bill. It’s low in carbohydrates and high in protein and essential fats, which makes it easier for many dogs to digest compared to heavily processed treats. Plus, because liver is naturally flavorful, it’s more likely to be accepted even by picky eaters or older dogs who might have lost interest in food.
Great for Training Rewards
One of the biggest reasons liver is so popular among dog trainers is its irresistible smell and taste. Dogs tend to go crazy for liver, which makes it the perfect training reward. Whether you’re working on basic commands or advanced agility training, using small bits of liver as a treat can help keep your dog’s attention and reinforce positive behavior. It’s a high-reward food that doesn’t require much — just a tiny piece can make your pup eager to learn.
Natural Source, No Fillers
When you offer liver — especially when it’s homemade — you know exactly what your dog is eating. There are no preservatives, artificial flavors, or mystery ingredients. Just real, nutritious food. For dog owners looking to transition to a more natural diet or cut out processed treats, liver is a simple and wholesome choice that can be used in cooked, raw, or treat form.
Choosing the Right Type of Liver
When it comes to making homemade liver dog treats or adding liver to your dog’s meals, not all liver is created equal. While most types of liver offer excellent nutritional benefits, choosing the right one depends on factors like availability, cost, and your dog’s individual needs or sensitivities.
Beef Liver
Beef liver is one of the most common options and is widely available in grocery stores and butcher shops. It’s rich in vitamin A, iron, and B12, making it a nutrient-dense choice. It also has a stronger flavor, which many dogs love. However, because it’s quite potent, you’ll want to feed it in moderation.
Chicken Liver
Chicken liver is another popular option — it’s milder in taste and softer in texture, making it ideal for puppies, smaller breeds, or dogs with sensitive stomachs. It’s also slightly lower in vitamin A than beef liver, so it offers a little more flexibility when it comes to portion control. Plus, it’s usually affordable and easy to prepare.
Turkey and Pork Liver
Turkey liver is similar to chicken liver in taste and nutritional profile, and it’s a great alternative if your dog has a poultry preference. Pork liver can be a good option too, though it tends to be a bit fattier. As always, make sure it’s well-sourced and cooked properly before feeding it to your dog.
Lamb Liver
Lamb liver is less common but still packed with nutrients. It’s a great option for dogs with food sensitivities or allergies to more common proteins. However, it can be a bit pricier and harder to find in regular grocery stores.
Things to Keep in Mind
Always choose liver from high-quality sources — ideally organic or grass-fed if available. This reduces the risk of exposing your dog to harmful additives or environmental toxins. Whichever type of liver you go with, remember to introduce it slowly and stick to proper portion sizes. Your dog’s taste buds and tummy will thank you.
Tools and Ingredients You’ll Need
Making homemade liver dog treats doesn’t require a fancy kitchen setup — just a few basic tools and simple ingredients will get the job done. Whether you’re baking, dehydrating, or pan-cooking liver, having the right essentials on hand will make the process smoother and more enjoyable.
Basic Kitchen Tools
You’ll want to start with a sharp knife and a sturdy cutting board for prepping the liver. Since liver can be slippery and a bit messy, a non-slip cutting board helps keep things under control. A food processor or blender is great if you’re making a puree-style treat or blending liver into dough. For baking, you’ll need mixing bowls, a spatula or spoon, and a baking sheet lined with parchment paper. If you plan on making crunchy treats, cookie cutters are a fun way to shape them.
A dehydrator is optional, but it’s perfect for making chewy, long-lasting liver treats. If you don’t have one, your oven on a low setting will do just fine.
Choosing the Right Liver
Fresh is always best. Look for chicken, beef, or turkey liver at your local grocery store or butcher. It should be deep red, moist, and free of any strong or off-putting odor. If you can find grass-fed or organic liver, that’s even better — cleaner ingredients mean a healthier treat for your pup.
Additional Ingredients (Optional)
Liver is nutrient-rich on its own, but if you’re creating baked treats, you might want to add some extras. Whole wheat flour, oat flour, or coconut flour can act as a base. Eggs help bind the mixture together, while parsley, turmeric, or a dash of garlic powder (in very small, dog-safe amounts) can boost flavor and nutrition.
Just be sure to avoid any ingredients that are toxic to dogs, like onions, garlic in large amounts, salt, or artificial sweeteners.
With the right tools and fresh ingredients, you’re all set to create liver treats that your dog will absolutely love — and you’ll feel good knowing exactly what’s in them.
8 Homemade Liver Dog Treat Recipes
Looking to spoil your furry friend with something healthy and delicious? Homemade liver dog treats are a protein-packed, nutrient-rich option that dogs go wild for. Whether you’ve got beef liver, chicken liver, or even lamb liver on hand, these simple recipes are great for training, rewards, or just a tail-wagging snack.
Below are 8 easy and tasty liver dog treat recipes you can make right in your kitchen.
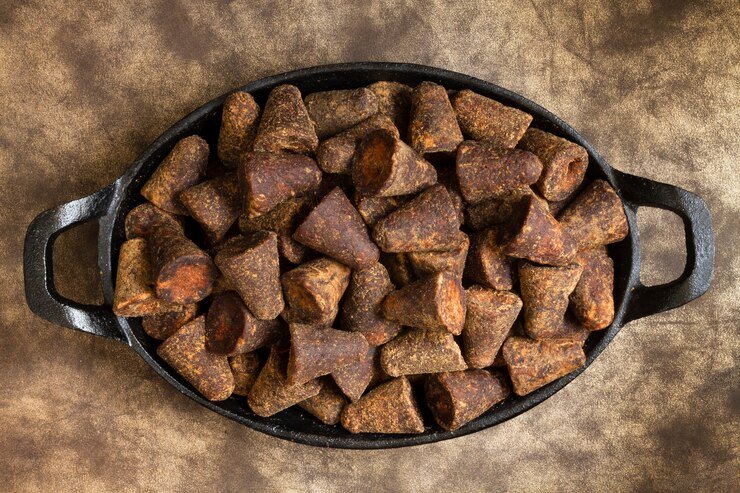
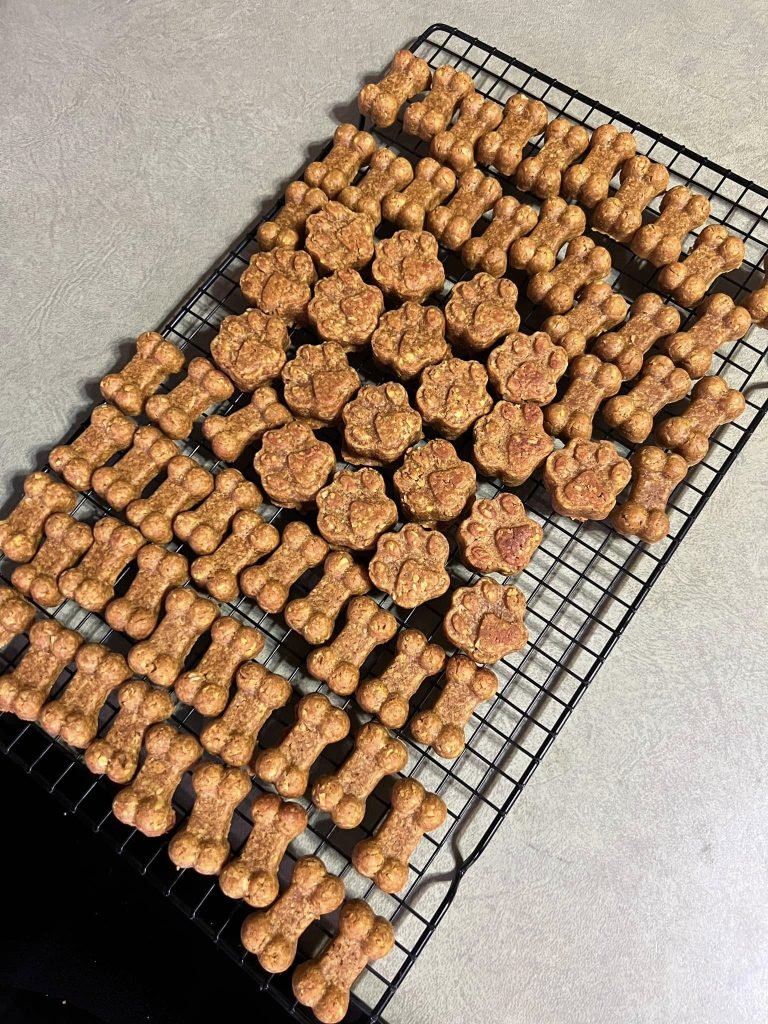
1. Simple Baked Liver Treats
If you’re looking for a healthy, homemade treat that your dog will love, look no further than simple baked liver treats. Liver is packed with nutrients like vitamin A, iron, and B vitamins, making it an excellent choice for boosting your dog’s health. Plus, homemade liver treats are easy to make, and the process is simple and quick. Whether you’re making them for training or just to show your dog some love, this guide will walk you through the steps to create delicious, nutritious liver treats your dog will adore.
Why Choose Homemade Liver Treats?
Before we dive into the recipe, let’s talk about why you might want to opt for homemade liver treats. Store-bought dog treats can often contain preservatives, artificial additives, and fillers that aren’t as beneficial for your furry friend. By making your own treats, you know exactly what’s going into them — fresh, wholesome ingredients that are good for your dog’s health. Plus, your dog will get to enjoy a natural, flavorful snack that’s packed with vitamins and minerals.
Ingredients You’ll Need
Before you start, gather the following ingredients:
- 1 pound of fresh liver (beef, chicken, or turkey)
- 1 ½ cups of whole wheat flour (or oat flour for gluten-free treats)
- 1 egg
- ½ cup of water (adjust as needed)
- Optional: 1 tablespoon of parsley or a pinch of turmeric for added flavor and health benefits
Make sure to rinse the liver well before use, and trim off any excess fat. You can use a food processor or blender for the next steps, but a sharp knife will work if you prefer to hand-chop the liver.
Step 1: Preparing the Liver
The first step in making your simple baked liver treats is to prepare the liver. If you’re using a food processor or blender, cut the liver into small chunks that will be easy to process. Pulse until you get a smooth, thick paste. If you don’t have a processor, you can use a sharp knife to finely chop the liver into small pieces.
It’s important to use fresh liver, as frozen liver may not process well and can affect the texture of your treats. Whether you’re using chicken, beef, or turkey liver, the process remains the same.
Step 2: Mix the Ingredients
Once the liver is blended into a paste, it’s time to combine it with the other ingredients. In a large mixing bowl, add the liver paste, flour, and egg. Stir the mixture until everything is well incorporated. You want the dough to have a thick, sticky consistency, so if it’s too dry, add a little more water — just a tablespoon at a time.
If you’d like to enhance the flavor or add extra nutritional benefits, this is the time to mix in some optional ingredients. Parsley can help freshen your dog’s breath, while turmeric is known for its anti-inflammatory properties. But keep in mind that too much spice can be overwhelming for your pup, so a pinch is plenty!
Step 3: Shape the Treats
Now that your dough is ready, it’s time to shape the treats.
Roll the dough out on a floured surface to about ¼-inch thickness. Use cookie cutters to cut the dough into fun shapes. You can use bone-shaped cutters, hearts, or any other design that suits you and your pup. This method is great for making bite-sized pieces, especially if you want to give your dog treats during training.
If you don’t have cookie cutters or prefer a more rustic approach, you can simply roll the dough into small balls or flatten the dough with your hands into squares or rectangles. These bite-sized treats are quick and easy to make and are perfect for popping into your dog’s bowl.
Step 4: Bake the Liver Treats
Preheat your oven to 350°F (175°C). Line a baking sheet with parchment paper to prevent the treats from sticking.
Place your shaped treats onto the prepared baking sheet. Make sure to leave a small amount of space between each treat to allow for even cooking. If you’ve used a tray bake method, just spread the dough evenly across the baking sheet and then cut it into squares after baking.
Bake your liver treats for 25 to 30 minutes, or until they’re firm and slightly browned on the edges. The baking time can vary depending on the thickness of your treats, so keep an eye on them. If you prefer a crunchier texture, leave them in the oven a little longer.
For chewier treats, you can remove them from the oven earlier, but make sure they’re firm enough to hold their shape.
Step 5: Cool and Store Your Treats
Once baked, remove the treats from the oven and let them cool completely on a wire rack. This step is essential, as cooling helps the treats firm up and makes them easier to store. Once cooled, you can store them in an airtight container for up to a week in the refrigerator.
If you want to extend their shelf life, consider freezing your liver treats. Simply place the cooled treats in a freezer-safe bag or container, and they’ll last up to 3 months. When you’re ready to use them, just thaw them out before serving.
2. Liver and Oats Dog Biscuits
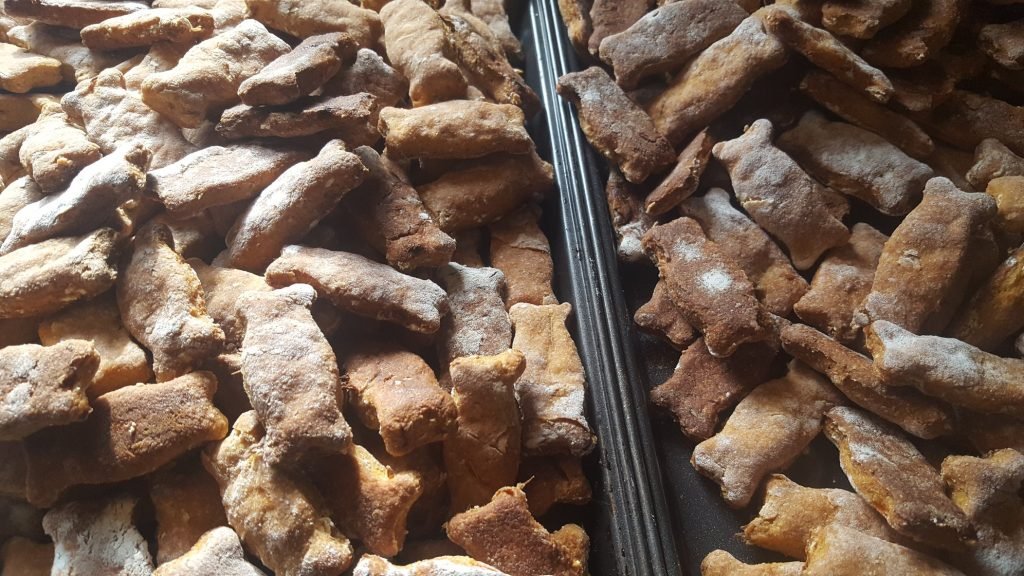
Looking for a healthy, homemade treat that’s easy to make and gentle on your dog’s tummy? Liver and oats dog biscuits might be just what you need. These wholesome biscuits combine the rich flavor of liver with the mild, digestible qualities of oats—perfect for dogs with sensitive stomachs or grain allergies. Plus, they’re packed with nutrients and can double as training rewards or special snacks.
Making these biscuits at home is surprisingly simple and doesn’t require fancy equipment or obscure ingredients. Whether you’re a seasoned baker or just starting out, this guide will walk you through everything you need to create tasty, nutritious biscuits your dog will go crazy for.
Why Combine Liver and Oats?
The pairing of liver and oats offers a great balance between flavor and nutrition. Liver is known for being rich in protein, iron, and vitamins like A, B12, and folate, making it a nutritional powerhouse for dogs. However, some dogs may find liver-heavy treats a bit rich on their own. That’s where oats come in.
Oats are a fiber-rich, gentle grain that can help regulate digestion. They also provide energy, promote heart health, and are gluten-free, which makes them a great option for dogs with wheat sensitivities. Combining these two ingredients results in a treat that’s hearty but not too heavy—easy to chew, easy to digest, and full of natural goodness.
What You’ll Need to Get Started
Before you get baking, here’s a quick look at the ingredients and tools you’ll want to have on hand:
- 1 cup of cooked liver (chicken, beef, or turkey), finely chopped or blended
- 2 cups of oat flour (or old-fashioned oats ground in a food processor)
- 1 egg
- 1 tablespoon of olive oil or coconut oil
- A few tablespoons of water or low-sodium broth (as needed)
- Optional: chopped parsley or turmeric for added benefits
You’ll also need a mixing bowl, a baking sheet, parchment paper, and a rolling pin. Cookie cutters are fun but not necessary—cutting the dough into squares works just as well.
Step-by-Step: Making Liver and Oats Dog Biscuits
Start by preheating your oven to 350°F (175°C) and lining your baking sheet with parchment paper.
Blending the Liver
Begin by cooking and preparing your liver. If you haven’t already, boil or sauté the liver until fully cooked, then let it cool slightly. Blend or finely chop it to a paste or very small pieces. This ensures it mixes well with the oat flour and helps evenly distribute that meaty flavor in every bite.
Mixing the Dough
In a large bowl, combine the blended liver with the oat flour and egg. Add the oil and stir everything together. If the mixture feels dry or crumbly, slowly add a tablespoon of water or broth at a time until a firm but pliable dough forms. The dough should be easy to roll out without being sticky.
If you want to add a little extra flair—like parsley for fresh breath or turmeric for joint health—now’s the time to stir it in.
Rolling and Cutting the Dough
Lightly flour your surface with oat flour and roll the dough out to about ¼-inch thick. Cut into shapes using your favorite cookie cutters or simply slice into squares or rectangles. Keep in mind your dog’s size and chewing habits when choosing treat sizes.
Transfer the biscuits to your prepared baking sheet, leaving a little space between each one.
Baking the Biscuits
Bake in the preheated oven for about 25–30 minutes or until the biscuits are firm and starting to turn golden brown. If you want a crispier texture for longer shelf life, turn the oven off and let the biscuits sit inside for another 30 minutes as it cools.
Once done, place the biscuits on a wire rack to cool completely.
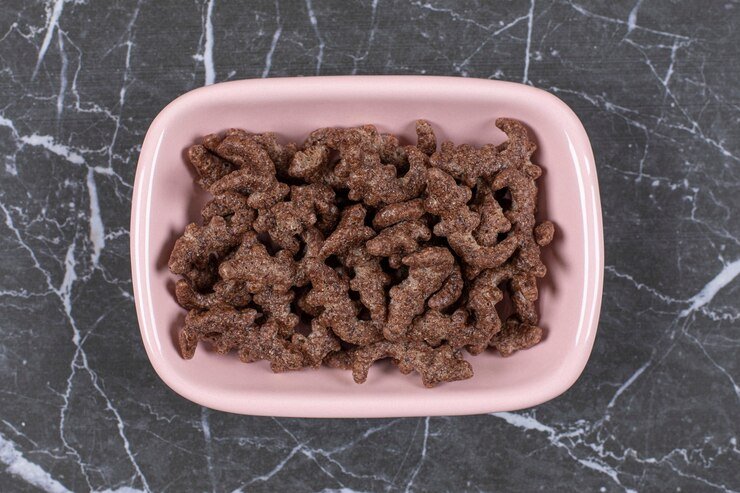
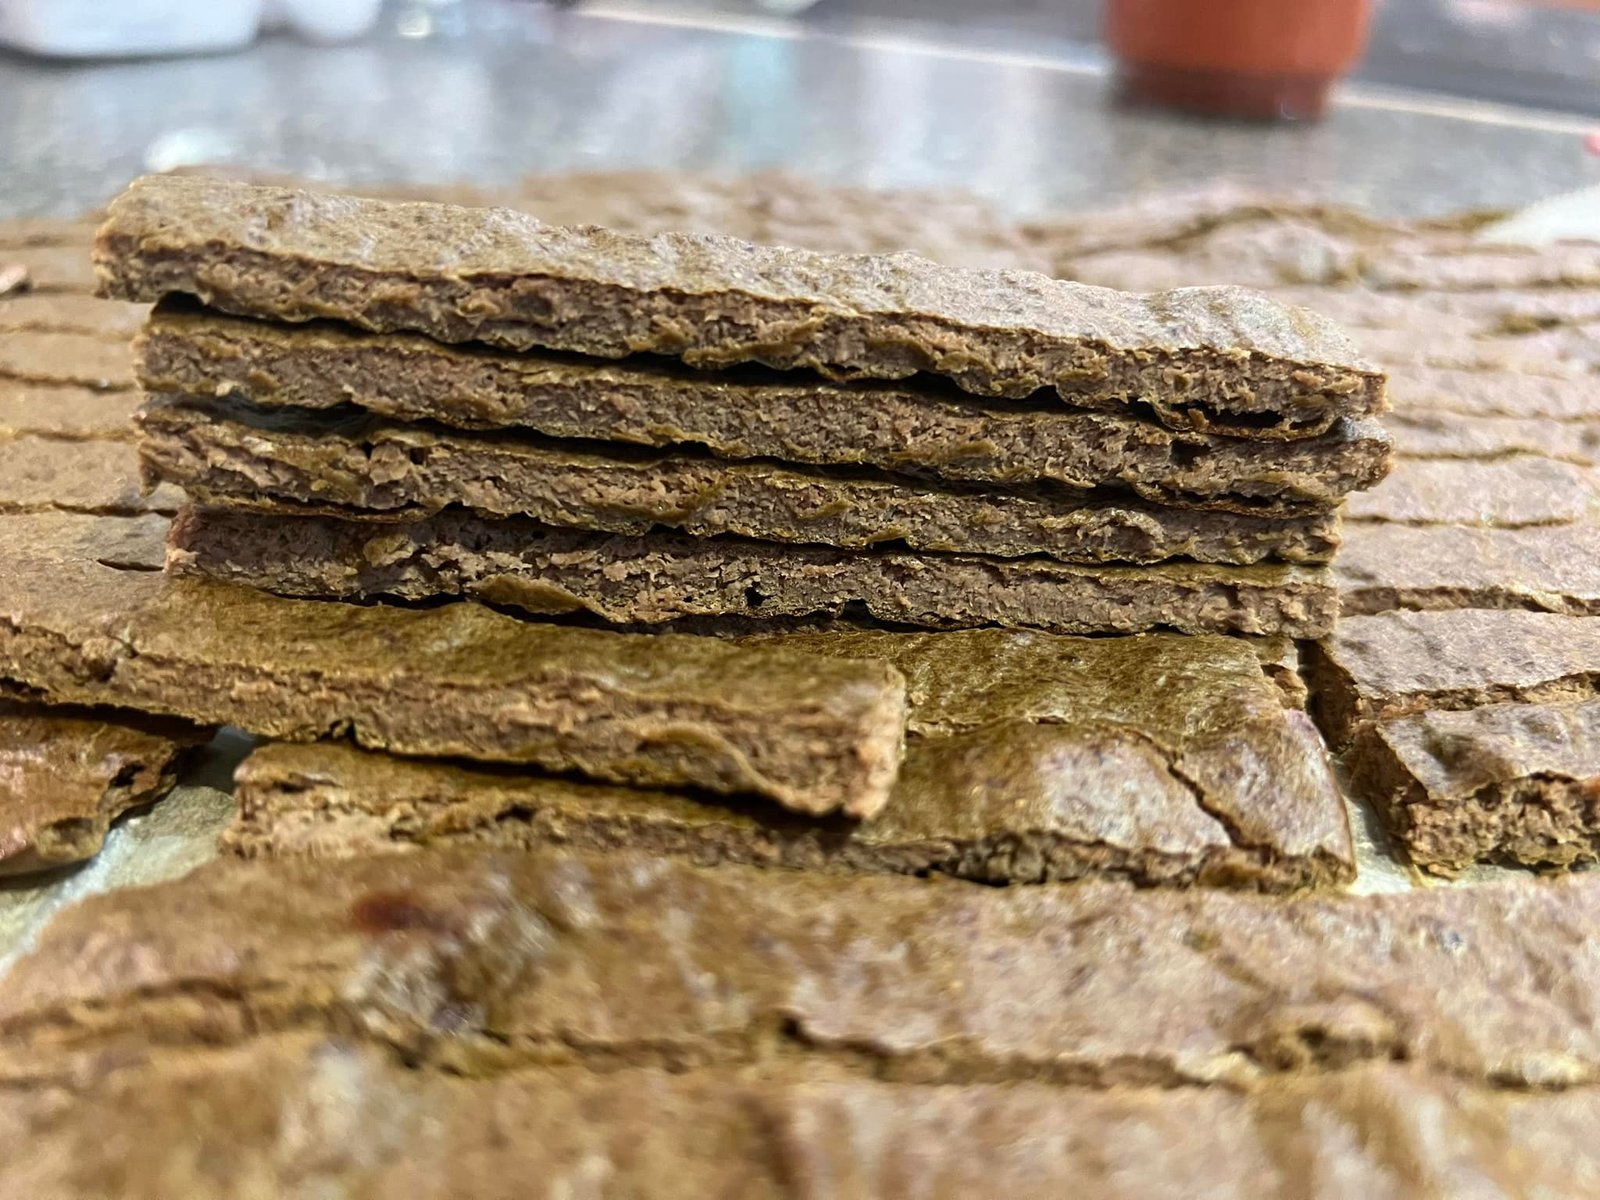
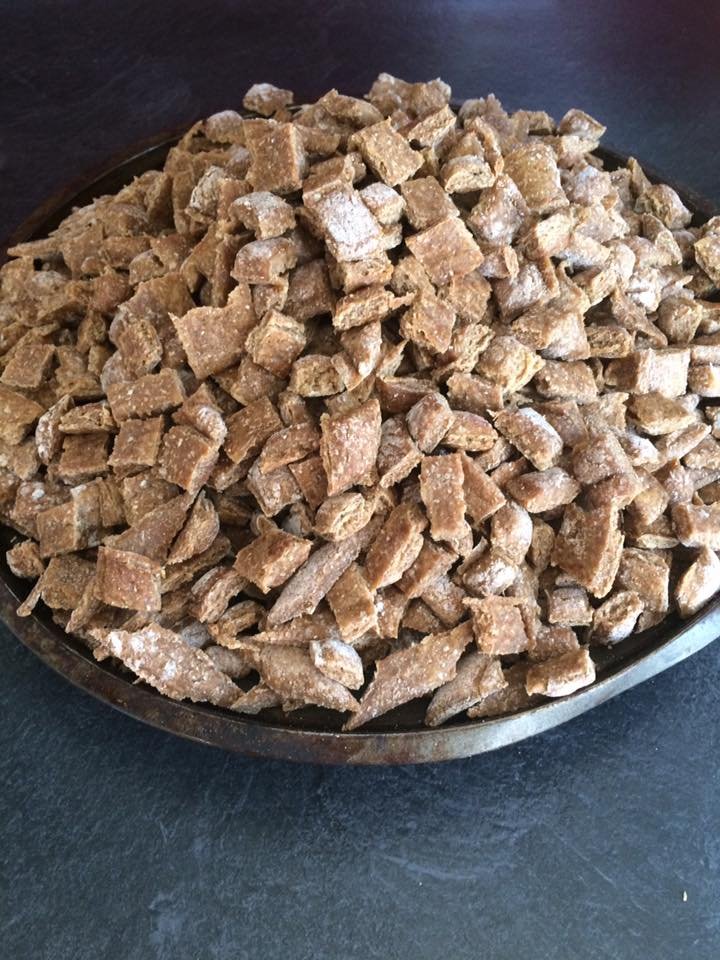
3. Liver Jerky
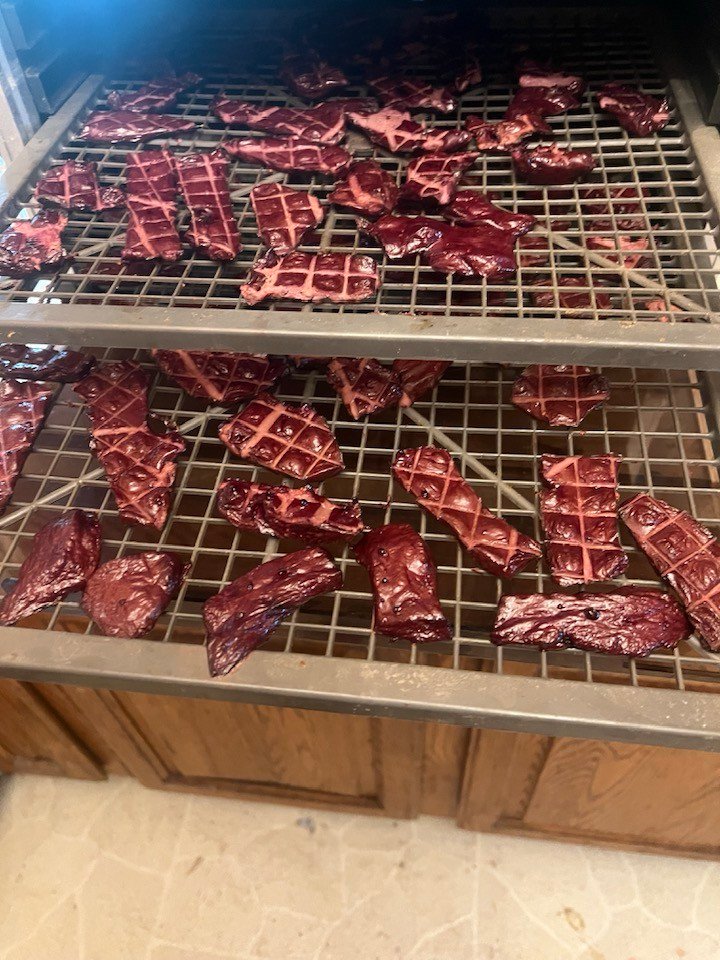
Liver jerky is one of the most loved treats by dogs—and for good reason. It’s flavorful, rich in nutrients, and super satisfying for chewing. Best of all, making your own liver jerky at home is easier than you might think. With just one main ingredient and a bit of time and patience, you can create a healthy, preservative-free snack that your dog will go crazy for.
Below, we’ll walk you through the process step by step so you can confidently prepare homemade liver jerky your dog will love.
Why Make Liver Jerky at Home?
Commercial jerky treats for dogs often come with unwanted preservatives, sodium, and artificial flavorings. Making your own liver jerky means you’re in control of the ingredients, and you can ensure it’s a wholesome, single-protein snack that’s safe and nutritious.
Liver is naturally high in vitamin A, iron, and essential amino acids. And when dehydrated into jerky form, it becomes a long-lasting treat that’s great for training, dental health, or just spoiling your pup with something special.
Step 1: Choosing the Right Liver
Start by selecting a fresh, high-quality liver. Chicken, beef, and turkey liver are all great choices. Chicken liver tends to be smaller and slightly softer, while beef liver has a firmer texture and more robust flavor.
Whatever you choose, make sure it’s fresh and free from any additives or preservatives. You can usually find liver at your local butcher, grocery store, or meat market. Frozen liver also works well—just be sure to thaw it completely in the refrigerator before using it.
Step 2: Prepping the Liver
Once you have your liver, rinse it under cold water to remove any blood or debris. Pat it dry thoroughly with paper towels. Removing excess moisture helps the liver dehydrate more evenly and efficiently.
Next, slice the liver into thin strips, about ¼ inch thick. Try to keep your slices uniform to ensure consistent drying. If the liver is too soft or slippery to cut easily, place it in the freezer for about 20 to 30 minutes. Slightly frozen liver is much easier to slice into clean strips.
For longer, chewable jerky, cut the liver along the grain (lengthwise). If you want softer, shorter bites, cut across the grain. Either method works—it just depends on your dog’s size and chewing habits.
Step 3: Drying the Liver
You have two options when it comes to drying the liver: using a dehydrator or baking it low and slow in your oven.
Lay your liver strips flat on the dehydrator trays, making sure they don’t overlap. Set your dehydrator to 160°F (70°C) for meat. Let the liver dry for 6 to 8 hours, depending on the thickness of the slices and the humidity in your environment.
The jerky is done when it’s dry to the touch, dark brown in color, and snaps or tears when bent—but doesn’t crumble. Some people prefer a slightly chewy texture, while others dry it until it’s completely crisp.
If you don’t have a dehydrator, no problem. Preheat your oven to its lowest setting, typically between 160°F to 180°F (70°C to 82°C). Line a baking sheet with parchment paper or place a wire rack on top of a baking tray to allow for better airflow.
Arrange the liver strips in a single layer and bake with the oven door slightly ajar to let moisture escape. This simulates the airflow of a dehydrator and helps prevent the liver from cooking instead of drying. Bake for 2.5 to 3.5 hours, checking periodically for doneness.
Step 4: Cooling and Storing the Jerky
After the liver jerky is fully dehydrated, remove it from the oven or dehydrator and let it cool completely on a wire rack. Proper cooling prevents condensation in storage, which could lead to mold.
Store your homemade liver jerky in an airtight container or zip-top bag. It will last up to 2 weeks in the refrigerator. For longer storage, freeze the jerky in small batches and thaw as needed—your dog won’t mind the wait!
Because homemade jerky doesn’t contain preservatives, it’s best to make small batches and store them in cool, dry places. For added protection, you can use vacuum-sealed bags to keep your treats fresh for even longer.
4. Liver and Pumpkin Treats
Combining the nutritional power of liver with the digestive benefits of pumpkin, liver and pumpkin treats are a fantastic homemade option for your furry friend. These treats not only taste great to dogs, but they also provide a gentle boost to their digestive health, thanks to the natural fiber in pumpkin. If you’re looking for a healthy, homemade dog treat that your pup will love and that you can feel good about feeding, this recipe is a perfect pick.
This guide walks you through each step to create these delicious baked goodies right from your kitchen.
Why Choose Liver and Pumpkin Together?
Liver is packed with vitamins A, B12, and iron—essential nutrients that support your dog’s vision, energy levels, and immune health. Pumpkin, on the other hand, is rich in fiber, beta-carotene, and moisture, which helps promote regular digestion and supports weight control.
When combined, these two ingredients create a flavorful, nutrient-dense treat that’s both satisfying and beneficial. It’s especially helpful for dogs with sensitive stomachs or those needing an occasional digestive reset.
Step 1: Gathering Your Ingredients
To make liver and pumpkin treats, you’ll need just a few simple ingredients:
- 1 pound of fresh or frozen liver (beef, chicken, or turkey)
- 1 cup of canned pure pumpkin (not pumpkin pie filling)
- 1 egg
- 1½ to 2 cups of whole wheat flour (or oat flour for a gluten-free version)
- Optional: A pinch of turmeric or parsley for added benefits
Make sure your pumpkin is plain and unsweetened. Avoid any canned products that include sugar, spices, or artificial flavorings, as they can be harmful to dogs.
Step 2: Prepping the Liver
Start by rinsing the liver under cold water and patting it dry. If you’re using frozen liver, make sure it’s fully thawed in the refrigerator beforehand. Liver can be soft and tricky to cut, so you may want to partially freeze it for 20–30 minutes before chopping. This will help you slice it into smaller chunks more easily.
Once chopped, place the liver in a food processor or blender and pulse until it’s smooth and thick—almost like a paste. This consistency will help it mix better with the pumpkin and flour in the next steps.
Step 3: Mixing the Dough
In a large mixing bowl, combine the pureed liver with the pumpkin and egg. Stir until well blended. Gradually add the flour, about half a cup at a time, until a dough forms. You’re aiming for a thick, slightly sticky dough that holds its shape but isn’t too wet.
If the dough feels too loose, add a bit more flour. If it’s too stiff, you can splash in a small amount of water or extra pumpkin puree to loosen it.
The dough should be firm enough to roll out but not so dry that it cracks. It should be easy to handle without sticking heavily to your hands. A well-mixed dough will make cutting or shaping your treats a breeze.
Step 4: Shaping and Baking the Treats
Preheat your oven to 350°F (175°C). Line a baking sheet with parchment paper or lightly grease it with a bit of oil.
On a floured surface, roll out the dough to about ¼ inch thickness. Use your favorite dog-themed cookie cutters—or just a knife—to cut the dough into bite-sized shapes. If you’re short on time, you can also scoop small spoonfuls of dough onto the baking sheet and flatten them slightly with your hand or a fork.
Bake the treats for 25–30 minutes, or until they’re firm to the touch and slightly golden on the edges. For crunchier treats, you can leave them in the oven (turned off) for an additional 30–45 minutes to dehydrate them further.
Step 5: Cooling and Storage
After baking, remove the treats from the oven and let them cool completely on a wire rack. Cooling is important to prevent condensation inside your storage container, which could cause mold or sogginess.
Store the cooled treats in an airtight container in the fridge for up to one week. For longer storage, freeze them in small batches and thaw as needed. Dogs usually enjoy them just as much straight from the freezer!
These treats are best given in moderation due to the richness of liver. A few treats a day are usually sufficient for most dogs. For small breeds, cut the treats into smaller shapes before baking.
5. Peanut Butter Liver Treats
Peanut butter and liver might sound like an odd combination to us, but to your dog, it’s pure magic. These two ingredients pack a powerful punch when it comes to both flavor and nutrition. Peanut butter delivers healthy fats and protein, while liver brings essential vitamins and minerals to the mix. This guide will take you through the full process of making delicious, homemade Peanut Butter Liver Treats that your pup will go wild for.
Why Combine Peanut Butter and Liver?
Dogs love both liver and peanut butter individually—but together, they create a flavor explosion that’s perfect for training, rewarding good behavior, or just showing your pup some love. Liver is rich in iron, B vitamins, and vitamin A, which supports energy, immunity, and healthy skin. Peanut butter (make sure it’s xylitol-free) adds healthy fat and a creamy texture that balances the stronger flavor of the liver.
Gathering Your Ingredients
Before you begin, gather the following items:
- 1 pound of chicken, beef, or turkey liver (fresh or frozen, fully thawed)
- ½ cup natural peanut butter (unsweetened, no xylitol)
- 1 egg
- 1½ to 2 cups of whole wheat or oat flour
- Optional: A dash of cinnamon or parsley
Make sure the peanut butter you’re using is safe for dogs. Always double-check the ingredients list to avoid xylitol, which is toxic to dogs.
Prepping the Liver for the Recipe
Liver has a strong scent and a soft, slippery texture, which can make it tricky to prep. Rinse it under cold water, pat it dry, and then chop it into manageable pieces. To make the next step easier, you can pop the liver in the freezer for 15–20 minutes before blending. This firms it up, making it simpler to handle.
Use a food processor or blender to puree the liver until it becomes smooth and paste-like. This ensures it mixes evenly with the peanut butter and flour later on.
Mixing the Dough:
In a large mixing bowl, combine the liver puree with peanut butter and the egg. Stir until everything is well incorporated. Slowly add the flour, about half a cup at a time, stirring or kneading as you go. You’re aiming for a thick, workable dough that isn’t too sticky or too dry.
If the dough sticks to your hands, add a touch more flour. If it crumbles, add a spoonful of peanut butter or a splash of water to help bring it back together.
Adjusting the Consistency:
The ideal texture is slightly firm but pliable. You should be able to roll it out without it cracking or sticking too much. Don’t worry if it’s not perfect—it’s all about making treats that are safe, healthy, and tasty for your pup.
Rolling and Shaping the Treats:
Preheat your oven to 350°F (175°C). Line a baking sheet with parchment paper or lightly grease it.
Roll the dough out on a lightly floured surface until it’s about ¼ inch thick. You can use cookie cutters to make fun shapes or simply cut the dough into small squares with a knife. For training treats, go for smaller pieces. If you’re just making everyday snacks, feel free to shape them however you like.
Place your cutouts on the prepared baking sheet, leaving a little space between each one.
Baking and Cooling the Treats:
Bake the treats in the preheated oven for 25–30 minutes, or until the edges turn golden brown. If you want crunchier treats, turn off the oven once baking is done and leave the tray inside for another 30 minutes with the door slightly ajar. This helps dehydrate the treats naturally.
Once baked, let the treats cool completely on a wire rack. Cooling helps them firm up and prevents condensation if you’re planning to store them.
These treats will keep in an airtight container in the refrigerator for up to 7 days. For longer shelf life, store extras in the freezer for up to 3 months. Just let them thaw for a few minutes before offering one to your dog.
6. Liver and Sweet Potato Snacks
Combining liver and sweet potatoes makes for a nutritious, dog-approved treat that balances protein, vitamins, and flavor. Liver provides essential nutrients like iron, B12, and vitamin A, while sweet potatoes bring in fiber, antioxidants, and natural sweetness. If you’re looking for an easy, wholesome recipe to spoil your pup a little, this guide has you covered from prep to tail-wagging finish.
Why Liver and Sweet Potato Work Well Together
Liver is one of the most nutrient-dense organ meats, making it an excellent choice for homemade dog treats. But it does have a strong flavor on its own, which is where sweet potatoes come in. Their mild, naturally sweet taste softens the intensity of the liver and adds beneficial nutrients like beta-carotene, vitamin C, and potassium. Together, they create a balanced snack that’s both delicious and healthy.
What You’ll Need Before You Start
Before you jump in, make sure you have the right ingredients and tools on hand. Here’s what you’ll need:
- 1 pound of liver (beef, chicken, or turkey all work well)
- 1 medium sweet potato, cooked and mashed
- 1 egg
- 1–1½ cups of whole wheat flour or oat flour
- Optional: a pinch of turmeric or parsley
Basic kitchen tools like a food processor or blender, mixing bowl, spoon, baking sheet, parchment paper, and rolling pin will also come in handy.
Cooking and Prepping the Sweet Potato
Start by washing your sweet potato thoroughly, then pierce it a few times with a fork. You can bake it at 400°F for about 45 minutes, boil it until soft, or microwave it if you’re short on time. Once it’s fully cooked and cooled, peel off the skin and mash it with a fork until smooth.
This mash will act as both a binder and a flavor balancer in the treat dough, helping everything stick together while offering a hint of sweetness.
Prepping the Liver
If you’re using fresh liver, rinse it under cold water and pat it dry. For easier blending, cut it into smaller chunks. You can also freeze it for 15–20 minutes to make it firmer and easier to handle. Add it to your food processor and blend until smooth and paste-like.
Blending the liver ensures it mixes evenly into the dough and makes it easier to measure and combine with other ingredients.
Making the Dough
In a large mixing bowl, combine your mashed sweet potato, liver puree, and one egg. Stir the mixture until everything is evenly incorporated. Begin adding flour, a little at a time, until you achieve a soft, workable dough. You might not need the full amount of flour—or you may need a bit more, depending on the moisture content of your liver and sweet potato.
The goal is a dough that’s firm enough to roll out but still slightly tacky. It shouldn’t be overly wet or sticky.
Rolling and Shaping the Treats
Preheat your oven to 350°F (175°C). Lightly flour your work surface and roll the dough to about ¼ inch thickness. You can cut it into small squares or use fun cookie cutters to make hearts, bones, or stars.
Transfer the cutouts onto a parchment-lined baking sheet, spacing them out slightly to ensure even baking.
Baking the Treats
Bake for 25–30 minutes, or until the treats are firm and the edges begin to brown. For a crispier texture, turn off the oven and leave the treats inside for an additional 30 minutes with the door slightly open.
Allow them to cool completely before offering them to your pup. Cooling helps the treats harden and ensures safe storage.
Storage and Serving Tips
Once cooled, store the treats in an airtight container in the fridge for up to a week. If you’ve made a large batch, they freeze well too—just defrost a few at a time as needed.
These treats are perfect for everyday rewards, training sessions, or even stuffing inside puzzle toys. Their soft-but-firm texture also makes them a good choice for senior dogs or those with dental sensitivities.
7. Liver and Carrot Cookies
If you’re looking to treat your dog to something both tasty and nutritious, liver and carrot cookies are a perfect pick. Liver is packed with essential nutrients like iron, zinc, and vitamin A, while carrots bring a gentle crunch and a sweet note, along with a boost of fiber and antioxidants. This recipe combines them into a soft, savory cookie your pup will eagerly sit for—and maybe even shake on command.
Why Liver and Carrots Are a Great Pair
Liver has a strong aroma and rich flavor that dogs absolutely love. But on its own, it can be a bit overwhelming. That’s where carrots come in. They mellow out the intensity while adding natural sweetness, plus they’re low in calories and high in vitamins like beta-carotene. Together, they create a balanced, delicious treat that’s ideal for dogs of all sizes.
Gathering Your Ingredients and Tools
To get started, you’ll need:
- 1 cup liver (chicken or beef), pureed
- 1 cup grated carrot (about 1 large carrot)
- 1 egg
- 1½ cups oat flour or whole wheat flour
- 1 tablespoon olive oil or coconut oil
- Optional: a pinch of cinnamon or parsley for extra flavor
As for tools, you’ll want a blender or food processor, mixing bowls, a spoon or spatula, a baking sheet, parchment paper, and a rolling pin if you’re shaping cookies.
Prepping the Liver
Fresh or frozen liver works here. If using frozen, make sure it’s fully thawed. Rinse and pat it dry, then cut it into smaller chunks for easier blending. Use your food processor to puree it until smooth. This ensures an even texture in the cookie dough and helps it mix seamlessly with the other ingredients.
Grating the Carrots
Wash and peel your carrot before grating it finely. A finer grate blends better with the dough and bakes more evenly. Carrots not only add nutrients but also moisture, which helps the cookies stay soft inside with a slightly crisp edge.
Mixing the Cookie Dough
In a large mixing bowl, combine the liver puree, grated carrots, egg, and oil. Stir until everything is well incorporated. Begin adding your flour gradually, mixing until the dough comes together. It should be slightly sticky but workable—if it’s too wet, add a bit more flour; too dry, add a splash of water.
Let the dough rest for 5–10 minutes. This helps the flour absorb moisture and makes rolling easier.
Shaping Your Cookies
Preheat your oven to 350°F (175°C). Line your baking sheet with parchment paper. On a floured surface, roll out the dough to about ¼ inch thick. You can use cookie cutters for fun shapes or simply slice the dough into bite-sized squares or rounds.
If rolling isn’t your thing, another easy option is to scoop out small spoonfuls and flatten them slightly with your fingers.
Baking the Cookies
Place your cookies on the lined baking sheet, giving a little space between each one. Bake for about 20–25 minutes, or until the edges are golden and the centers are set. For a crunchier cookie, bake a little longer or leave them in the turned-off oven for 30 minutes to dry out further.
Let the cookies cool completely before storing or serving. Cooling not only firms them up but also makes them safe to handle and chew.
Storage Tips and Treat Time
Once fully cooled, store the cookies in an airtight container in the fridge. They’ll stay fresh for about a week. For longer storage, freeze them in a zip-top bag and thaw a few at a time.
These cookies make perfect training treats, snack-time rewards, or just a sweet way to say “I love you” to your four-legged friend. Because they’re homemade, you avoid preservatives, fillers, and any ingredients that might not agree with your dog’s tummy.
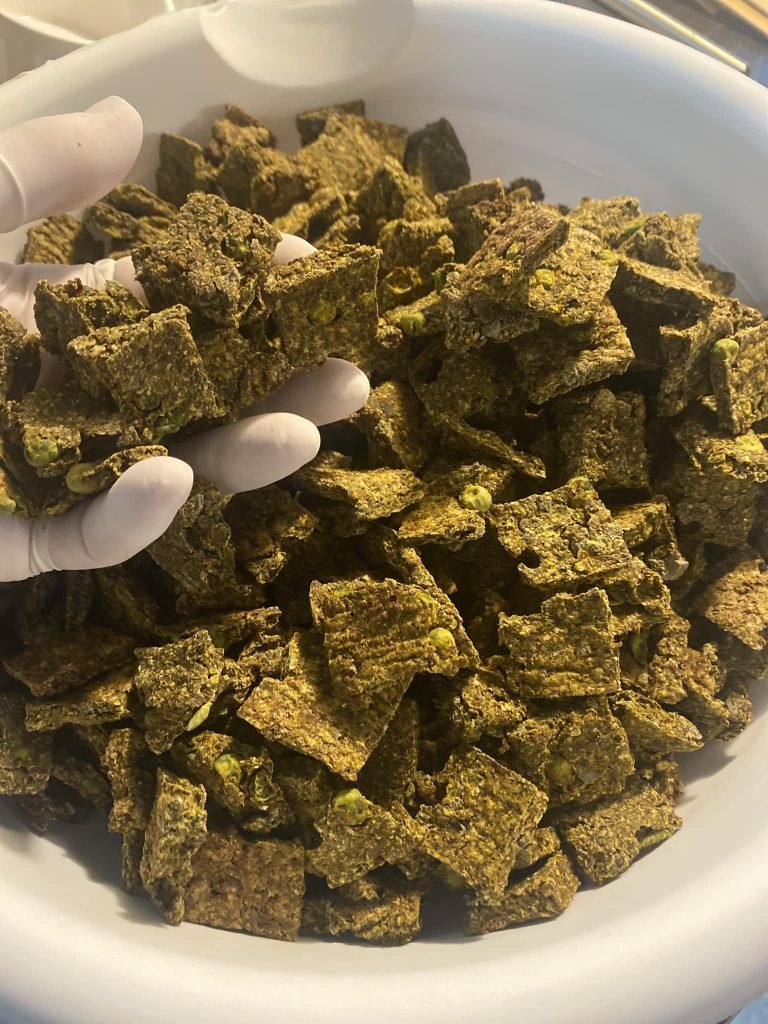
8. Liver and Spinach Dog Treats

Looking to pack a healthy punch into your dog’s snack time? Liver and spinach treats are a fantastic choice. Liver provides a rich source of protein, iron, and essential vitamins, while spinach brings in fiber, antioxidants, and a healthy dose of green goodness. This homemade combo is tasty, full of nutrients, and surprisingly easy to whip up in your kitchen.
Why Liver and Spinach Work So Well Together
Liver is beloved by most dogs for its intense flavor and irresistible scent, but it can be heavy on its own. Spinach helps balance it out with its lighter, slightly earthy taste, while also delivering a serious nutritional boost. Vitamins A, C, and K, along with iron and magnesium, make spinach a great addition to your pup’s diet in moderation.
Ingredients and Tools You’ll Need
Here’s what you’ll need to prepare these treats:
- 1 cup chicken or beef liver (raw or cooked)
- 1 cup fresh spinach, chopped or lightly steamed
- 1 egg
- 1 to 1½ cups oat flour or whole wheat flour
- 1 tablespoon olive oil or coconut oil
For tools, you’ll want a food processor or blender, a mixing bowl, spatula or spoon, baking sheet, parchment paper, and cookie cutters or a knife for shaping.
Preparing the Liver
If using raw liver, rinse it under cold water and pat it dry. Cut it into smaller chunks for easier blending. Toss it into your food processor and blend until smooth. If you prefer using cooked liver, simply boil or sauté it until it’s fully cooked, then blend it the same way. Either method will work well in the dough.
Handling the Spinach
You can use fresh or lightly steamed spinach in this recipe. If using fresh, wash it thoroughly and chop it finely. For steamed spinach, a quick 30-second steam will soften it just enough to blend smoothly with the liver. Avoid over-steaming to preserve nutrients.
Add the spinach to the blended liver and pulse until well combined. You’ll end up with a greenish liver mixture that forms the base of your treat dough.
Mixing the Dough
Transfer your liver-spinach blend into a large mixing bowl. Add in the egg and oil, stirring to combine. Slowly mix in the flour a little at a time, working it in until a soft, slightly sticky dough forms. You want the dough to be pliable but not wet—just enough to roll and shape.
Let the dough rest for 5–10 minutes. This gives the flour time to absorb moisture, making the dough easier to handle and roll out.
Shaping the Treats
Preheat your oven to 350°F (175°C). Lightly flour a clean surface, then roll out your dough to about ¼ inch thickness. Use cookie cutters or a knife to cut the dough into your desired shapes. Small, bite-sized pieces work best for training or daily treats.
Place your shapes on a parchment-lined baking sheet, leaving a little space between each.
Baking the Treats
Bake the treats for 20–25 minutes, or until they’re firm to the touch and just starting to brown on the edges. If you want a crunchier texture, you can leave them in the oven (turned off) for an additional 20–30 minutes to dry out more thoroughly.
Let the treats cool completely before serving. This not only makes them safe to eat but also helps them firm up for storage.
Storage and Serving Suggestions
Store the cooled treats in an airtight container in the fridge for up to a week. For longer storage, freeze them in a zip-top bag and take out a few at a time when needed.
These treats are great as a daily snack, training reward, or even crumbled over your dog’s food for a nutritional boost. They’re soft enough for older dogs to chew but can also be made crispier depending on how long you bake them.
People Also Asked
What Type of Liver Is Best for Homemade Dog Treats?
When it comes to making liver treats at home, beef liver, chicken liver, and turkey liver are all excellent choices. Beef liver is rich in nutrients and has a strong flavor dogs love, while chicken liver is milder and softer, making it easier to blend or puree. Turkey liver is a great alternative if you’re looking for something in between.
Always choose fresh, high-quality liver, preferably from grass-fed or pasture-raised animals if available. Avoid liver that has a strong odor or discolored appearance—it should be reddish and moist, not gray or dried out.
How Often Can You Give Liver Treats to Your Dog?
Liver treats should be given in moderation due to the high vitamin A content. While liver is packed with beneficial nutrients, too much vitamin A can lead to toxicity over time. A safe rule of thumb is to give liver treats a few times per week rather than daily.
For small dogs, 1–2 small treats per serving is plenty, while larger dogs can handle a few more. These treats are best used as a supplement to your dog’s balanced diet, not a replacement.
Can You Use Cooked or Raw Liver for Dog Treats?
Yes, both cooked and raw liver can be used, depending on the recipe and your comfort level. Raw liver is easier to blend and retains more nutrients, but some pet owners prefer to lightly cook it for safety reasons. If cooking, steaming or boiling is best to preserve most of the vitamins.
Whether you use raw or cooked liver, always wash it thoroughly before use and store any leftovers in the refrigerator or freezer to avoid spoilage.
Are Liver Treats Safe for Puppies?
Liver treats are generally safe for puppies in small amounts. Because their digestive systems are still developing, it’s best to introduce liver slowly and monitor for any reactions like loose stools.
Start with a tiny portion and use cooked liver for easier digestion. Avoid giving liver treats every day and make sure they’re part of a balanced diet. Consult your vet before adding new treats to your puppy’s routine, especially if they have dietary restrictions.
How Do You Store Homemade Liver Dog Treats?
To keep liver treats fresh and safe for your dog, store them in an airtight container in the refrigerator for up to 5–7 days. For longer shelf life, you can freeze the treats in a zip-top freezer bag or sealed container for up to 2–3 months.
When you’re ready to use them, let them thaw at room temperature or warm them slightly in the microwave. Avoid leaving them out at room temperature for more than a few hours, especially if they contain no preservatives.
What Ingredients Pair Well With Liver in Dog Treats?
Liver pairs well with several dog-friendly ingredients that add flavor, texture, and nutritional value. Some popular pairings include pumpkin, sweet potato, oats, peanut butter (xylitol-free), carrots, spinach, and eggs.
These ingredients help balance the richness of liver and create more palatable, digestible treats. They also make it easier to form dough or batter when baking or dehydrating the treats. Always use ingredients that are safe and healthy for dogs, and skip anything with added sugar, salt, or spices.
Final Words
Homemade liver dog treats are a simple, nutritious, and cost-effective way to show your dog some love. Packed with protein, vitamins, and minerals, liver makes a flavorful base that most dogs can’t resist. Whether you’re baking, dehydrating, or mixing it with healthy add-ins like pumpkin or spinach, you have full control over what goes into your dog’s snacks.
These treats not only taste great but also support your dog’s overall health when given in moderation. Best of all, making them yourself means no hidden ingredients—just wholesome goodness.
So grab your apron, fire up the oven, and treat your pup to something homemade, healthy, and tail-waggingly delicious! They’ll thank you with every bite.