

Looking for healthier snack options for your pup? These 6 Homemade Low-Fat Dog Treats are the perfect way to spoil your dog without the guilt. Whether your furry friend is on a special diet, trying to lose a few pounds, or you’re just looking to cut back on unnecessary fats, making your own treats at home gives you full control over the ingredients. Store-bought options can be packed with preservatives, fillers, and hidden fats—but these homemade recipes keep things simple, wholesome, and tail-waggingly delicious.
The best part? You don’t need to be a master chef to whip them up. With a few basic ingredients from your kitchen and some love, you can create treats your dog will beg for. From crunchy bites to soft snacks, this list of 6 Homemade Low-Fat Dog Treats has something for every pup. Let’s get baking and treat your best friend to something tasty and healthy!
Benefits of Low-Fat Dog Treats
When it comes to keeping our dogs happy and healthy, treats play a big role. They’re perfect for training, rewarding good behavior, or just showing a little extra love. But not all treats are created equal—especially when it comes to fat content. Choosing low-fat dog treats can make a big difference in your dog’s health and overall well-being.
Below, we’ll break down the key benefits of offering low-fat treats and why they’re a smart choice for pet parents who want the best for their furry companions.
Helps Maintain a Healthy Weight
One of the biggest reasons to choose low-fat dog treats is weight management. Just like humans, dogs can pack on the pounds quickly—especially with too many high-fat snacks.
Extra weight can lead to a number of health issues, including joint pain, heart disease, and even diabetes. Low-fat treats help reduce unnecessary calorie intake while still allowing your dog to enjoy tasty rewards. They’re a great way to keep your pup fit without sacrificing treat time.
If your dog is already overweight or prone to weight gain (like breeds such as Labradors or Beagles), switching to low-fat treats can support a healthier lifestyle. Combine this with regular exercise, and you’ll be on the right track.
Better for Dogs with Pancreatitis or Sensitive Stomachs
Some dogs suffer from pancreatitis, a painful and potentially dangerous condition caused by inflammation of the pancreas. One of the most important aspects of managing this condition is sticking to a low-fat diet.
Even if your dog hasn’t been diagnosed with pancreatitis, they may still have a sensitive stomach. High-fat treats can lead to digestive upset, including vomiting or diarrhea. Low-fat dog treats are gentler on your pup’s digestive system and reduce the risk of flare-ups or discomfort.
If your vet has recommended a low-fat diet due to health concerns, it’s crucial to follow through—even when it comes to treats.
Supports Long-Term Heart Health
A diet high in unhealthy fats doesn’t just affect weight—it can impact heart health, too. Over time, fatty diets may contribute to high cholesterol and increased strain on the heart.
By choosing low-fat dog treats, you’re supporting better cardiovascular function and overall health. These treats are often made with lean proteins and whole-food ingredients that help maintain steady energy and keep your dog’s ticker strong. It’s a small change that can make a big difference over time.
Reduces Risk of Obesity-Related Diseases
Obesity in dogs is more than just an appearance issue—it’s a serious health concern. Overweight dogs are more likely to develop conditions such as:
- Type 2 diabetes
- Osteoarthritis
- Respiratory issues
- High blood pressure
- Certain cancers
Low-fat treats can help reduce the risk of these problems by keeping your dog’s caloric intake in check. They also encourage better portion control, since you can reward more frequently without as much concern for overfeeding.
Improves Energy and Activity Levels
Dogs that maintain a healthy weight tend to be more active and playful. When you’re not weighing them down with heavy, fatty treats, they often have more energy to enjoy walks, play fetch, or just run around the yard.
Low-fat treats give your dog the fuel they need—without the sluggish side effects that sometimes come from rich snacks. This is especially beneficial for older dogs or those recovering from injury who need to stay mobile and alert.
Encourages Cleaner Eating Habits
When you switch to low-fat dog treats, you often end up cutting out a lot of the additives and junk found in traditional store-bought options. Many homemade or health-focused low-fat treats use ingredients like sweet potatoes, carrots, oats, or lean proteins.
This not only lowers the fat content but also boosts the nutritional value of each snack. Cleaner ingredients can lead to shinier coats, healthier digestion, and even better breath.
Plus, when you make your own low-fat treats at home, you know exactly what your dog is eating. No fillers, no by-products—just good, simple food.
A Safer Option for Frequent Treating
If you use treats regularly for training or reinforcement, low-fat options are your best bet. You can give more rewards throughout the day without worrying as much about fat overload. This is ideal for puppies in training, senior dogs learning new routines, or any dog working on behavior improvement.
Frequent treating can backfire if the snacks are high in fat and calories—but low-fat treats strike the right balance between positive reinforcement and healthy nutrition.
Peanut Butter and Pumpkin Bites Recipe
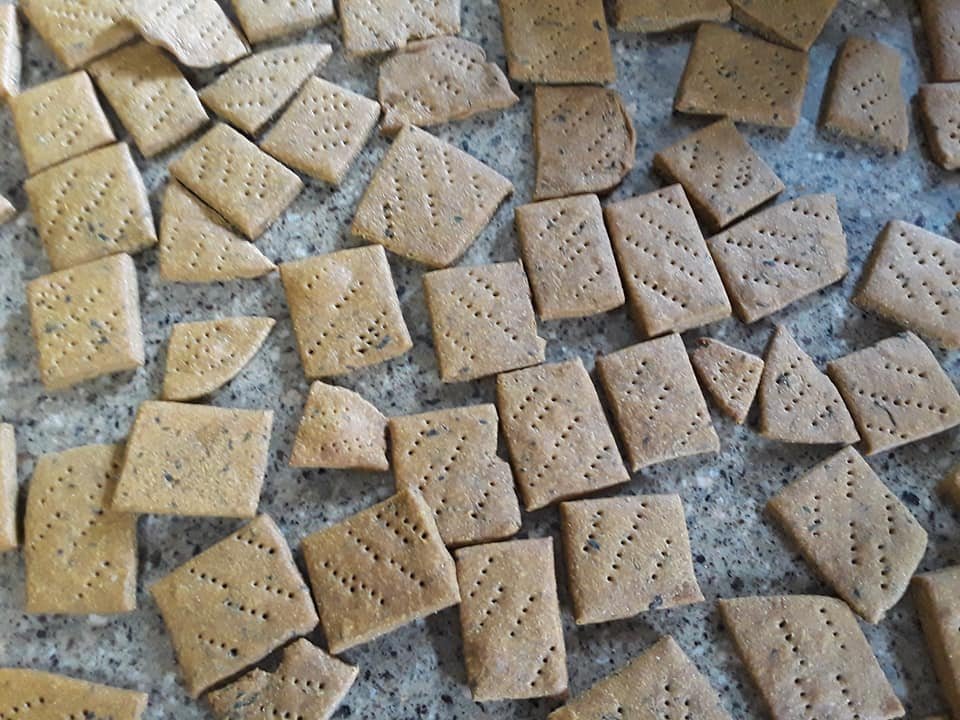
Looking for a quick and easy dog treat that’s both healthy and tail-waggingly delicious? These Peanut Butter and Pumpkin Bites are a favorite among pups and pet parents alike. Packed with wholesome ingredients and low in fat, this homemade recipe is perfect for dogs watching their waistlines—or anyone who wants to ditch the store-bought snacks for something more natural.
Pumpkin is gentle on your dog’s tummy and full of fiber, while peanut butter adds a flavor dogs go crazy for. Together, they create a chewy, tasty treat that’s easy to make and even easier to store.
Here’s a step-by-step guide to making your own Peanut Butter and Pumpkin Bites right at home.
Ingredients You’ll Need
Before you begin, gather these simple, pantry-friendly ingredients:
- 1/2 cup natural peanut butter (unsweetened, no xylitol)
- 1 cup canned pumpkin puree (plain, not pie filling)
- 2 cups whole wheat flour (or oat flour for sensitive tummies)
- 1/2 tsp cinnamon (optional)
- 1 egg (helps bind the dough)
These ingredients are low in fat, high in fiber, and safe for most dogs when used in moderation.
Step 1: Preheat and Prepare
Start by preheating your oven to 350°F (175°C).
Line a baking sheet with parchment paper or a silicone baking mat to prevent sticking and keep cleanup easy.
Step 2: Mix Wet Ingredients
In a large mixing bowl, combine the canned pumpkin, peanut butter, and egg. Mix well using a spoon or electric mixer until smooth and fully combined.
This base mixture creates the rich, moist texture that makes these bites irresistible.
Step 3: Add Dry Ingredients
Slowly add the flour to the wet mixture, stirring as you go. The dough should become thick and slightly sticky, but not too wet. If it’s too dry, add a tablespoon of water at a time. If it’s too sticky, sprinkle in a bit more flour.
Add the optional cinnamon for a little extra flavor boost—it’s safe for dogs in small amounts and adds a lovely scent.
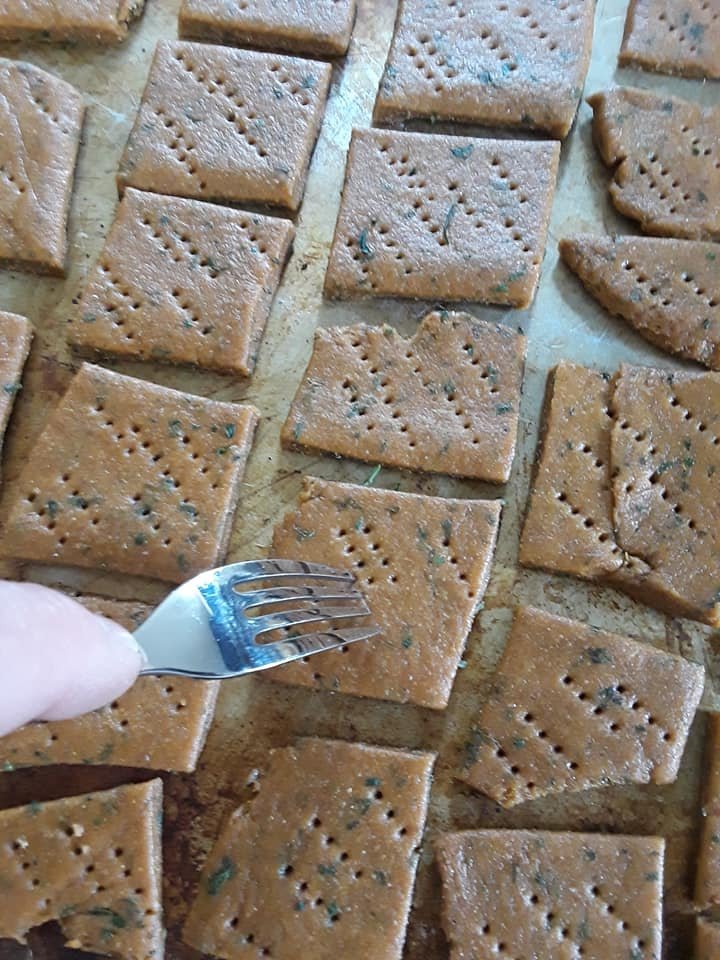
Step 4: Roll and Cut
Once your dough is ready, lightly flour your work surface and roll it out to about 1/4 inch thickness.
Use small cookie cutters (bone shapes are always fun!) or simply cut into small squares using a knife or pizza cutter.
Try to keep the treats small—especially if you use them for training or daily rewards.
Step 5: Bake to Perfection
Place the cutouts on your lined baking sheet and pop them into the preheated oven.
Bake for 20–25 minutes, or until the edges are golden brown and slightly crisp.
For a crunchier texture (great for dental health), leave them in the oven with the heat off for an additional 10 minutes to dry out.
Step 6: Cool and Store
Let the treats cool completely before serving them to your dog.
Store them in an airtight container at room temperature for up to a week, or refrigerate to keep them fresh longer. You can also freeze them in batches and defrost as needed.
Just make sure your pup doesn’t help themselves while they cool!
Why These Treats Are a Great Choice
These Peanut Butter and Pumpkin Bites are low in fat, contain no artificial preservatives, and are made with ingredients most pet owners already have at home. They’re:
- Easy to make
- Budget-friendly
- Customizable (you can add oats, flaxseed, or shredded carrot)
- Great for sensitive stomachs
They’re also a thoughtful gift idea for fellow dog lovers—just pop them into a cute jar or treat bag, and you’re good to go!
Sweet Potato Chews Recipe
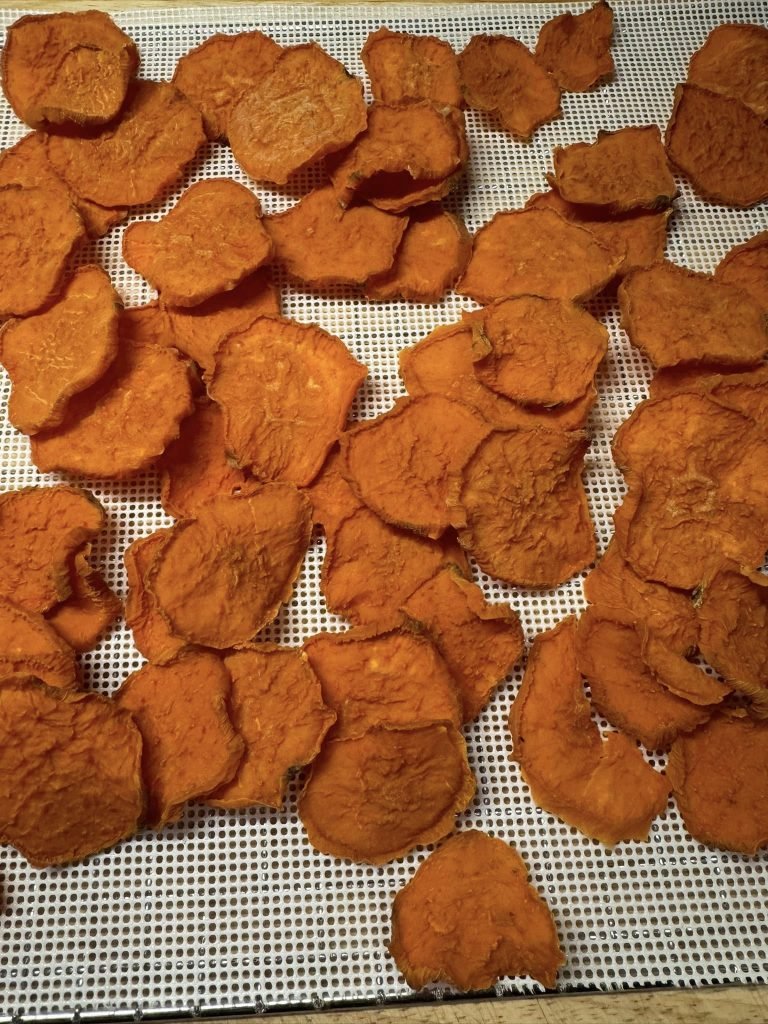
If you’re looking for a simple, healthy, and low-fat treat for your dog, these Sweet Potato Chews are a great option. Naturally sweet and full of fiber, sweet potatoes are an excellent alternative to processed, store-bought snacks. This recipe requires just one ingredient and delivers a chewy, satisfying treat that’s easy on your dog’s digestive system.
Whether you’re seeking a gentler chew than rawhide or bones, or just want to give your dog something wholesome and tasty, these sweet potato chews are sure to please. Let’s walk through how to make these delicious treats step-by-step!
Ingredients You’ll Need
This recipe requires only one ingredient:
- 1–2 large sweet potatoes (organic if possible)
That’s it! No additives, preservatives, or fat, making it a healthy and simple option for your dog.
Step 1: Wash and Prep the Sweet Potatoes
Start by thoroughly washing the sweet potatoes under warm water. Use a vegetable brush to scrub off any dirt. If you plan to leave the skin on (which adds extra fiber and nutrients), make sure it’s clean. You can also peel the sweet potatoes if you prefer, but leaving the skin on will provide additional texture and nutrients for your dog.
Step 2: Slice Thin and Even
Next, use a sharp knife or mandoline to slice the sweet potatoes into thin rounds or long strips. Aim for slices that are about 1/4 inch thick. The thinner the slices, the crispier they’ll be, while thicker slices will be chewier. For larger dogs, long strips are a great option, while smaller breeds may prefer bite-sized pieces or rounds for training treats.
The key to even cooking is consistency, so try to slice the pieces as uniformly as possible.
Step 3: Preheat the Oven
Preheat your oven to 250°F (120°C). This low temperature will allow you to dehydrate the sweet potato slices slowly, creating that perfect chewy or crispy texture. The slower the roasting process, the better the result!
Line a baking sheet with parchment paper or a silicone mat to prevent sticking and make cleanup easier.
Step 4: Arrange and Bake
Place the sweet potato slices in a single layer on the prepared baking sheet. Make sure the slices don’t overlap to ensure even cooking. Once the tray is ready, pop it into the oven and bake for 2.5 to 3 hours. Be sure to flip the slices halfway through for even dehydration.
If you want chewier treats, check around the 2-hour mark. For crispier chews, leave them in a little longer. The longer they bake, the crunchier they’ll become, so feel free to adjust based on your dog’s preference for chewiness or crunchiness.
Step 5: Cool and Store
Once the chews are baked to your desired texture, remove them from the oven and let them cool completely. As they cool, they will firm up and develop that satisfying chewy texture your dog will love.
Store the sweet potato chews in an airtight container at room temperature for up to 2 weeks. For longer storage, you can refrigerate them or freeze in small batches, so you have a ready supply of chews for your dog.
Why Sweet Potato Chews Are a Healthy Choice
Sweet potatoes are not just tasty—they’re also incredibly healthy for your dog. Here’s why sweet potato chews are an excellent option:
- Low in Fat: Sweet potatoes are naturally low in fat, making them a good choice for dogs on a weight-conscious diet.
- High in Fiber: The fiber content helps with digestion and supports a healthy gut.
- Packed with Nutrients: Sweet potatoes are rich in vitamins A, C, and potassium, all of which contribute to overall health.
- Easy to Digest: Sweet potatoes are gentle on your dog’s digestive system, making them perfect for dogs with sensitive tummies.
- Naturally Sweet: There’s no added sugar needed—sweet potatoes are naturally sweet and appealing to your dog.
These chews are also a great solution for dogs with food sensitivities or allergies. They’re grain-free, meat-free, and dairy-free, so they’re suitable for pups with specific dietary needs.
Apple and Carrot Crunchies Recipe
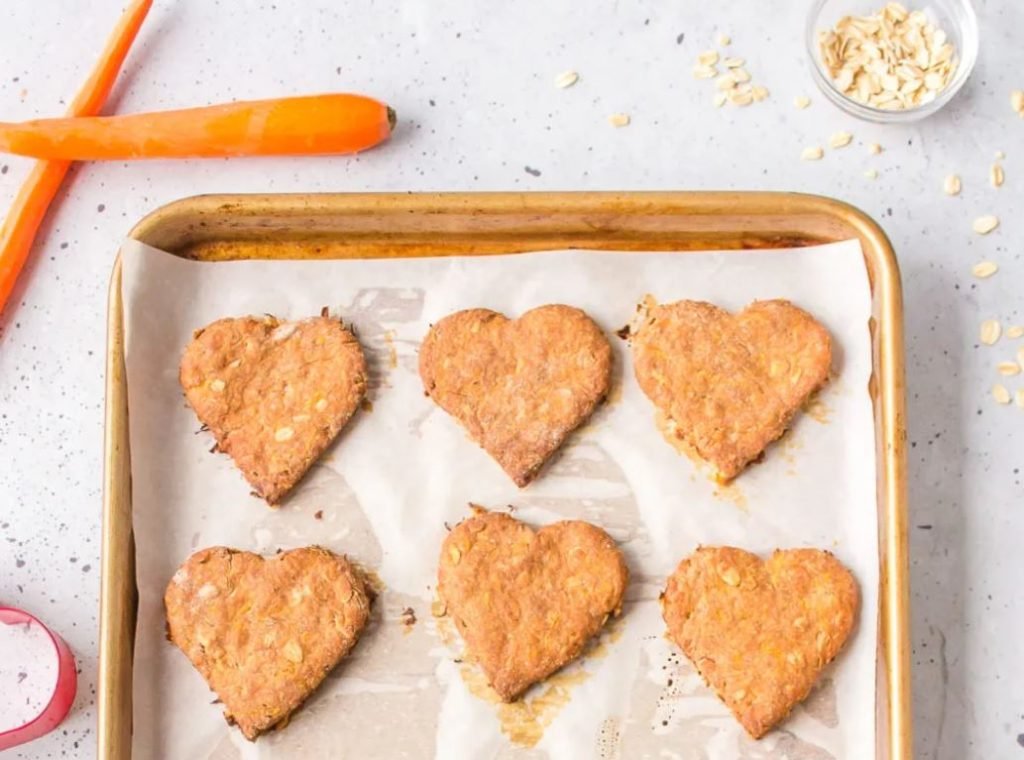
If you’re looking to make a dog treat that’s both nutritious and fun, these Apple and Carrot Crunchies are a perfect choice. With just a handful of simple ingredients, this recipe is an easy way to treat your pup to something healthy without breaking the bank. Plus, these treats are full of flavor, and the crunchy texture is perfect for dogs who love to chew.
Packed with fiber and low in fat, they’re a great snack for pups who are watching their weight or those with sensitive stomachs. The combination of fresh apples and carrots gives your dog a tasty, naturally sweet treat that’s free of artificial additives.
Here’s how you can make these delightful crunchies at home:
Ingredients You’ll Need
Gather up these ingredients for the tastiest dog treats your pup will love:
- 1 cup finely grated carrot (about 2 medium carrots)
- 1/2 cup finely chopped apple (peeled and cored)
- 2 cups whole wheat flour (or oat flour for a gluten-free version)
- 1 egg
- 1/4 cup water (add more if needed)
- Optional: 1 tablespoon unsweetened applesauce for extra moisture
Make sure your apple is free of seeds or cores, as they contain substances harmful to dogs.
Step 1: Preheat the Oven
Start by preheating your oven to 350°F (175°C). Line a baking sheet with parchment paper or a non-stick baking mat to prevent sticking.
Step 2: Prepare the Fruits and Veggies
Peel and grate the carrots, and finely chop the apple after peeling and coring it. The smaller the pieces, the easier they’ll mix into the dough, preventing any soggy centers during baking. A food processor can make this part quicker, especially when you’re preparing multiple batches.
Step 3: Mix the Ingredients
In a large bowl, combine the grated carrots, chopped apples, flour, and egg. Gradually add the water as you mix until you get a thick, slightly sticky dough. If the dough feels too dry, you can add more water or applesauce. If it’s too wet, a bit more flour will help balance it out. You want the dough to be similar in consistency to cookie dough.
Step 4: Roll and Shape the Dough
Flour your work surface and roll the dough out to about 1/4 inch thick. Now, get creative! Use cookie cutters to make fun shapes or just slice it into squares with a knife or pizza cutter. Smaller pieces are great for training sessions, while larger ones make for perfect snack-sized treats.
Step 5: Bake Until Golden and Crisp
Place your shaped dough on the prepared baking sheet, spacing them slightly apart. Bake for 25-30 minutes, or until the edges are golden brown and the treats are firm to the touch. For a little extra crunch, turn off the oven and leave the treats inside with the door cracked for an additional 10–15 minutes.
Step 6: Cool and Store
Allow the treats to cool completely before offering them to your dog. This will help them firm up to that perfect crunchiness that dogs love. Store them in an airtight container at room temperature for up to a week. For longer storage, keep them in the fridge or freeze them for a later treat.
Why Apple and Carrot Crunchies Are a Smart Pick
These treats are not only tasty but also full of health benefits. Here’s why they’re a great choice for your dog:
- Low in fat and calories: Ideal for pups on a weight-conscious diet.
- Rich in fiber: Supports healthy digestion.
- Packed with vitamins A and C: Essential for skin and immune health.
- Crunchy texture: Helps keep teeth clean.
- No preservatives, salt, or added sugar: Just pure, natural goodness.
Plus, they’re a great choice for dogs with sensitivities or those on limited-ingredient diets. It’s always nice to know exactly what’s going into the treats your pup enjoys!
Creating these treats could be a fun addition to your adventures—especially if your pup is joining you on trips or during your downtime, where a healthy snack can brighten their day. These simple treats might just become your dog’s new favorite!
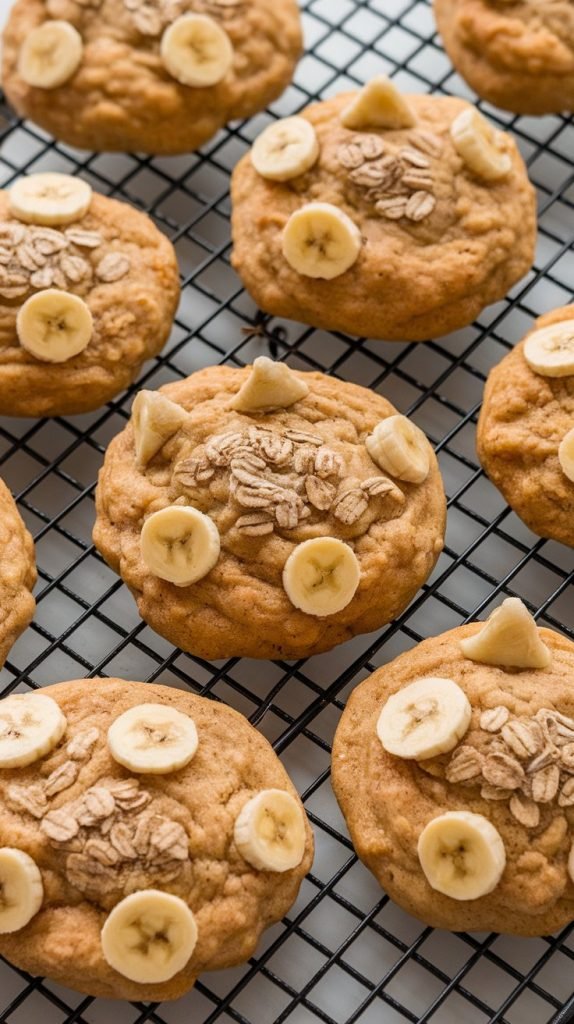
Banana Oat Cookies Recipe

Looking for a healthy, low-fat treat that satisfies your dog’s sweet tooth without the sugar? These Banana Oat Cookies are the perfect solution. Made with just a few simple ingredients, they’re chewy, nutritious, and packed with natural flavors—no preservatives, no artificial ingredients, and no guilt. They’re ideal for dogs who want something special but need to watch their weight.
Bananas and oats work together to provide a nutrient-rich, easily digestible treat. Bananas are a great source of potassium and fiber, while oats help promote good digestion and give your pup slow-burning energy. Ready to bake up a batch of tail-wagging goodness? Let’s dive into the recipe.
Ingredients You’ll Need
Here’s what you’ll need to make these tasty, dog-friendly cookies:
- 1 ripe banana
- 1 cup rolled oats (old-fashioned, not instant)
- 1 egg
- Optional: 1 tablespoon natural peanut butter (no xylitol)
These ingredients are safe, simple, and naturally low in fat—perfect for a healthy doggy treat.
Step 1: Preheat Your Oven
Start by preheating your oven to 350°F (175°C). Line a baking sheet with parchment paper to make cleanup a breeze and prevent sticking.
Step 2: Mash the Banana
In a medium-sized bowl, mash the ripe banana with a fork until smooth. The riper the banana, the sweeter and easier it is to mash. This will form the base of your dough and provide a natural sweetness to the cookies.
Step 3: Mix in the Remaining Ingredients
Add the rolled oats, egg, and optional peanut butter to the mashed banana. Stir everything together until you get a thick, sticky dough. If the dough feels too dry, add a splash of water or a little more mashed banana. If it’s too wet, sprinkle in a few more oats until the dough holds its shape.
The dough should be moldable but not runny, so it can easily be shaped into cookies.
Step 4: Shape the Cookies
Scoop out tablespoon-sized amounts of dough and roll them into balls. Place them on the prepared baking sheet. Gently flatten each ball with the back of a spoon or your palm to form cookie shapes. Keep in mind that these cookies won’t spread much during baking, so the shape you create will be the final result.
Step 5: Bake Until Set
Place the baking sheet in the oven and bake the cookies for 12–15 minutes, or until the edges turn golden brown and the centers are firm. If you want your cookies a little crunchier, you can leave them in for a few extra minutes or let them sit in the oven (turned off) for an additional 10 minutes.
Step 6: Cool and Store
Once the cookies are done, remove them from the oven and let them cool completely before serving them to your pup. This will help them firm up to the perfect texture. Store the cookies in an airtight container at room temperature for up to 5 days. You can also refrigerate them for up to 2 weeks or freeze any extras for future treats.
Why Banana Oat Cookies Are a Great Treat
These cookies aren’t just delicious—they’re also packed with health benefits for your dog. Here’s why they make a great snack:
- Bananas are rich in potassium, fiber, and vitamins B6 and C.
- Oats are a gluten-free grain that’s gentle on digestion and great for overall health.
- The cookies are low in fat and sugar, making them ideal for weight-conscious pups.
- They’re easy to chew and digest, making them perfect for senior dogs or smaller breeds.
- These cookies are 100% homemade, with no preservatives, fillers, or unknown ingredients.
With these wholesome ingredients, you can feel confident that you’re treating your dog to something that’s not only tasty but also good for them. Enjoy making these Banana Oat Cookies and watch your pup’s tail wag in excitement!
Chicken and Rice Balls Recipe
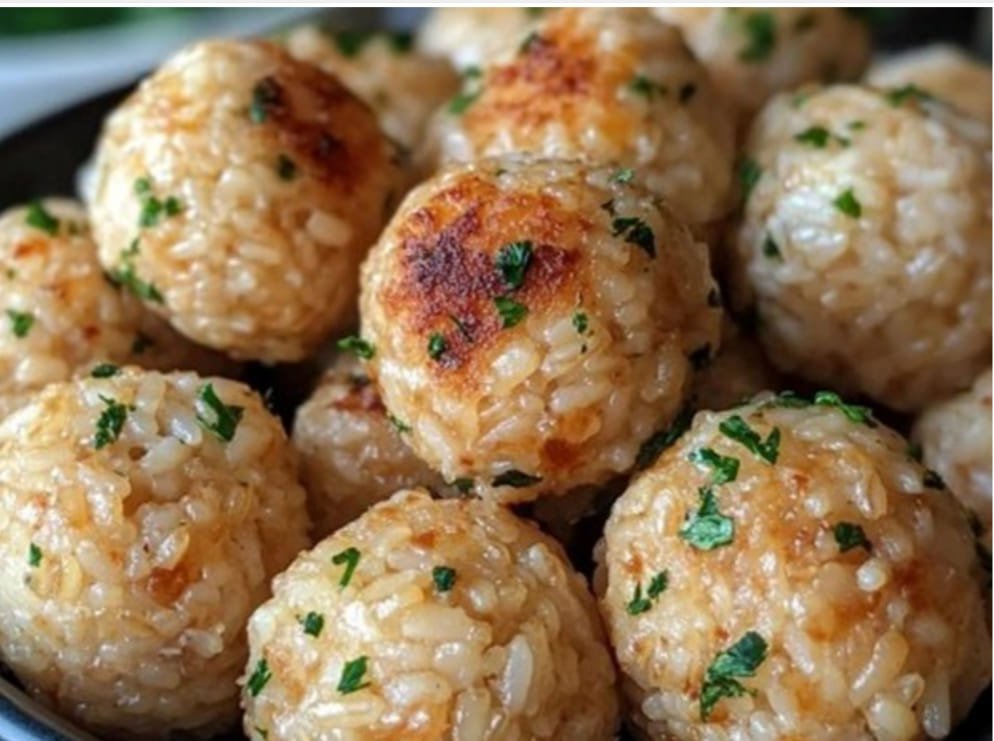
If you’re searching for a protein-packed, low-fat treat that your dog will love, look no further than these Chicken and Rice Balls. Made with real, wholesome ingredients like shredded chicken and plain rice, these snacks are gentle on the tummy, full of flavor, and perfect for dogs with sensitive digestion or food sensitivities.
This recipe is simple to make and is ideal for using up leftover chicken and rice. Plus, the soft texture makes these treats a great option for senior dogs or pups with dental issues. So, let’s dive in and start cooking!
Ingredients You’ll Need
Here’s what you’ll need for a batch of tasty chicken and rice balls:
- 1 cup cooked, shredded chicken (plain, skinless, boneless)
- 1/2 cup cooked white or brown rice (no seasoning)
- 1 egg
- 1/4 cup plain oat flour or whole wheat flour (optional, for binding)
- Optional: 1 tablespoon finely chopped parsley (for fresh breath)
Make sure to use plain, unseasoned chicken—avoid any with salt, spices, or seasoning.
Step 1: Preheat the Oven
Start by preheating your oven to 350°F (175°C). Line a baking sheet with parchment paper or a silicone mat to keep the balls from sticking.
Step 2: Mix the Ingredients
In a large mixing bowl, combine the shredded chicken and cooked rice. Stir in the egg and, if using, the optional flour until everything is well mixed.
If the mixture feels too wet or sticky, you can add a little more flour. If it seems too dry, add a teaspoon of water or more egg to help the mixture come together. The goal is to create a firm, moldable consistency that will hold its shape.
Step 3: Roll Into Bite-Sized Balls
Scoop about 1 tablespoon of the mixture and roll it between your hands to form a small ball.
Place each chicken and rice ball onto the prepared baking sheet. Repeat this process until all of the mixture is used up.
You can make the balls smaller or larger depending on your dog’s size and appetite. Just keep in mind that smaller balls will bake faster, so adjust the cooking time if necessary.
Step 4: Bake Until Firm and Golden
Bake the balls for 18–22 minutes, or until they’re set and lightly golden on the outside.
They should hold their shape but remain soft and easy to chew, making them perfect for dogs of all ages. Check them after 18 minutes to ensure they don’t overcook—each oven is different.
Step 5: Cool and Store
Remove the tray from the oven and let the chicken and rice balls cool completely before serving them to your dog.
Once cooled, store them in an airtight container in the fridge for up to 5–7 days, or freeze small portions for up to 2 months. Simply thaw the balls before offering them as a treat.
Why Chicken and Rice Balls Are a Healthy Treat
These Chicken and Rice Balls are more than just a tasty snack for your dog. Here’s why they’re a great choice:
- High in Protein: The chicken provides a lean protein source, which helps support healthy muscle development.
- Easy to Digest: Rice and chicken are both gentle on your dog’s stomach, making this treat perfect for dogs with sensitive digestion.
- Low in Fat: By using skinless chicken breast, you’re keeping the fat content low, which is ideal for dogs on a weight-conscious diet.
- Customizable: You can add dog-safe herbs, such as parsley, or even finely chopped veggies like carrots or peas to make the treats even healthier.
- Perfect for All Ages: The soft and moist texture makes these treats ideal for senior dogs or picky eaters who might have trouble with crunchier snacks.
Plus, making your own treats ensures that there are no mystery ingredients or fillers. You know exactly what’s going into each bite, giving you peace of mind and your dog a healthy snack.
Blueberry Yogurt Drops Recipe
If you’re looking for a cool, fruity treat that’s low in fat and packed with antioxidants, these Blueberry Yogurt Drops are a perfect choice. Bite-sized and refreshing, these frozen snacks are made with simple, healthy ingredients that benefit your dog’s health—and might even tempt you to try one too!
These treats are especially great during the warmer months when your pup needs something to help beat the heat. The best part? They’re incredibly easy to make and store, requiring no baking and just a few minutes of prep. So, let’s dive in and learn how to make these delicious, dog-approved drops!
Ingredients You’ll Need
Here’s what you’ll need for these tasty treats:
- 1/2 cup plain, unsweetened Greek yogurt (ensure it has no xylitol)
- 1/4 cup fresh or frozen blueberries (if using frozen, thaw them)
- Optional: 1 teaspoon honey (skip if your dog is diabetic or very young)
These ingredients are low in fat and safe for dogs when given in moderation. They also offer a nice balance of flavor and nutrition, making them a guilt-free snack for your furry friend.
Step 1: Blend the Ingredients
To start, grab a blender or food processor and combine the Greek yogurt and blueberries. If you’re using honey, add it to the mix now.
Blend everything together until you have a smooth, creamy consistency. You should end up with a beautiful purple color, which may not matter to your dog, but it certainly looks appetizing!
Step 2: Portion Into Drops
Next, take the blended mixture and spoon it into a piping bag, zip-top bag (with the corner snipped), or use a small spoon to portion it out.
Drop small dollops onto a parchment-lined baking sheet or silicone mat. Make sure each drop is a bite-sized portion so your dog can enjoy them without mess. For a fun touch, you can also use silicone molds to create cute shapes like hearts, paws, or bones!
Step 3: Freeze Until Solid
Once your drops are ready, place the baking sheet in the freezer. Let the drops freeze for at least 2–3 hours or until they are completely set and firm.
After they’ve frozen, transfer the drops to an airtight container or zip-top freezer bag for storage. They’ll keep fresh for a while in the freezer, so you can make a batch ahead of time and store them for future treats.
Step 4: Serve When Your Dog Needs a Cool Treat
These drops are best served straight from the freezer, offering your pup a refreshing snack after a walk or playtime. Just remember, they melt quickly, so it’s a good idea to serve them outdoors or on an easy-to-clean surface unless you want to deal with a few purple paw prints on your floor!
Why Blueberry Yogurt Drops Are a Healthy Pick
These Blueberry Yogurt Drops are not only adorable, but they’re also full of nutrients that benefit your dog:
- Blueberries are rich in antioxidants, fiber, and vitamins C and K, which support overall health and boost your dog’s immune system.
- Greek yogurt is an excellent source of calcium and probiotics, which help with digestive health and support bone strength.
- These treats are naturally low-fat and low-calorie, making them a great choice for dogs on a weight-conscious diet.
- They’re easy to portion out, making them perfect for training sessions or as a cooling snack on a hot day.
- With no artificial flavorings, these treats are naturally sweet and tangy, offering a pure and healthy indulgence.
In short, these Blueberry Yogurt Drops are a win-win. They’re healthy, customizable, and fun to make—plus, your dog will absolutely love them!
People Also Asked
What Are the Benefits of Homemade Low-Fat Dog Treats?
Homemade low-fat dog treats are a great choice for pet owners looking to provide their dogs with a healthier snack. The key benefits include better control over the ingredients, which means no artificial additives, preservatives, or unhealthy fats. These treats can be tailored to your dog’s specific dietary needs, such as weight management or food sensitivities. Homemade treats also allow you to use fresh, wholesome ingredients like fruits, vegetables, and lean meats, promoting overall health and nutrition for your furry friend. Plus, they’re usually more affordable than store-bought treats.
How Can I Make Low-Fat Dog Treats at Home?
Making low-fat dog treats at home is simple and requires just a few basic ingredients that you probably already have in your kitchen. Common ingredients for low-fat dog treats include whole grains like oats or brown rice flour, fruits like apples or bananas, and vegetables such as carrots or sweet potatoes. To start, combine the dry ingredients with wet ingredients like egg or low-sodium broth. Once mixed, shape the dough, bake at a moderate temperature, and let the treats cool before serving. It’s an easy, cost-effective way to provide your dog with a healthy snack.
Are Low-Fat Dog Treats Good for Dogs with Sensitive Stomachs?
Yes, low-fat dog treats are often a great choice for dogs with sensitive stomachs. Fatty foods can sometimes cause digestive upset or exacerbate conditions like pancreatitis. Low-fat treats made from easily digestible ingredients like oatmeal, pumpkin, or rice flour are less likely to irritate your dog’s stomach. However, always ensure that the treats you’re making are free from artificial additives or ingredients that could be harmful. If your dog has a known food sensitivity, it’s important to adjust the recipe to avoid any ingredients that may trigger an upset stomach.
What Ingredients Should I Avoid When Making Low-Fat Dog Treats?
When making low-fat dog treats, avoid ingredients that could be harmful to your dog or contribute to weight gain. Some of the ingredients to steer clear of include:
- Artificial sweeteners, especially xylitol, which is toxic to dogs.
- High-fat dairy products like cheese or butter, as they can be hard for dogs to digest.
- Chocolate, which contains theobromine, a substance that is toxic to dogs.
- Excessive sugar or salt, as these can lead to obesity and other health issues.
- Grapes and raisins, which can cause kidney failure in dogs.
Always ensure that the ingredients you use are safe and healthy for your dog’s specific needs.
Can Low-Fat Dog Treats Help with Weight Management?
Yes, low-fat dog treats can be a helpful tool in managing your dog’s weight. These treats provide a healthy alternative to store-bought options that may be high in fat and calories. By choosing low-fat ingredients and controlling portion sizes, you can give your dog a satisfying snack without the extra calories that could contribute to weight gain. Additionally, low-fat treats are often higher in fiber, which helps dogs feel fuller longer, reducing the chances of overfeeding.
How Often Should I Give My Dog Homemade Low-Fat Treats?
While homemade low-fat treats are healthy, they should still be given in moderation. Treats should make up no more than 10% of your dog’s daily calorie intake. Overfeeding even healthy treats can lead to weight gain or an upset stomach. Consider your dog’s size, activity level, and dietary needs when deciding how often to offer treats. If your dog is on a strict diet or has specific health concerns, it’s always a good idea to consult your vet to determine the right amount of treats for your pet.
Can I Use Fruits and Vegetables in Homemade Low-Fat Dog Treats?
Absolutely! Fruits and vegetables are an excellent addition to homemade low-fat dog treats. Many fruits and vegetables are low in fat, high in fiber, and packed with essential vitamins and minerals. For example, carrots, sweet potatoes, apples, and blueberries are all dog-friendly and can be easily incorporated into treat recipes. Just be sure to avoid any fruits or vegetables that are toxic to dogs, such as grapes, raisins, or onions. When adding fruits and vegetables, make sure to chop them into small, digestible pieces to prevent choking.
How Do I Know If My Dog Likes Homemade Low-Fat Treats?
It’s easy to tell if your dog likes homemade low-fat treats. Start by offering them a small portion to see how your dog reacts. If your dog eagerly eats the treat, it’s a sign they enjoy it. You may also notice them wagging their tail or even looking for more. If they aren’t as excited about the treat, try experimenting with different flavors or shapes to see what they prefer. For example, some dogs might love the taste of pumpkin, while others might prefer apple or carrot. It’s all about trial and error to find the perfect low-fat treat for your dog.
Final Words
Homemade low-fat dog treats are an excellent way to show your furry friend some love while maintaining their health and well-being. By using simple, natural ingredients like oats, fruits, and vegetables, you can create treats that are not only delicious but also beneficial for your dog’s digestive system, weight management, and overall health. These treats are easy to make, customizable to your dog’s preferences, and free from harmful additives and preservatives commonly found in store-bought options.
Remember to always monitor portion sizes, as treats, even healthy ones, should only make up a small part of your dog’s daily diet. By making these low-fat treats a part of your regular routine, you can offer your dog tasty rewards that help keep them happy, healthy, and active.
Whether you’re looking for a way to spoil your dog without the guilt or aiming to support their specific dietary needs, these homemade treats are a perfect, wholesome solution.