

If you’re looking to spoil your pup with something a little extra special, you’ll love these 5 Homemade Soft Dog Treats. Store-bought options can be convenient, but making your own treats means you know exactly what’s going into them — no weird fillers, artificial flavors, or preservatives. Plus, it’s a fun and rewarding way to show your furry friend some love!
These recipes are simple, made with wholesome ingredients you probably already have in your kitchen. Whether your dog prefers peanut butter, pumpkin, or chicken flavors, there’s a soft, chewy treat here that’ll make their tail wag. Soft treats are perfect for dogs of all ages, especially puppies, seniors, or pups with dental issues who need something gentle to chew.
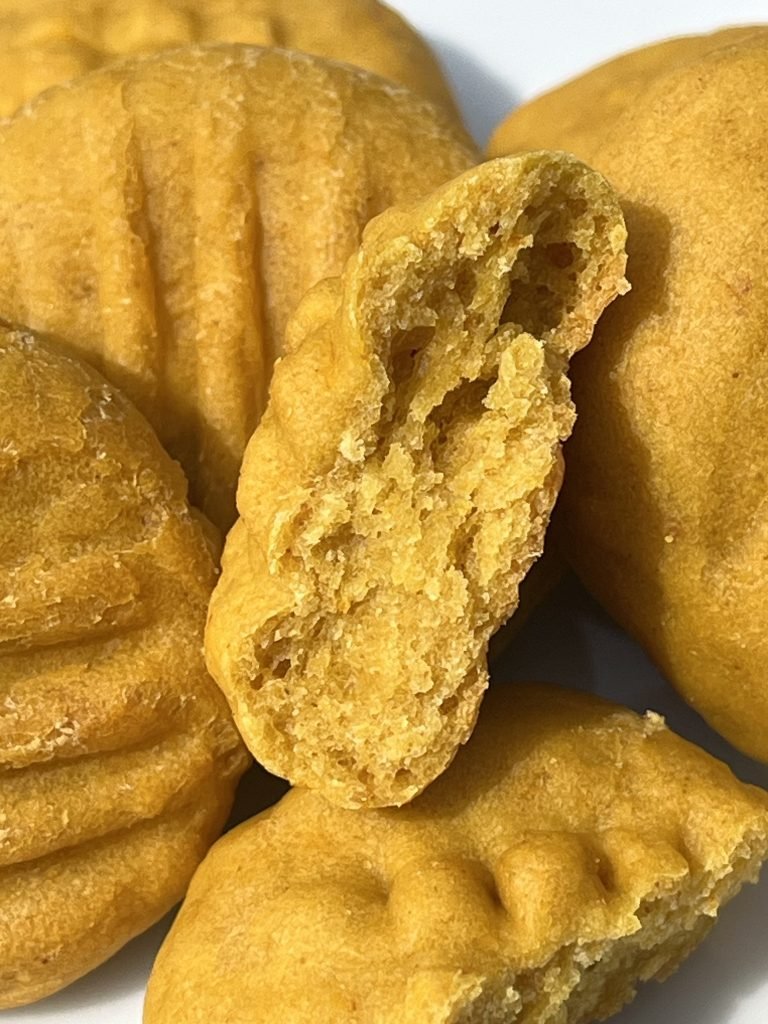
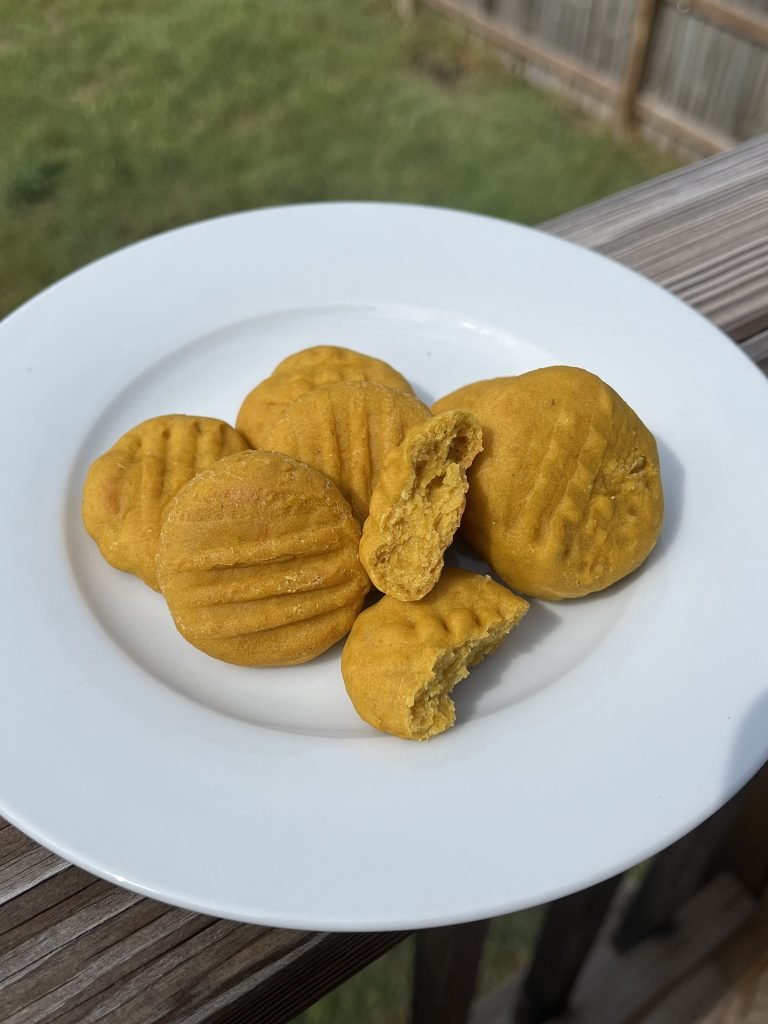
Recipe 1: Pumpkin and Peanut Butter Bites
If you’re searching for an easy, healthy, and pup-approved treat, these Pumpkin and Peanut Butter Bites are perfect. Packed with natural flavors dogs love and made with just a handful of simple ingredients, this soft treat is a winner for dogs of all ages. Let’s break it down step by step so you can treat your pup to something homemade and wholesome.
Ingredients You’ll Need:
Before you start, gather these basic ingredients:
- 1 cup canned pumpkin (plain, unsweetened)
- ½ cup natural peanut butter (make sure it’s xylitol-free)
- 2 ½ cups oat flour (or finely ground rolled oats)
- 1 egg (optional, helps bind the dough)
That’s it! No complicated ingredients, just good stuff your dog will happily gobble up.
Step 1: Preheat and Prep
First things first, preheat your oven to 350°F (175°C). While it’s heating up, line a baking sheet with parchment paper or a silicone baking mat to keep your treats from sticking. It’ll also make cleanup so much easier.
Step 2: Mix the Wet Ingredients
In a large mixing bowl, combine the canned pumpkin and peanut butter. Stir them together until the mixture is smooth and well blended. If you’re using an egg, add it in now and mix thoroughly.
Step 3: Add the Oat Flour
Slowly add the oat flour to the wet mixture, stirring as you go. The dough should start to thicken up and pull away from the sides of the bowl. If it feels too sticky, you can sprinkle in a little more oat flour until it reaches a workable, slightly tacky consistency.
Step 4: Shape the Treats
Use a spoon or small cookie scoop to portion out the dough. You can roll them into small balls about the size of a marble or gently press them down with a fork for a cute, flattened shape. If you have dog-themed cookie cutters, feel free to get creative — your pup won’t mind either way!
Step 5: Bake to Perfection
Place the shaped dough pieces onto your prepared baking sheet, spacing them about an inch apart. Bake in your preheated oven for 12 to 15 minutes, or until the edges are set but the treats are still soft in the middle. Remember, we’re aiming for soft, chewy bites, not crunchy cookies.
Step 6: Cool and Store
Once baked, let the treats cool on a wire rack. It’s tempting to hand one over right away, but make sure they’ve cooled down enough for safe snacking. Store the cooled treats in an airtight container in the refrigerator for up to a week, or freeze them for longer storage.
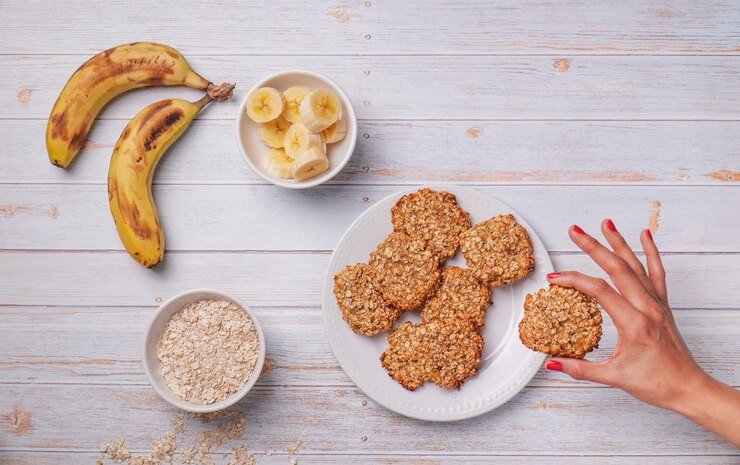
Recipe 2: Banana Oatmeal Chews
If your dog loves bananas as much as mine does, these Banana Oatmeal Chews are about to become their new favorite treat. Soft, chewy, and naturally sweet, these simple homemade dog treats are made with just a few pantry staples you probably already have on hand. They’re perfect for dogs of all ages — especially senior pups or those with sensitive teeth. Let’s dive right into the step-by-step guide to making them.

Ingredients You’ll Need:
Gather these easy, dog-safe ingredients before you start:
- 2 ripe bananas (the riper, the better)
- 2 cups rolled oats (you can pulse them in a food processor for a finer texture if you like)
- 1 tablespoon natural peanut butter (make sure it’s xylitol-free)
- 1 egg (optional, helps with binding)
- A splash of water (if needed for texture)
Simple, wholesome, and pup-approved!
Step 1: Preheat the Oven and Prep the Baking Sheet
Start by preheating your oven to 350°F (175°C). Line a baking sheet with parchment paper or a silicone baking mat. This prevents sticking and makes for an easier cleanup when you’re done.
Step 2: Mash the Bananas
In a large mixing bowl, peel and mash the ripe bananas with a fork or potato masher until smooth. The riper the bananas, the easier this step will be and the sweeter your treats will taste (without adding any extra sugar).
Step 3: Mix in the Peanut Butter and Egg
Once your bananas are mashed, stir in the natural peanut butter and the egg, if you’re using one. Mix well until everything is combined into a thick, creamy mixture. The peanut butter adds a rich flavor dogs can’t resist, and the egg helps hold the treats together while baking.
Step 4: Add the Oats
Gradually mix the oats into the banana mixture. Stir until all the oats are coated and the mixture turns thick and slightly sticky. If it feels too dry, add a splash of water. If it’s too wet, sprinkle in a few more oats. The dough should be firm enough to hold its shape but still soft and pliable.
Step 5: Shape the Chews
Use a spoon or your hands to scoop out small portions of dough. You can roll them into balls, flatten them slightly with your palm, or press them into simple shapes. These don’t need to be perfect — your pup will love them no matter what they look like!
Step 6: Bake Until Soft and Set
Arrange your shaped chews on the lined baking sheet, leaving a little space between each. Bake in the preheated oven for 12 to 15 minutes, or until the edges are set but the treats are still soft in the center. Remember, we’re going for chewy, not crunchy.
Step 7: Cool and Store
Remove the chews from the oven and let them cool completely on a wire rack. Once cooled, you can offer one to your eager pup right away — chances are, they’ve been waiting patiently for the good smells coming from the kitchen. Store the rest in an airtight container in the fridge for up to a week, or freeze them for longer storage.
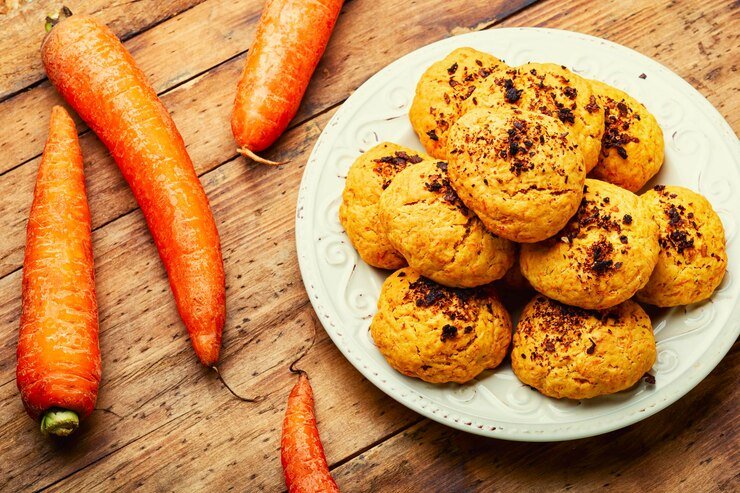
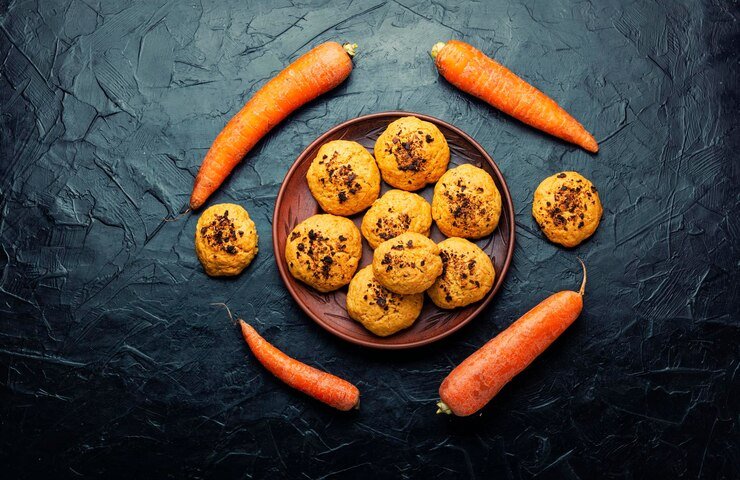
Recipe 3: Sweet Potato and Carrot Mash Cookies
If you’re looking for a soft, wholesome treat packed with natural goodness, these Sweet Potato and Carrot Mash Cookies are a must-try. Sweet potatoes and carrots are both rich in vitamins, fiber, and antioxidants — perfect for keeping your dog healthy and happy.
These chewy cookies are gentle on teeth, easy to digest, and full of flavors dogs naturally love. Let’s get straight into the step-by-step guide to making them!
Ingredients You’ll Need:
Round up these simple, dog-safe ingredients before you start:
- 1 cup cooked, mashed sweet potato (no added sugar or seasoning)
- ½ cup finely grated carrots (peeled first)
- 2 cups oat flour (or ground rolled oats)
- 1 egg (for binding)
- 1 tablespoon coconut oil (optional, for moisture and healthy fats)
- A splash of water (if needed for texture)
That’s it — fresh, clean, and healthy ingredients you can feel good about feeding your pup.
Step 1: Prep the Oven and Baking Sheet
Preheat your oven to 350°F (175°C). Line a baking sheet with parchment paper or a silicone baking mat to prevent sticking and make cleanup easy.
Step 2: Cook and Mash the Sweet Potato
If you haven’t already, cook your sweet potato by boiling, steaming, or baking it until fork-tender. Let it cool slightly, then peel and mash it in a large mixing bowl until smooth. Sweet potatoes are naturally sweet and packed with fiber, making them a great ingredient for dog treats.
Step 3: Grate the Carrots
Peel and finely grate the carrots using a hand grater or food processor. The finer the better since it’ll blend smoothly into your cookie dough and bake evenly.
Step 4: Mix the Ingredients
Add the grated carrots to the bowl with the mashed sweet potato. Stir in the oat flour, egg, and coconut oil. Mix everything together until a thick, slightly sticky dough forms. If it feels too dry, add a splash of water to loosen it up. If it’s too wet, a little extra oat flour will do the trick.
Step 5: Shape the Cookies
Scoop out small portions of dough using a spoon or cookie scoop. Roll them into balls, then flatten them slightly with your hand or the back of a spoon to form soft, chunky cookie shapes. They don’t have to be perfect — your dog won’t mind one bit!
Step 6: Bake Until Set but Soft
Place your cookie shapes onto the prepared baking sheet, leaving a little space in between. Bake in the preheated oven for 14 to 18 minutes, or until the edges are firm but the cookies are still soft in the center. Since we’re aiming for a chewy texture, avoid overbaking.
Step 7: Cool and Store
Once baked, remove the cookies from the oven and let them cool completely on a wire rack. Offer one to your pup once they’ve cooled enough — trust me, they’ve been waiting for it. Store the leftovers in an airtight container in the fridge for up to a week, or freeze them for a longer-lasting stash.
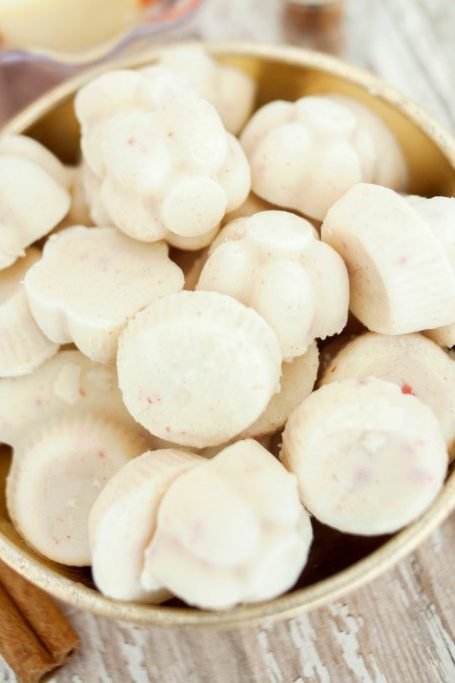
Recipe 4: Apple and Yogurt Bites
When you’re looking for a cool, healthy treat to keep your pup happy — especially on warm days — these Apple and Yogurt Bites are a perfect choice. Made with simple, dog-safe ingredients, they’re soft, refreshing, and packed with natural goodness.
Apples offer fiber and vitamins, while plain yogurt is great for digestion. Plus, these little bites are quick to prep and freezer-friendly, making them an easy go-to snack. Let’s get into the step-by-step instructions so you can whip up a batch for your four-legged friend.
Ingredients You’ll Need:
Here’s what you’ll want to gather before you start:
- 1 large apple (cored, peeled, and finely chopped)
- 1 cup plain, unsweetened yogurt (Greek yogurt works well too)
- 1 tablespoon natural peanut butter (optional, for extra flavor)
- A sprinkle of ground cinnamon (optional, a tiny pinch — avoid nutmeg, it’s unsafe for dogs)
Simple, wholesome, and totally pup-approved.
Step 1: Prep the Apple
Start by peeling, coring, and chopping your apple into very small pieces. Make sure to remove all seeds and the core, as apple seeds aren’t safe for dogs. You can chop by hand or pulse the apple in a food processor for a finer texture if your pup prefers softer treats.
Step 2: Combine the Ingredients
In a medium-sized mixing bowl, add the chopped apple, plain yogurt, and peanut butter if you’re using it. Stir everything together until well mixed. If you’re adding a tiny pinch of cinnamon for a little extra flavor, mix it in now. Just remember — a little goes a long way.
Step 3: Fill the Molds
Grab a silicone ice cube tray, silicone mold, or small cupcake liners. These work best for freezing and make it easy to pop the treats out later. Spoon the apple and yogurt mixture into each mold cavity, filling them to the top. Smooth the surface with the back of a spoon for even freezing.
Step 4: Freeze Until Firm
Place the filled mold in the freezer and let the bites set for at least 3 to 4 hours, or until they’re completely firm. For best results, leave them in overnight.
Step 5: Remove and Store
Once frozen, pop the bites out of the molds and transfer them to a freezer-safe container or zip-top bag. They’ll keep well in the freezer for up to 2 months. Just grab one whenever your pup deserves a cool, creamy treat.
Recipe 5: Cheesy Parsley Squares
If your pup goes crazy for cheese, you’ve got to try these Cheesy Parsley Squares. They’re soft, savory, and packed with cheesy goodness, with a fresh touch of parsley that adds a bit of flavor and a natural breath freshener for your furry friend. These homemade dog treats are simple to make, use wholesome ingredients, and bake up into soft squares that are perfect for dogs of all ages. Ready to make a batch? Let’s walk through it together.
Ingredients You’ll Need:
Gather these dog-safe, easy-to-find ingredients:
- 1 cup shredded low-fat cheddar cheese
- 2 cups whole wheat flour (or oat flour for a gentler option)
- 1 tablespoon chopped fresh parsley (or 1 teaspoon dried)
- 1 egg
- ¾ cup water (adjust as needed)
- 1 tablespoon olive oil
That’s all you need for a cheesy, tail-wagging snack!
Step 1: Preheat the Oven and Prep Your Baking Dish
Start by preheating your oven to 350°F (175°C). Lightly grease an 8×8-inch baking dish or line it with parchment paper. This will help prevent sticking and make it easier to lift out and slice the squares once baked.
Step 2: Mix the Dry Ingredients
In a large mixing bowl, combine the whole wheat flour and chopped parsley. Stir them together so the parsley is evenly distributed throughout the flour. Parsley doesn’t just add a fresh taste — it’s also great for your pup’s breath and provides a little extra boost of vitamins.
Step 3: Add the Cheese
Next, stir in the shredded cheddar cheese. Mix well so the cheese gets coated in the flour mixture. This helps keep the cheese evenly spread throughout the dough, giving every bite a bit of that irresistible cheesy flavor dogs love.
Step 4: Combine the Wet Ingredients
In a separate bowl, beat the egg, then add the olive oil and water. Mix these together until well combined. This mixture will help bind your dough and give the finished squares a soft, chewy texture.
Step 5: Bring It All Together
Pour the wet mixture into the dry ingredients. Stir everything together with a spoon or rubber spatula until a thick, slightly sticky dough forms. If it feels too dry, add a splash of water. If it’s too wet, sprinkle in a bit more flour.
Step 6: Spread and Bake
Transfer the dough to your prepared baking dish and spread it out evenly, pressing it flat with a spatula or your hands. Try to make the thickness consistent so the squares bake evenly. Pop the dish into your preheated oven and bake for 20 to 25 minutes, or until the top is firm and lightly golden.
Step 7: Cool and Slice
Remove the baking dish from the oven and let it cool completely. Once cooled, lift the treat slab out of the pan (if you used parchment) or leave it in the dish. Use a sharp knife or pizza cutter to slice it into small, bite-sized squares.
FAQs
What Are the Benefits of Making Homemade Soft Dog Treats?
Making homemade soft dog treats gives you complete control over the ingredients your pup is eating. You can avoid artificial flavors, preservatives, and unhealthy fillers often found in store-bought treats. Homemade recipes allow you to tailor treats to your dog’s dietary needs, whether they need grain-free options, low-fat recipes, or soft textures for sensitive teeth.
Plus, it’s a fun, rewarding way to bond with your dog while providing them with something fresh, healthy, and made with love.
How Should You Store Homemade Soft Dog Treats?
Because homemade soft dog treats don’t contain preservatives, it’s important to store them properly. Keep them in an airtight container in the refrigerator for up to one week. For longer storage, you can freeze them in a freezer-safe bag or container for up to two months. When you’re ready to serve, just thaw them for a few minutes at room temperature.
Can You Customize Homemade Soft Dog Treat Recipes?
Absolutely! One of the best parts of making homemade soft dog treats is how easily you can customize them. Swap out ingredients based on your dog’s preferences or dietary restrictions. If your pup loves pumpkin, sweet potato, or banana, you can adjust recipes to include these flavors. You can also use different flours like oat or rice flour for gluten-free options, or add small amounts of herbs like parsley for fresh breath.
Are Soft Dog Treats Safe for Puppies and Senior Dogs?
Yes, soft dog treats are perfect for both puppies and senior dogs. Their soft, chewy texture makes them easier to chew and digest, especially for dogs with baby teeth or dental issues. Just be mindful of ingredient choices — avoid foods that are harmful to dogs, like chocolate, raisins, onions, and artificial sweeteners like xylitol. Stick to wholesome, dog-friendly ingredients for a safe and tasty treat.
What Ingredients Should You Avoid in Homemade Dog Treats?
When making homemade soft dog treats, it’s important to steer clear of ingredients that can be toxic or harmful to dogs. Avoid chocolate, grapes, raisins, onions, garlic, macadamia nuts, and artificial sweeteners like xylitol. Stick to safe ingredients like peanut butter (xylitol-free), plain yogurt, pumpkin, carrots, oats, and bananas. Always double-check labels when using packaged items like peanut butter or yogurt to be sure they’re dog-safe.
How Often Can You Give Your Dog Homemade Soft Treats?
Homemade soft dog treats should be offered in moderation, just like any snack. Treats should make up no more than 10% of your dog’s daily calorie intake. While they’re made with healthy, wholesome ingredients, it’s still important to balance treats with your dog’s regular diet. Use them as rewards for training, occasional snacks, or special surprises between meals.
Can You Use Baby Food in Homemade Soft Dog Treat Recipes?
Yes, many pet owners safely use plain, unsweetened baby food in homemade soft dog treats. Flavors like plain pumpkin, sweet potato, or chicken can be a convenient, soft ingredient base. Just be sure to check the ingredient list and avoid any baby food containing garlic, onion, salt, or added sugar. Using baby food can help create a smooth, moist texture that’s easy for your pup to chew.
What’s the Best Way to Make Homemade Dog Treats Soft?
To keep homemade dog treats soft, focus on using moisture-rich ingredients like mashed banana, pumpkin puree, yogurt, or unsweetened applesauce. Avoid overbaking, since a shorter baking time helps maintain a chewy texture. Storing them in an airtight container in the fridge also helps retain softness, especially if you add a slice of bread inside the container to keep the treats from drying out.
Conclusion
Making your own 5 Homemade Soft Dog Treats is one of the easiest, most rewarding ways to spoil your pup while keeping them healthy. With simple, wholesome ingredients like pumpkin, sweet potato, banana, and yogurt, you can create tasty, soft snacks perfect for dogs of all ages — from playful puppies to gentle seniors.
These recipes let you skip the preservatives and artificial flavors found in store-bought options, giving your dog treats made with care and love. Whether you’re baking chewy cookies or freezing cool yogurt bites, your pup will be wagging their tail for more. Give these homemade recipes a try and enjoy the happiness that comes from making something special just for your furry friend!