

If you’re a dog parent looking to spoil your furry friend without the guilt, these 4 Healthy Low-Calorie Homemade Dog Treat Recipes are the perfect solution! We all want to show our dogs love, and what better way than with tasty, homemade treats that are good for them?
Whether your pup has dietary restrictions, needs to maintain a healthy weight, or you’re simply searching for cleaner, more nutritious snack options, these recipes are made with wholesome ingredients that you can feel good about. Plus, they’re easy to make, and your dog will love every bite!
From crunchy to chewy, these treats are designed to satisfy your dog’s cravings while keeping them in top shape. In this guide, we’ll walk you through four simple yet delicious recipes that are low in calories but packed with flavor. So, get ready to treat your dog to something special with these 4 Healthy Low-Calorie Homemade Dog Treat Recipes!
Benefits of Homemade Low-Calorie Dog Treats
As pet owners, we always want the best for our dogs, especially when it comes to their health and happiness. While store-bought treats can be convenient, many of them are filled with preservatives, artificial flavors, and excess calories that aren’t ideal for our furry companions.
That’s where homemade low-calorie dog treats come in! Making your own treats at home allows you to control the ingredients, ensuring that your dog is getting the healthiest snacks possible. Let’s take a closer look at the benefits of homemade low-calorie dog treats and why they’re a great choice for your pup.
Control Over Ingredients
One of the most significant advantages of making your own dog treats is the ability to control exactly what goes into them. With store-bought treats, you often don’t know the full extent of the ingredients, and they might contain harmful preservatives, artificial additives, or low-quality fillers. By making homemade treats, you get to choose wholesome, natural ingredients that meet your dog’s specific dietary needs.
For example, you can use healthy alternatives like pumpkin, sweet potatoes, or oats, which are rich in fiber and nutrients. You can also avoid any ingredients that your dog may be allergic to, ensuring the treats are safe and nourishing. This level of control is especially beneficial if your dog has food sensitivities or health conditions like obesity or diabetes.
Helps with Weight Management
If your dog is overweight or prone to gaining weight, homemade low-calorie dog treats can be a game-changer. Many store-bought treats are high in fat and calories, which can lead to unnecessary weight gain if given in excess. By making your own treats, you can reduce the calorie content, offering your pup a guilt-free snack option that helps maintain a healthy weight.
You can use ingredients like carrots, green beans, or lean meats that are low in calories but high in nutrients. These treats provide your dog with all the joy of indulging in a snack, without the extra calories that contribute to weight issues. This is especially important for small dogs, older dogs, or breeds that are prone to obesity.
Customizable for Dietary Needs
Every dog is different, and their dietary needs can vary based on age, breed, health status, and activity level. Homemade low-calorie dog treats allow you to customize recipes to meet your dog’s specific needs. Whether you’re dealing with a puppy that needs to build muscle, a senior dog who needs joint support, or a dog with food allergies, you can adjust the ingredients accordingly.
For example, you can create gluten-free, grain-free, or dairy-free treats if your dog has sensitivities to certain foods. You can also incorporate additional supplements like glucosamine for joint health or omega-3s for a shiny coat. The ability to customize your treats ensures that they support your dog’s health in a meaningful way.
Promotes Healthy Digestion
Homemade dog treats, especially low-calorie ones, can also aid in digestion. Ingredients like pumpkin and sweet potatoes are great for promoting a healthy digestive system in dogs. Pumpkin, for instance, is high in fiber and can help with both diarrhea and constipation. Sweet potatoes are another excellent source of fiber, and they contain antioxidants that can boost your dog’s immune system.
If you choose to incorporate these ingredients into your homemade dog treats, you’ll be providing your dog with a snack that not only satisfies their taste buds but also supports their digestive health. Plus, since these treats are low in calories, they won’t overload your dog’s system, making them a perfect addition to a balanced diet.
Strengthening the Bond with Your Dog
Creating homemade low-calorie dog treats also provides a wonderful opportunity for bonding with your furry friend. While preparing the treats, you’re able to give your dog some extra love and attention, and the anticipation of a tasty treat can strengthen your bond. Not only will they love the treats you make, but they’ll also associate you with positive experiences and rewards.
Moreover, involving your dog in the treat-making process can be a fun and interactive activity. Let your dog watch you as you prepare the ingredients or even get them involved by letting them taste-test along the way! The simple act of sharing this process with your dog can bring you both closer.
Savings in the Long Run
Another practical benefit of homemade low-calorie dog treats is cost savings. While it may seem like buying store-bought treats is more affordable, the cost of purchasing them regularly adds up over time. When you make your own treats, you can purchase bulk ingredients, which is often much more economical in the long run. Plus, many of the ingredients used in homemade treats are versatile and can be used for multiple batches, stretching your dollar further.
Not to mention, making treats at home allows you to bake in larger quantities, meaning you have a stock of treats on hand without having to worry about running out or spending money on overpriced packaged products.
Fresher and More Flavorful
Homemade low-calorie dog treats are also fresher and more flavorful than their store-bought counterparts. When you make the treats yourself, you know they’re fresh and free from preservatives that can diminish flavor. Dogs, just like humans, enjoy a tasty snack, and homemade treats can be far more appetizing than ones that have been sitting on a shelf for months.
You can also experiment with different flavors and textures to keep your dog excited about snack time. Whether your dog loves peanut butter, cheese, or meat-based flavors, you can easily adjust the recipes to suit their taste preferences. Freshly made treats are not only healthier but also more enjoyable for your dog.
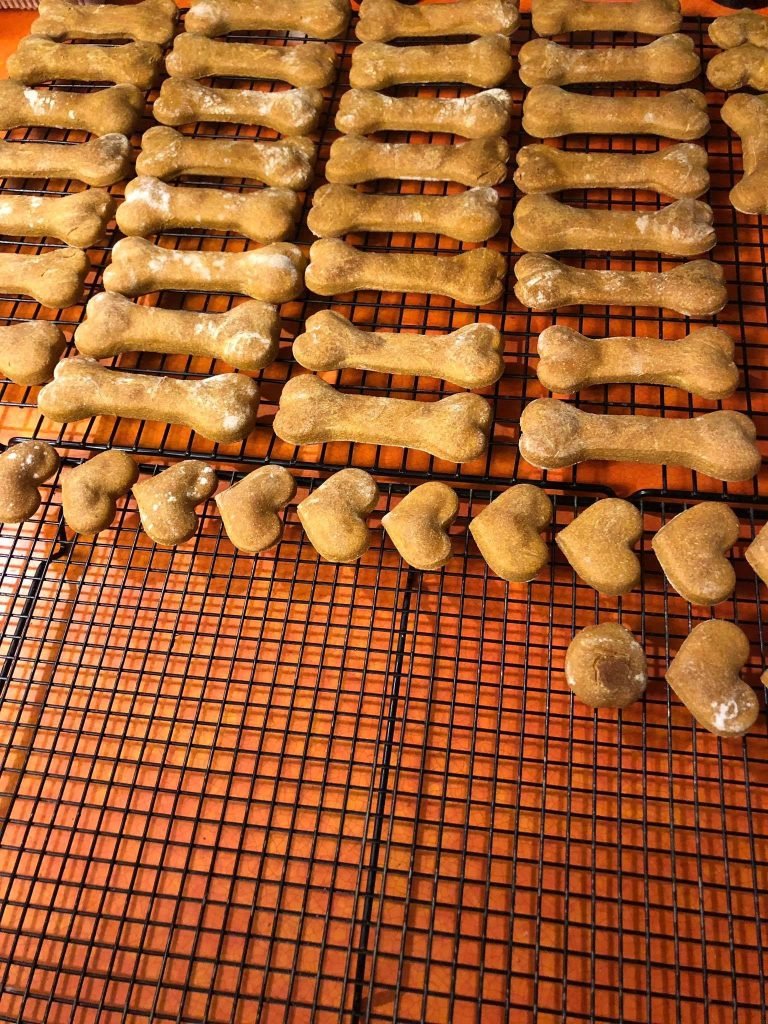
Crunchy Apple-Carrot Biscuits
If you’re searching for a healthy and low-calorie treat for your dog that will satisfy both their taste buds and nutritional needs, these Crunchy Apple-Carrot Biscuits are just the thing! Not only do these treats taste delicious, but they also provide a host of health benefits.
The natural sweetness from the apples and carrots pairs perfectly with the wholesome goodness of whole wheat flour, making these treats both nutritious and tasty. Packed with fiber, vitamins, and antioxidants, they promote good digestion, healthy skin, and a shiny coat for your furry friend.
Making homemade dog treats gives you full control over the ingredients, ensuring you’re only providing the best for your pup. These apple-carrot biscuits are easy to prepare, and the whole process is fun!
You’ll find that these homemade dog biscuits are an excellent alternative to store-bought treats, which may be filled with artificial ingredients or preservatives. Let’s dive into the recipe and make these healthy snacks for your dog!
Ingredients:
- 1 cup whole wheat flour – Rich in fiber, it supports healthy digestion and provides long-lasting energy.
- 1/2 cup finely grated carrots – A good source of beta-carotene and fiber, promoting eye health and improving digestion.
- 1/2 cup finely chopped apple (remove seeds and core) – Packed with essential vitamins like A and C for a healthy immune system and coat.
- 1 egg – A great source of protein, essential for muscle repair and growth.
- 1 tablespoon olive oil – Rich in omega-3 fatty acids, it supports skin and coat health.
- 1/4 cup water (or more if needed) – Helps bind the dough together and makes it easy to work with.
Step-by-Step Instructions
Before jumping into the preparation, it’s a good idea to gather all your ingredients and make sure everything is ready to go. Having everything prepped will streamline the process and make the baking experience even more enjoyable.
Start by grating the carrots finely and chopping the apple into small pieces. Make sure to remove the seeds and core from the apple before using it in the recipe. Preheat your oven to 350°F (175°C) so that it’s at the right temperature when you’re ready to bake. With all the ingredients ready, you’re set to begin!
1. Preheat the Oven
The first step in preparing these homemade dog biscuits is to preheat your oven to 350°F (175°C). A well-preheated oven ensures that the biscuits bake evenly and achieve the desired crispy texture.
2. Prepare the Ingredients
Next, start preparing the ingredients. Grate the carrots finely – this allows them to mix better with the flour and ensures a smoother texture for the dough. Chop the apple into small pieces, making sure to remove the seeds and core. Apples are a great addition, adding natural sweetness and important nutrients. Remember, the seeds can be toxic to dogs, so always remove them before using apples in recipes.
3. Mix the Dry Ingredients
In a large mixing bowl, combine the whole wheat flour and the grated carrots. Stir them together so that the carrots are well distributed throughout the flour. This ensures that every bite of the biscuit is packed with fiber and nutrients from the carrots.
4. Add the Wet Ingredients
Now it’s time to add the wet ingredients. Crack the egg into the bowl, followed by the chopped apple, olive oil, and water. Stir the mixture well until everything is evenly incorporated. You should have a dough-like consistency. If the mixture seems too dry or crumbly, slowly add more water, one tablespoon at a time, until the dough is soft and pliable, but not sticky.
5. Roll Out the Dough
Once your dough is ready, transfer it onto a lightly floured surface. Using a rolling pin, roll the dough out to about 1/4 inch thick. The dough should be thin enough to achieve a crisp texture but thick enough to hold its shape during baking. If you don’t have a rolling pin, you can also flatten the dough by hand, pressing it evenly until it’s the desired thickness.
6. Cut Out the Biscuits
Using your favorite cookie cutters, cut the dough into fun shapes such as bones, circles, or hearts. If you don’t have any cookie cutters, you can simply cut the dough into squares or strips using a knife or a pizza cutter. The shapes don’t need to be perfect, as long as they’re all relatively the same size, so they bake evenly.
7. Bake the Biscuits
Place the cut-out biscuits onto a parchment-lined baking sheet. Make sure to leave about an inch of space between each biscuit so that they don’t stick together while baking. Bake the biscuits in the preheated oven for 25-30 minutes, or until they turn golden brown and become firm. The biscuits should be crunchy, so check one by allowing it to cool slightly and then breaking it in half – it should be crisp all the way through.
8. Cool the Biscuits
After baking, remove the biscuits from the oven and allow them to cool on a wire rack. This step is essential, as it lets the biscuits firm up and gives them the perfect crunchy texture that your dog will love. Once they’ve completely cooled, they’re ready to serve!
Making these Crunchy Apple-Carrot Biscuits is a great way to provide your dog with a healthy snack that’s free from preservatives and additives. Not only do they taste great, but they also offer a variety of health benefits. The carrots provide fiber, promoting healthy digestion, while the apples add vitamins and antioxidants. The whole wheat flour offers a good amount of fiber to support your dog’s digestive system and energy levels. These treats are also low in calories, making them a guilt-free option for rewarding your dog.
These homemade biscuits are the perfect snack for dogs of all sizes and breeds. They can be used as training rewards, everyday treats, or even as a healthy addition to your dog’s regular diet. Plus, your dog will love the crunchy texture, which can help clean their teeth and gums as they chew. By making these treats at home, you can be sure your dog is enjoying a wholesome snack made with love!
So, grab your ingredients, preheat your oven, and treat your pup to these homemade Crunchy Apple-Carrot Biscuits! Your dog will thank you with a wagging tail and plenty of puppy kisses.
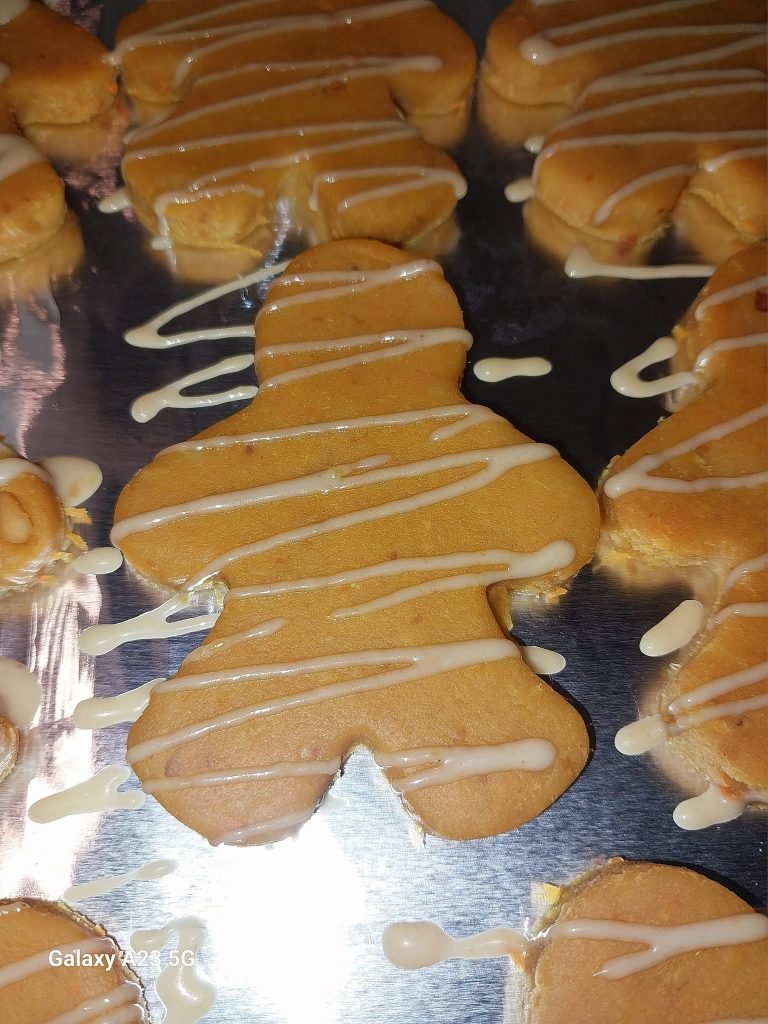
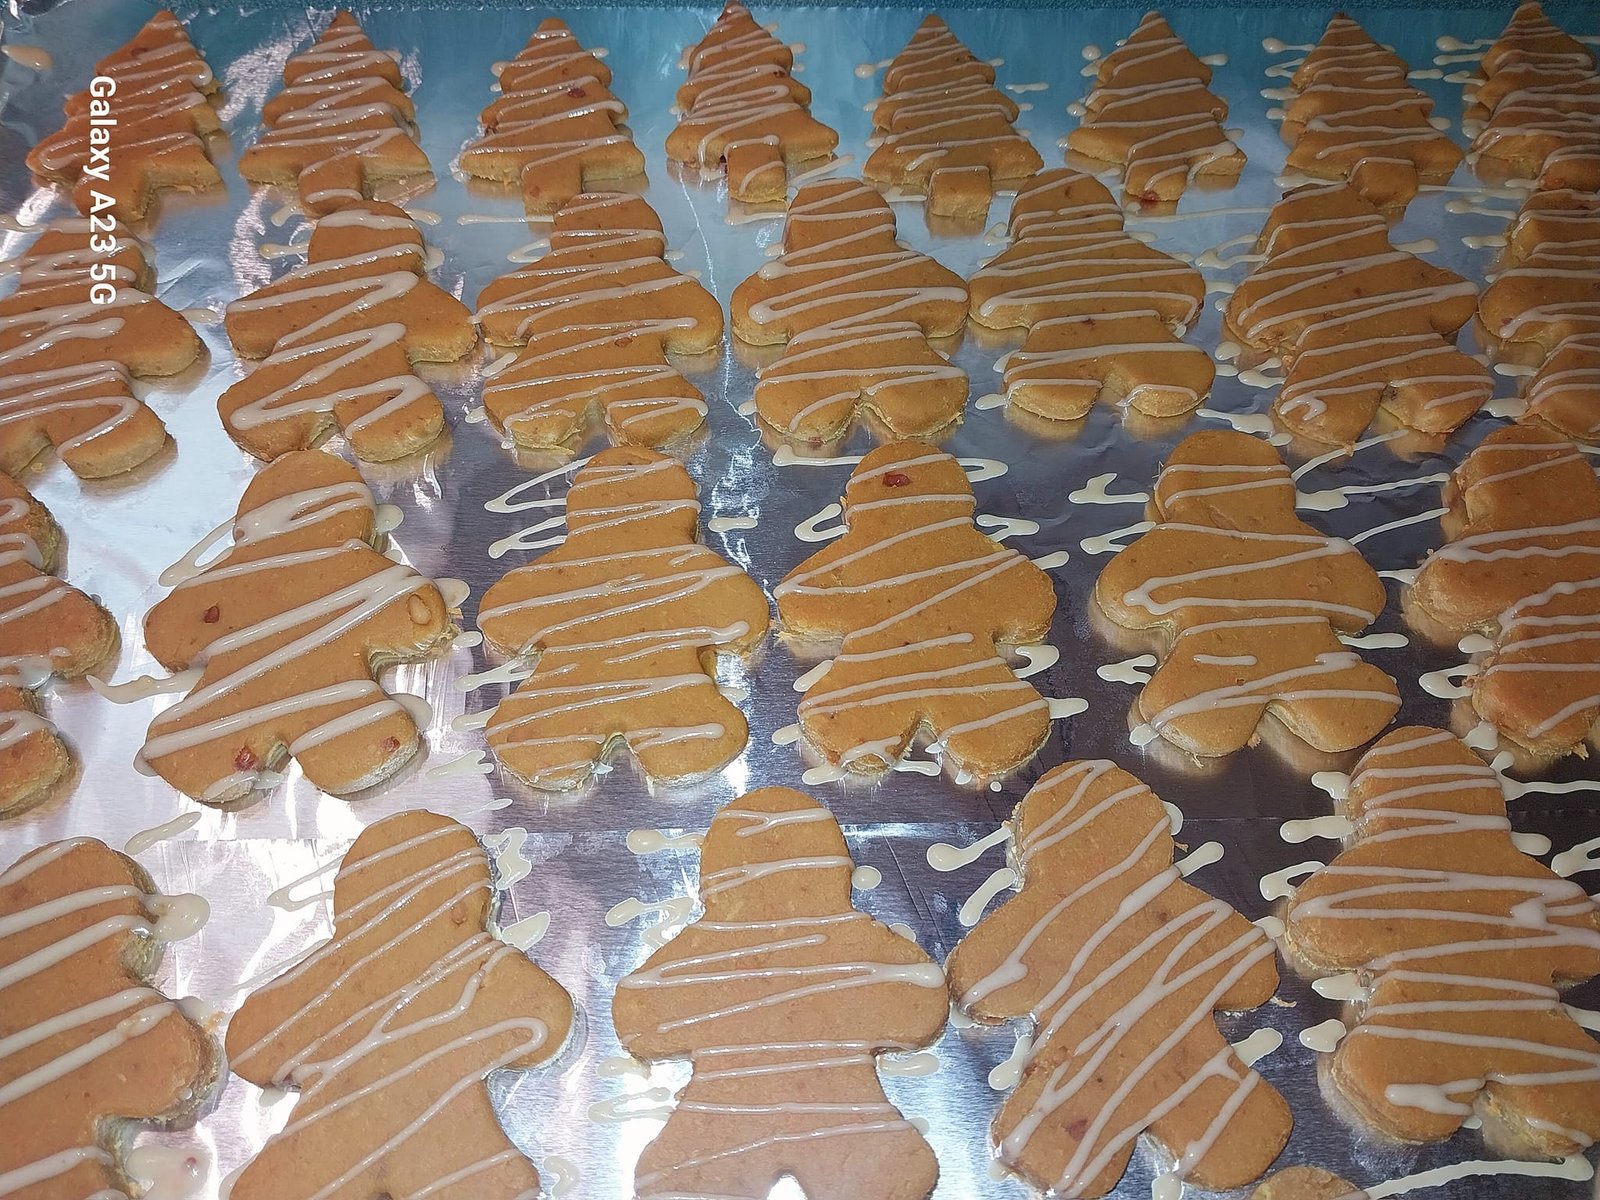
Peanut Butter and Pumpkin Bites
If you’re looking for a nutritious and low-calorie treat for your dog that’s both tasty and packed with healthy ingredients, these Peanut Butter and Pumpkin Bites are the perfect solution! Not only are they delicious, but they also offer a boost of essential nutrients like fiber, vitamins, and healthy fats.
The combination of peanut butter and pumpkin gives these bites a rich flavor that your dog will love, while providing digestive and immune system support. Easy to prepare and full of healthy goodness, these treats are a fantastic homemade option for rewarding your dog!
Making homemade dog treats ensures that your pup is getting the best ingredients, free from any unnecessary additives or preservatives. These peanut butter and pumpkin bites are a great way to treat your dog while keeping their diet healthy and balanced. Let’s get started with this simple and wholesome recipe!
Ingredients:
- 1/2 cup canned pumpkin puree – Rich in fiber and beta-carotene, great for digestive health.
- 1/4 cup peanut butter (unsweetened and xylitol-free) – Provides healthy fats and protein for muscle and skin health.
- 1 egg – Packed with protein and essential nutrients for muscle building.
- 1 cup whole wheat flour – Supports digestion with fiber and provides energy.
- 1 tablespoon coconut oil – Great for maintaining a healthy coat and promoting joint health.
- 1/4 cup water (or more if needed) – Helps bind the dough to the right consistency.
Step-by-Step Instructions

Before you start baking, it’s a good idea to get all your ingredients ready. Make sure you have the canned pumpkin puree and peanut butter on hand, and ensure your egg is cracked and ready to go. Preheat your oven to 350°F (175°C), so it’s at the perfect temperature for baking the treats. Once everything is prepared, it’s time to start making these delightful peanut butter and pumpkin bites!
1. Preheat the Oven
First things first, preheat your oven to 350°F (175°C). This ensures that your treats will bake evenly and come out with the right texture.
2. Prepare the Ingredients
In this step, make sure the ingredients are ready to be mixed. Open the can of pumpkin puree and measure out the peanut butter. If your peanut butter is too thick, you can microwave it for a few seconds to loosen it up. Also, make sure your egg is cracked and ready to go into the mixture.
3. Mix the Wet Ingredients
In a large mixing bowl, combine the pumpkin puree, peanut butter, and egg. Stir until all the ingredients are well combined and smooth. The pumpkin will give the treats a moist texture, while the peanut butter adds richness and flavor.
4. Add the Dry Ingredients
Next, add the whole wheat flour to the wet mixture. Stir in the flour gradually to prevent clumping. Once the flour is fully incorporated, add the coconut oil and water. Stir everything together until the dough becomes smooth. If the dough is too thick and hard to work with, feel free to add a little more water, one tablespoon at a time, until the dough is soft but not sticky.
5. Roll Out the Dough
Turn the dough out onto a lightly floured surface. Use a rolling pin to roll it out to about 1/4 inch thick. You want the dough thin enough so the bites are crispy, but not so thin that they’ll burn.
6. Cut Out the Bites
Now, use cookie cutters to shape the dough into small bite-sized pieces. You can use bone-shaped cutters, round cutters, or even hearts for a cute touch. If you don’t have cookie cutters, you can simply cut the dough into squares or use a knife to cut it into strips.
7. Bake the Bites
Place the cut-out bites on a parchment-lined baking sheet, ensuring there’s a little space between each one. Bake the treats for 20-25 minutes, or until they turn golden brown and feel firm to the touch. The time may vary depending on your oven, so keep an eye on them to avoid over-baking.
8. Cool the Bites
Once baked, remove the bites from the oven and allow them to cool on a wire rack. Let them cool completely to firm up and achieve the perfect crunchy texture. Once cooled, the treats are ready to serve!
These Peanut Butter and Pumpkin Bites are a great way to spoil your dog with a homemade, healthy treat. Packed with fiber from the pumpkin and healthy fats from the peanut butter and coconut oil, these bites promote a shiny coat, healthy digestion, and energy. The whole wheat flour provides additional fiber, making these treats not only tasty but also nutritious. These bites are a perfect way to treat your dog to something delicious while supporting their overall health.
Homemade dog treats like these are the perfect way to ensure your pup is getting wholesome, quality ingredients. Plus, these Peanut Butter and Pumpkin Bites are free from any artificial additives or preservatives, making them an ideal choice for your dog’s daily snack. Whether you use them for training, rewarding, or just because, your dog will love these tasty treats, and you’ll love knowing exactly what goes into them.
So, grab your ingredients, preheat your oven, and start baking these irresistible Peanut Butter and Pumpkin Bites! Your dog will thank you with plenty of tail wags and excited barks!
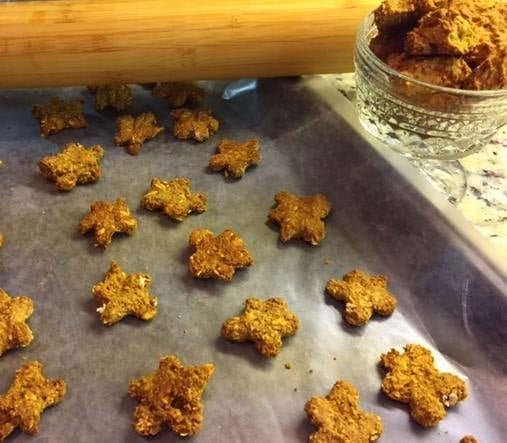
Banana-Oat Cookies

If you’re looking for a delicious and healthy treat that your dog will absolutely love, these Banana-Oat Cookies are the perfect choice! These cookies are simple to make and use just a few wholesome ingredients like bananas and oats. Bananas are a great source of potassium, which is good for muscle function and heart health, while oats provide fiber to aid digestion. Combined, they make a nutritious snack that will keep your dog feeling happy and healthy.
Making homemade dog treats is an excellent way to control what goes into your dog’s diet, ensuring they only get the best ingredients. These Banana-Oat Cookies are not only nutritious but are also quick and easy to prepare. So, let’s dive into this simple and fun recipe that your dog will adore!
Ingredients:
- 1 ripe banana – A great source of potassium and natural sweetness.
- 1 cup rolled oats – High in fiber and helps with digestion.
- 1 egg – Packed with protein for muscle and coat health.
- 1/4 cup peanut butter (unsweetened and xylitol-free) – A source of healthy fats and protein.
- 1/4 cup whole wheat flour – Adds fiber to the cookies.
- 1/4 cup water (or more if needed) – Helps to bring the dough together.
Step-by-Step Instructions:
Before you start, gather all of your ingredients, including a ripe banana and peanut butter. Make sure your egg is cracked and ready. Preheat your oven to 350°F (175°C), so it’s the right temperature when you’re ready to bake. These treats come together quickly, so having everything prepared ahead of time will make the process smooth and easy.
1. Preheat the Oven
Start by preheating your oven to 350°F (175°C). This allows your oven to reach the perfect temperature for baking the cookies.
2. Prepare the Banana
Take your ripe banana and mash it up in a bowl using a fork or potato masher. Make sure there are no large chunks, as a smooth consistency will make mixing the ingredients easier. Bananas are naturally sweet, so they’ll help give your cookies a delicious flavor your dog will love.
3. Mix the Wet Ingredients
Once the banana is mashed, add the peanut butter and egg to the bowl. Stir until the mixture becomes smooth and well combined. The peanut butter gives the cookies a rich taste while providing healthy fats that support your dog’s coat and joints.
4. Add the Dry Ingredients
Next, add the rolled oats and whole wheat flour to the wet mixture. Stir everything together until the dough begins to come together. If the dough feels too dry, add a little water (about 1 tablespoon at a time) until the dough reaches the right consistency. The dough should be thick but still manageable.
5. Shape the Cookies
Once the dough is ready, take spoonfuls of it and roll them into balls, or you can use your hands to form small round shapes. If you prefer, you can flatten the dough slightly to make them more cookie-like. You can also use a cookie cutter to make fun shapes if you like!
6. Place on a Baking Sheet
Line a baking sheet with parchment paper or a non-stick mat. Place the shaped dough onto the baking sheet, leaving some space between each cookie. This ensures that the cookies bake evenly and don’t stick together.
7. Bake the Cookies
Put the baking sheet into your preheated oven and bake the cookies for 15-20 minutes, or until they turn golden brown. Keep an eye on them as baking times can vary slightly depending on the size and thickness of your cookies. The cookies should feel firm when pressed but not hard.
8. Cool the Cookies
Once baked, remove the cookies from the oven and let them cool completely on a wire rack. This helps them firm up and achieve the perfect crunch that your dog will enjoy.
These Banana-Oat Cookies are a wonderful, healthy treat for your dog. The bananas provide a natural sweetness while being rich in vitamins and minerals like potassium, which is great for your dog’s overall health. Oats are an excellent source of fiber, which helps with digestion, making these cookies both nutritious and tasty. With the added peanut butter, these cookies will not only be enjoyable for your dog but will also support their skin, coat, and joints.
Making your own dog treats gives you the peace of mind knowing exactly what’s going into your pet’s snacks. These Banana-Oat Cookies are free of artificial preservatives, sugar, or additives, making them a wholesome and healthy choice. Whether you’re training, rewarding, or simply treating your pup, these cookies are the perfect bite-sized snack.
Now that you have this simple recipe, you can treat your dog to a homemade snack that is full of goodness. Your pup will love the taste, and you’ll love how easy it is to make these treats!
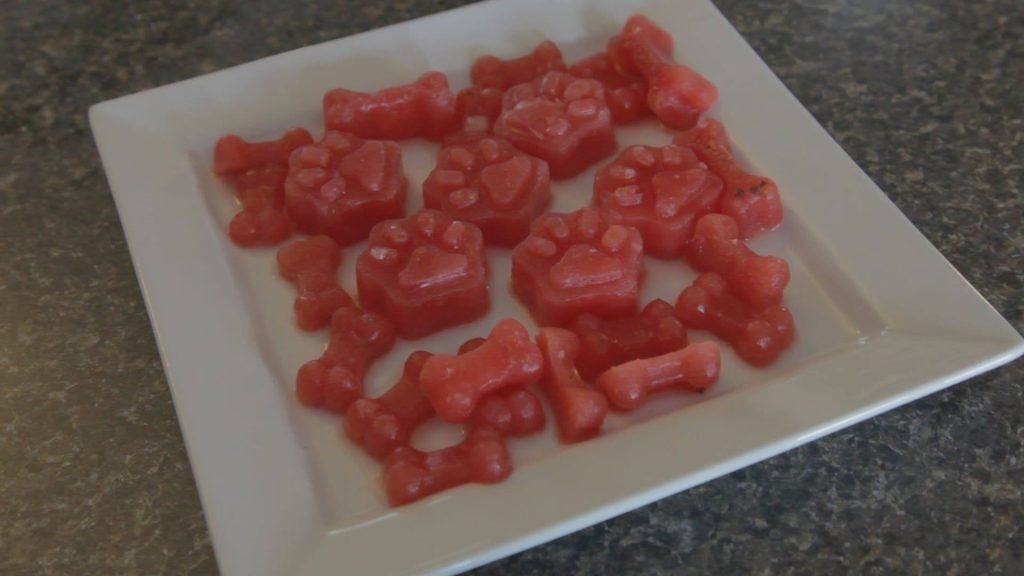
Recipe 4: Frozen Berry-Yogurt Cubes

If you’re looking for a refreshing and healthy treat that will cool down your dog on a hot day, these Frozen Berry-Yogurt Cubes are the perfect solution! Packed with antioxidants from the berries and probiotics from the yogurt, these treats will not only satisfy your dog’s cravings but also provide a nutritional boost. These frozen treats are super easy to prepare and require just a few simple ingredients. Plus, they’re a great way to spoil your dog while giving them something healthy.
Frozen treats are a fun way to keep your dog hydrated and refreshed, especially during warm weather. The berries are rich in vitamins and antioxidants, while the yogurt supports digestive health with probiotics. So, let’s jump into this simple recipe and give your dog a delicious, chilled snack they’ll love!
Ingredients:
- 1/2 cup plain yogurt (unsweetened and xylitol-free) – A source of probiotics that help support digestion.
- 1/2 cup mixed berries (blueberries, strawberries, raspberries) – Rich in antioxidants and vitamins.
- 1 tablespoon honey (optional) – Natural sweetness and an antibacterial agent.
- 1/4 cup water (if needed) – Helps to blend the mixture to the right consistency.
Step-by-Step Instructions
Before you start, gather all your ingredients: plain yogurt, your choice of berries, and a bit of honey if you’d like to add some extra sweetness. You’ll also need ice cube trays or silicone molds for shaping the treats. The preparation for this recipe is very straightforward, and the only wait time is for the freezing process.
1. Prepare the Berries
Start by washing the berries thoroughly. If you’re using larger berries like strawberries, cut them into smaller pieces so they blend well. The variety of berries you choose will determine the flavor and color of the frozen treats, so feel free to mix and match based on what you have on hand.
2. Blend the Ingredients
In a blender or food processor, combine the plain yogurt, berries, and honey (if using). Blend until everything is smooth and well-combined. You can adjust the consistency by adding a little water if needed to help it blend more easily.
3. Pour the Mixture Into Molds
Once the mixture is ready, carefully pour it into your ice cube tray or silicone molds. You can choose any shape you like, whether it’s simple cubes or fun shapes like bones or hearts. The choice is yours, and the fun shapes can make the treat even more exciting for your dog.
4. Freeze the Cubes
Place the tray in the freezer and allow the cubes to freeze for about 4-6 hours or until solid. The freezing time will depend on the size of your molds, so check the treats after a few hours to ensure they are fully frozen.
5. Serve and Enjoy
Once frozen, remove the Frozen Berry-Yogurt Cubes from the tray and serve them to your dog. You can pop them out of the tray easily if you’re using silicone molds. These cubes make an excellent treat for hot days, and your dog will love the cool, refreshing snack!
These Frozen Berry-Yogurt Cubes are a fantastic way to treat your dog to a healthy, cooling snack. The yogurt provides essential probiotics that aid digestion, while the berries offer a rich supply of antioxidants that help combat inflammation and support overall health. By making these treats yourself, you can be sure they are free of artificial sweeteners and preservatives that are often found in store-bought options.
With just a few ingredients, you can make a batch of these tasty and healthy treats that your dog will enjoy. Whether you’re looking to beat the summer heat or just provide your dog with a wholesome snack, these Frozen Berry-Yogurt Cubes are the perfect solution. Make sure to keep a batch ready in your freezer for a quick and satisfying treat that your dog will love!
Frequently Asked Question
What Are Healthy Low-Calorie Dog Treats?
Healthy low-calorie dog treats are snacks designed specifically to provide nutritional benefits without adding unnecessary calories to your dog’s diet. They often use wholesome ingredients like fruits, vegetables, lean meats, and whole grains that provide essential vitamins, minerals, and fiber.
These treats are ideal for dogs who are overweight, on a diet, or have health conditions that require calorie control. By making these treats at home, you can ensure they are free from artificial preservatives, unhealthy fats, or added sugars, giving your dog a natural, healthy option.
How Can I Make Low-Calorie Dog Treats at Home?
Making low-calorie dog treats at home is easy and allows you to control the ingredients. Start by using wholesome, fresh ingredients like carrots, apples, sweet potatoes, and plain yogurt.
Avoid processed ingredients like refined sugars or high-fat content. Combine dry ingredients like whole wheat flour with wet ingredients like mashed fruits or vegetables, and add a binding agent such as an egg. Once mixed, roll out the dough, shape it, and bake it at the right temperature. By doing so, you can create healthy, low-calorie treats that your dog will love.
Are Homemade Low-Calorie Dog Treats Better Than Store-Bought?
Homemade low-calorie dog treats offer several advantages over store-bought alternatives. When you make treats yourself, you control the quality of the ingredients and can ensure there are no fillers, preservatives, or artificial sweeteners that could be harmful to your pet.
Homemade treats also allow for customization to suit your dog’s specific dietary needs. For example, if your dog has a sensitivity to certain ingredients, you can easily exclude them from the recipe. Additionally, homemade treats are often more affordable in the long run compared to pre-packaged options.
Can Low-Calorie Dog Treats Help with Weight Management?
Yes, low-calorie dog treats can be beneficial for weight management. If your dog is overweight, substituting high-calorie treats with low-calorie options can help maintain a balanced diet. These treats offer a guilt-free way to reward your dog without worrying about excessive calorie intake.
Low-calorie dog treats made from nutritious ingredients like vegetables and fruits can keep your dog full and satisfied without contributing to weight gain, making them a great option for overweight or senior dogs who need to shed a few pounds.
How Often Should I Give My Dog Low-Calorie Treats?
The frequency of low-calorie treats depends on your dog’s daily caloric intake, activity level, and overall health. Generally, treats should account for no more than 10% of your dog’s daily calorie consumption.
For example, if your dog eats around 500 calories a day, treats should make up no more than 50 calories. Low-calorie treats can be given more often than regular treats, but you should always ensure they don’t replace your dog’s main meals or upset their balanced diet. Moderation is key when offering any treat.
What Ingredients Are Best for Low-Calorie Dog Treats?
Some of the best ingredients for making low-calorie dog treats include sweet potatoes, carrots, apples, pumpkin, spinach, and blueberries. These ingredients are naturally low in calories but rich in essential vitamins, fiber, and antioxidants.
Chicken breast or turkey can also be a great source of lean protein for low-calorie treats. Avoid high-fat ingredients like fatty meats or refined sugars, which can quickly add unnecessary calories. Always opt for whole, fresh ingredients to ensure your dog receives the best nutritional value.
Can I Use Store-Bought Ingredients for Homemade Low-Calorie Dog Treats?
Yes, you can use store-bought ingredients to make homemade low-calorie dog treats, but it’s important to choose carefully. Opt for fresh, organic produce when possible, and be mindful of preservatives or added sugars in store-bought products.
Whole wheat flour, plain low-fat yogurt, carrots, apples, and chicken are some common store-bought ingredients that can easily be used in your recipes. Just be sure to read labels carefully to avoid any hidden additives that might not be safe for your dog.
How Long Do Homemade Low-Calorie Dog Treats Last?
Homemade low-calorie dog treats can last for about 1 to 2 weeks if stored properly in an airtight container at room temperature. To extend their shelf life, you can store them in the refrigerator, where they’ll keep fresh for up to 3 weeks.
If you want to keep treats even longer, consider freezing them. Freezing homemade dog treats is a great option, and they can last for up to 3 months in the freezer. Just make sure to thaw them before serving them to your dog.
Final Words
Making healthy, low-calorie homemade dog treats is a fantastic way to show your furry friend some love while keeping their diet in check. These four simple recipes not only provide a healthier alternative to store-bought treats but also ensure you know exactly what’s going into your dog’s snacks.
From tasty pumpkin bites to savory chicken and veggie biscuits, these treats offer a perfect balance of nutrients without the added calories. Plus, they’re customizable, so you can experiment with flavors your dog loves while maintaining a low-calorie count.
By incorporating fresh, wholesome ingredients, you can support your dog’s health, manage their weight, and still give them something they’ll look forward to. With a little effort, you can provide your pet with treats that are both delicious and nutritious, proving that healthy snacking doesn’t have to mean sacrificing flavor!